EFCO 8750XD User Manual
Page 32
EFCO 2012
Page 32
Series 8750XD Unitized Curtain Wall Installation Instructions
Section 8 - Setting Units at Dynamic Starter Sills
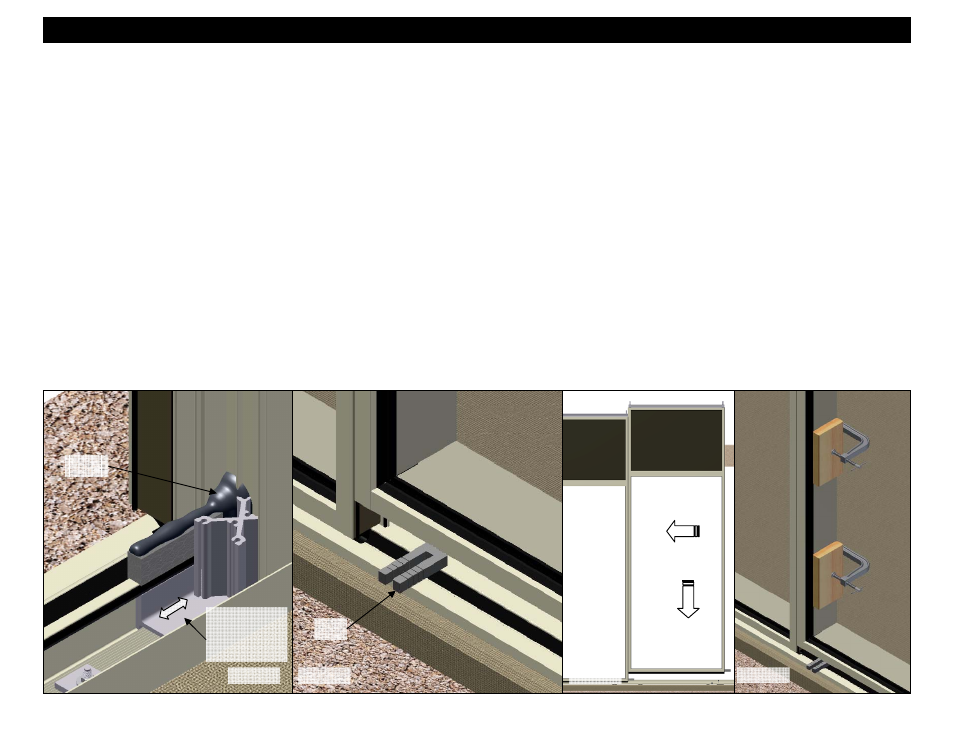
9. Before setting the next unit adjust the dynamic loading clip so that it aligns with the vertical. The anchor can be slid from side to side on the insert.
10. Next apply a generous amount of sealant to the foam sealant backer. Run a bead down the entire length. See Figure 69.
11. Set the next unit after the jamb unit by nesting the vertical stacking mullions together without snapping them. See Figure 61 on page 29.
12. Lower the units enough to engage the slab anchor bar (FM48) at the sill, but still be approximately 1/2” above the engagement leg of the starter sill. The unit
hook anchors should have enough vertical adjustment to hook onto the slab anchors. Reference page 29.
13. Place temporary 3/4” shims between the unit sill and the front of the dynamic starter sill.
14. Once the unit is approximately 1/2” above the engagement leg of the starter sill, use clamps to snap the mullions together. Reference Figure 63 and step 13
on page 30. See also Figure 72 below.
15. Lower the unit down into position to completely engage the anchor bars (FM48) and the unit sets hard on the shims between the unit sill and the dynamic
starter sill. The hook anchors should also be hooked onto the slab anchors.
16. Adjust the jack bolt as required for the unit to set hard on the shim pack at the starter sill below.
17. Reference steps 15-17 on page 30 for adjusting and plumbing, then fastening slab anchors
18. Tighten the jack bolts of the mullion anchors just tight enough so that the shims at the starter sill below can be removed and the unit stays in the nominal
position. Remove the shims between the sill and the starter sill that were applied in step 13.
18. Set the unit to the required elevation height and level it by turning the jack bolt at each mullion anchor clockwise to raise, or counterclockwise to lower the unit
in to the final position.
19. Match drill the slab anchors through the hook anchors on both sides of the unit, and install the pinning screws to lock the frame unit into the final position.
20. Repeat steps 9 through 20 until all units on the dynamic starter sill level have been installed.
21. When erecting a long run of units, check overall frame location dimensions at every fifth unit to avoid dimensional buildup and to ensure that units are
properly positioned with regard to established bench marks.
22. Proceed to “Section 9 - Applying Critical Seals and Stack Gasket”.
Figure 69
Figure 70
Figure 71
Figure 72
Sealant
Adjust dynamic
loading clip by
sliding side to
side.
Shim