Section 12:setting corner units – EFCO 8750XD User Manual
Page 37
EFCO 2012
Page 37
Series 8750XD Unitized Curtain Wall Installation Instructions
1. Follow the check list in “Section 6 - Unit Inspection and Preparation for Installation” on pages 25, 26 and 27 before installing the corner units.
2. Verify the adjacent unit has been installed properly before installing corner units. If not make necessary adjustments to align the units.
3. Corner units are designed to be installed from left to the right as viewed from the exterior of the building.
4. Setting Inside and Outside corner units is very similar to setting typical units at both static and dynamic sills and typical intermediate units. Reference the
corresponding section that applies for detailed instructions. Section 7 “Setting Units at Static Starter Sills” pages 28-30, Section 8 “Setting Units at Dynamic
Starter Sills” pages 31-32, Section 10 “Setting Typical intermediate Units” pages 34-35, and Section 11 “Setting Typical Head Condition Units” page 36.
5. The exception being inside corners. The unit on the left (viewed from the exterior) will have the right edge of the unit coming in without a cover or duracast
spacer. This is designed to come together with the left edge of the unit on the right. Before setting the left unit the HD26 Joint plugs will need to be sealed.
See shop drawings for more detail.
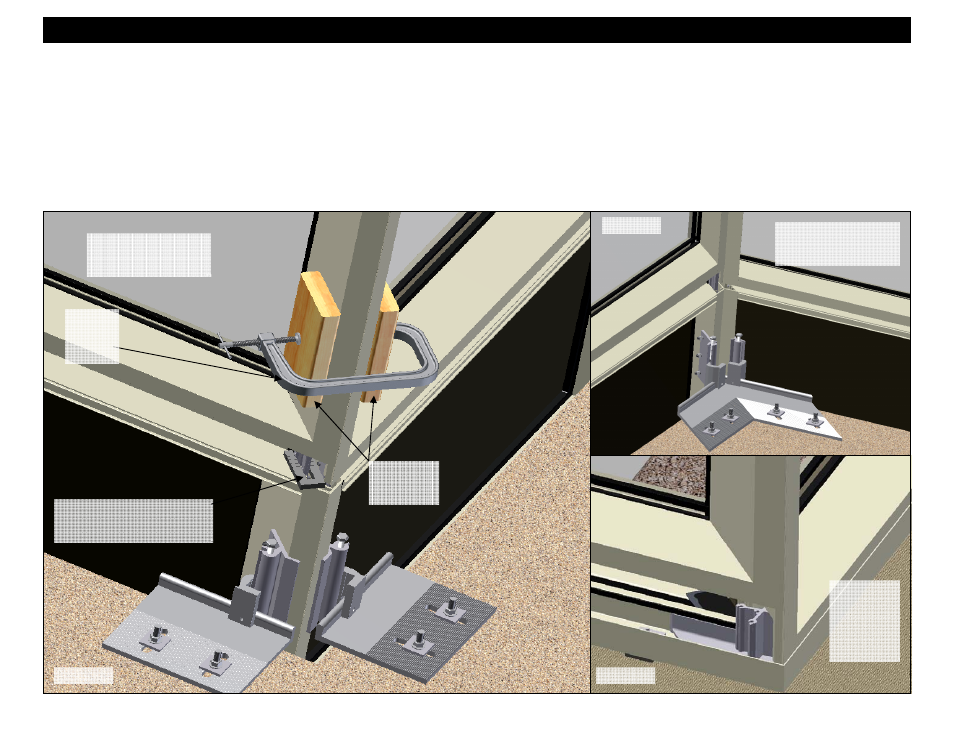
Section 12 - Setting Corner Units
90 degree
inside corner
at dynamic
starter sill
viewed from
interior
90 degree outside corner
at typical intermediate
viewed from interior
90 degree inside corner
at dynamic starter sill
viewed from interior
Figure 88
Figure 90
Figure 89
Wood block
on both sides
of mullion.
Clamp
mullions
and snap
together.
Place 1” shim around the splice
bars on top of the mullion at the
head of the unit below