Section 8:setting units at dynamic starter sills – EFCO 8750XD User Manual
Page 31
EFCO 2012
Page 31
Series 8750XD Unitized Curtain Wall Installation Instructions
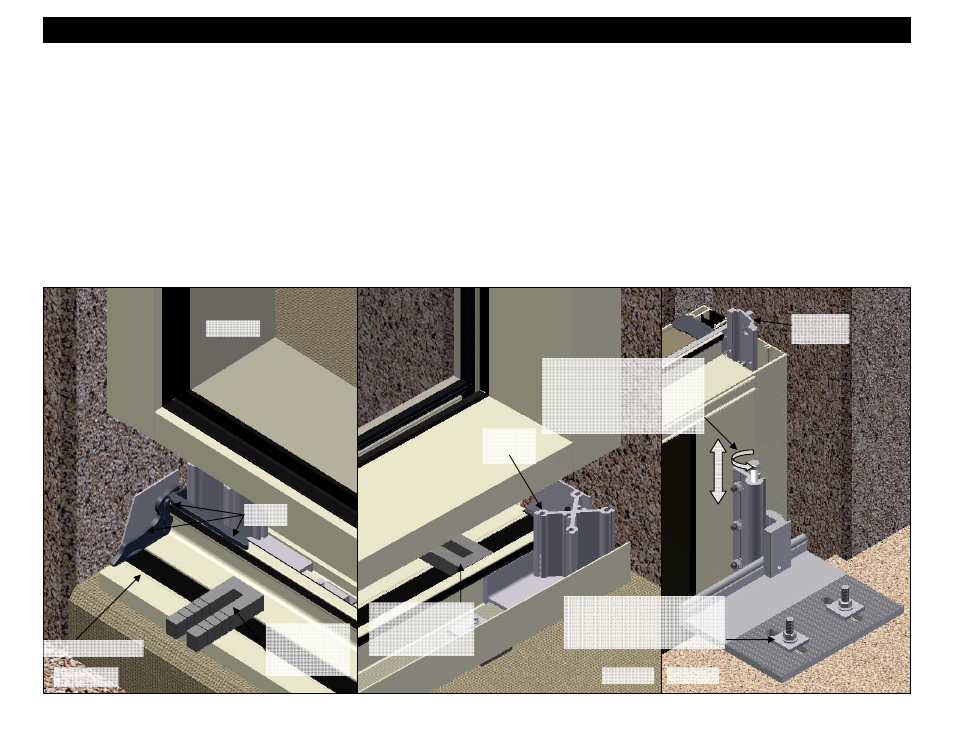
1. Dynamic starter sills are used with installations that require provisions for vertical movements at the beginning floor of the curtain wall.
2. Setting unit units at the dynamic starter sill is very similar to setting units at the static starter sill. There are however a few differences. These differences are
explained verbally and graphically below. Also reference pages 26 through 28 “Setting Units at Static Starter Sills”.
3. Place temporary 3/4” shims between the unit sill and the front of the dynamic starter sill. The shims are used to maintain the correct spacing at the stack joint
area of the starter sill. See Figures 66 and 67.
4. Lower the jamb unit down into position while inserting the dynamic load clip (FM48) and stacking the unit onto the starter sill. The hook anchors should also
be hooked onto the slab anchors. The unit should now be setting hard on the shims.
5. Reference page 28 steps 6-8 for plumbing unit and fastening slab anchors.
6. Tighten the jack bolts of the mullion anchors just tight enough so that the shims can be removed and the unit stays in the nominal position. Remove the
shims between the sill and the starter sill that were applied in step 3.
7. Set the unit to the required elevation height and level it by turning the jack bolt at each mullion anchor clockwise to raise, or counterclockwise to lower the unit
in to the final position.
8. Match drill the slab anchors through the hook anchors on both sides of the unit, and install the pinning screws to lock the frame unit into the final position.
See Figure 58 on page 28.
Section 8 - Setting Units at Dynamic Starter Sills
3/4” shim pack
placed between the
starter sill and the
unit sill.
Dynamic
load clip
Figure 66
Figure 68
Figure 67
Splice Bar
lift point
Dynamic Starter Sill
Jamb Unit
3/4” shim pack
placed between
the starter sill
and the unit sill.
Sealant
Adjust the jack bolt as required
for the unit to set hard on the
shim pack at the stack joint
below. Rotate the bolt clockwise
to raise or counterclockwise to
lower the unit.
Once the units are set and final
adjustments are made, turn the
washer so that the serrations
align and secure anchor bolts.