Section 4:dynamic starter sill prep and install – EFCO 8750XD User Manual
Page 19
EFCO 2012
Page 19
Series 8750XD Unitized Curtain Wall Installation Instructions
Section 4 - Dynamic Starter Sill Preparation and Installation
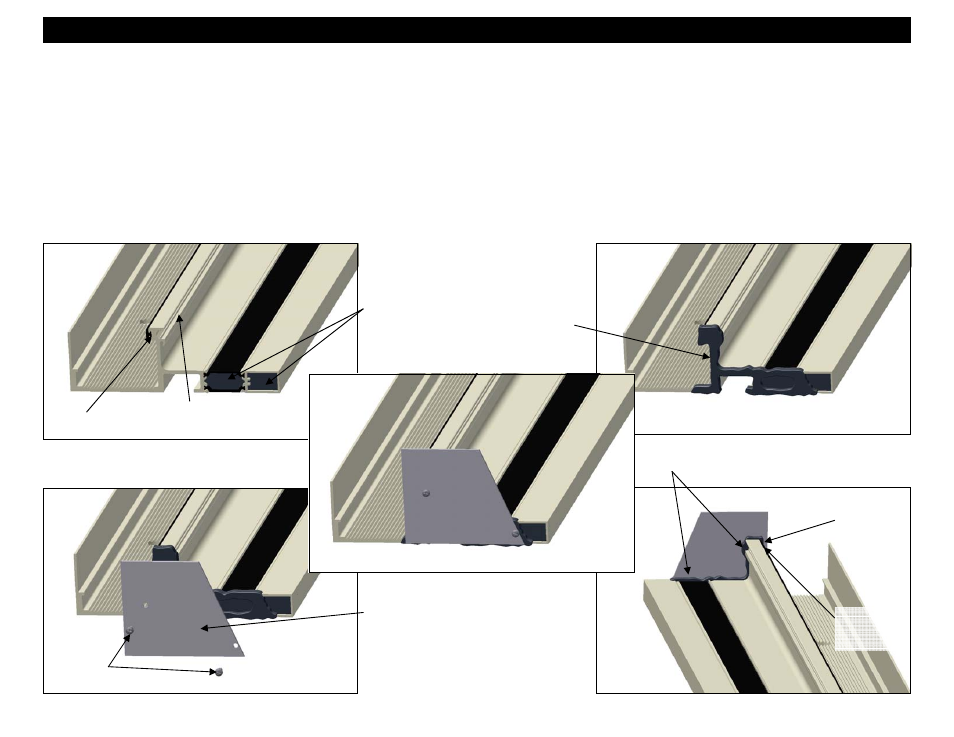
1. Preparation of the Dynamic Starter Sill:
a. The dynamic starter sill may have an end dam pre-attached and sealed at the jamb condition. Ensure that the end dam is properly applied and
sealed to the starter sill as described below. This is a critical seal and the joint must be carefully tooled to create a watertight seal. See Figures 23
thru 27.
b. The starter sill may have LC23 spacer pre-applied. The LC23 is cut to the length of the starter sill. The WEA2 gasket will not be applied at this point
it will be applied once all sections of the sill are set to avoid having unnecessary seams or splices. This will be covered later in these instructions.
c. Plug the both ends of the tubular sections of the starter sill by recessing backer rod at least 1/4” into the end of the tube. Fill the voids in the tube and
between the thermal struts with sealant and tool smooth.
Clean all sealant contact surfaces using an approved solvent or cleaner of all oils and other contaminants. The sealant manufacturer’s
preparation and application instructions should be followed exactly. If sealant primer is required, apply it per the primer/sealant
manufacturer’s instructions.
LC23
Spacer
Pocket for
WEA2
FM55 End Dam
Attach with
(2) STC7
Figure 23
STC7
Tool sealant smooth
into joints.
Plug with backer rod
and fill the voids in
the tube and between
the thermal struts
with sealant and tool
sealant smooth.
Figure 24
Figure 25
Figure 26
Silicone Sealant
along profile to be
covered by end
dam
Ensure LC23
Butts into the
end dam
fully.
Figure 27
Back Seal
End Dam to
Starter Sill