EFCO 8750XD User Manual
Page 17
EFCO 2012
Page 17
Series 8750XD Unitized Curtain Wall Installation Instructions
Figure 17
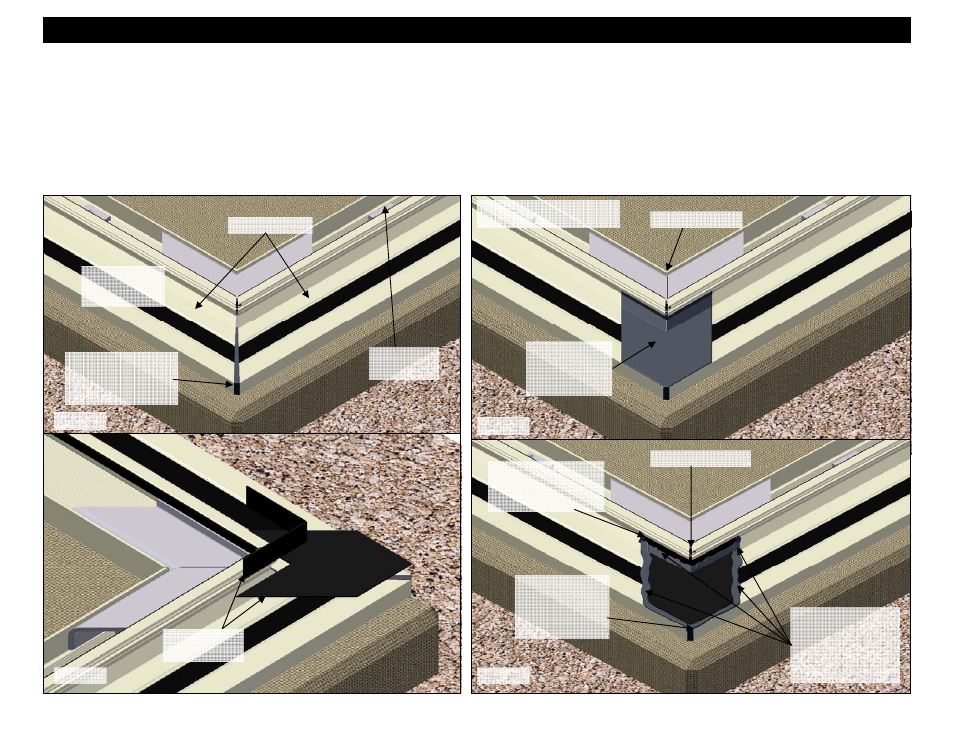
20. Using an approved solvent or cleaner, clean the sealant contact surfaces of the corner splice joint of all oils and other contaminants.
21. The starter sill will be spliced at corner conditions. Refer to the approved shop drawings for project specific joint size.
22. Anchor the new starter sill section ensuring the starter sill is level and while maintaining the appropriate joint size at the splice joint.
23. Slide the static loading clips into the corner, butting them together.
24. Apply sealant into the joint between the sections of starter sill and tool smooth to create a water tight seal. Use backer rods in the joint where appropriate.
The splice joint width may vary per project requirements. See Figure 17.
25. Apply a bed of sealant over joint and use pieces cut from HC13 silicone splice sheet cover joint. Apply sealant around the edges and seams of the
pieces cut from the splices sheet. See Figures 18, 19 and 20.
Static Starter Sill
Section 3 - Static Starter Sill Preparation and Installation (90° Outside Corner)
Apply sealant between
the two starter sills
and tool to create a
watertight seal.
Shim starter sill
to proper
elevation height.
90° Outside Corner
Figure 18
Figure 19
Figure 20
Marry the splice
sheet sealant with
the reveal splice
sealant to create a
watertight seal.
Place pieces of
splice sheet
HC13 into a bed
of sealant.
Pieces of HC13
Splice sheet (2)
Slide splice sheet up
under gasket track and
tool sealant to ensure a
watertight seal.
Apply sealant around
entire perimeter and
all seams of splice
sheet pieces and tool
to create a watertight
seal.
Anchor bolts
as required
Butt Joint Typical
Back seal down leg