Section 7:setting units at static starter sills – EFCO 8750XD User Manual
Page 28
EFCO 2012
Page 28
Series 8750XD Unitized Curtain Wall Installation Instructions
Section 7 - Setting Units at Static Starter Sills
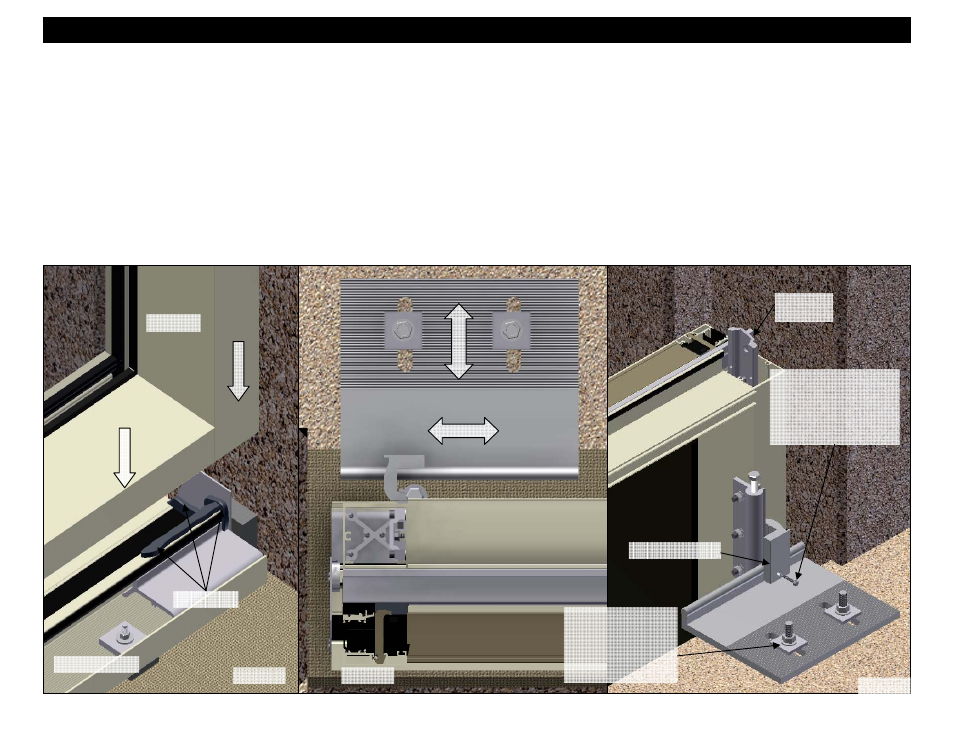
1. Static starter sills are used with installations that don’t require provisions for vertical movements at the beginning floor of the curtain wall.
2. Ensure that end dam is properly sealed and apply a bead sealant to top of stack leg about 8” long where HC05 foam sealant backer will contact it.
3. Units are typically installed from left to right from as seen from the exterior of the building. Install each frame unit in sequence, starting at the left jamb unit.
4. Units are lifted by the splice bars attached at the head of each unit. These bars are also used to align the units when stacked vertically.
5. Lower the jamb unit down into position onto the starter sill. The hook anchors should also be hooked onto the slab anchors. The unit should now be setting
hard on the starter sill. See Figures 56 and 58.
6. If the starter sill was properly installed and the unit is square and is setting hard on the starter sill, the unit will be at the proper elevation and will be level and
plumb from side to side.
7. Compare the jamb unit to established bench marks and move the unit side to side to position it laterally to the final required location.
8. Adjust the unit for plumb, parallel to the plane of the wall, by sliding the slab anchor forward or backward until the unit is plumb. See Figure 57.
9. Rotate the serrated washers where the serrations align with the serrations in the anchor and secure the slab anchor’s anchor bolts. See Page 23 Figure 43.
Match drill the slab anchors through the hook anchors on both sides of the unit, and install the pinning screw to lock the frame unit into the final position. See
Figure 58.
Figure 57
Splice Bar
lift point
Static Starter Sill
Mullion Anchor
Figure 58
Jamb Unit
Figure 56
Sealant
Once the units are set
and final adjustments
are made, turn the
washer so that the
serrations align and
secure anchor bolts.
Once final adjustments
have been made, match
drill the hook anchor and
install the M171 pin screw
to lock the lateral position
of the frame unit.