Section 10:setting typical intermediate units – EFCO 8750XD User Manual
Page 34
EFCO 2012
Page 34
Series 8750XD Unitized Curtain Wall Installation Instructions
1. Install each frame unit in sequence, starting at the left jamb unit.
2. Lift the jamb unit with the splice bars at the head of the unit.
3. Ensure the HC05 caulk backer has been inserted into the sill as shown in Figure 50 on page 26. Note that jamb units will receive HC05 on both ends of the
sill. Subsequent units will require HC05 on the right end only of the unit sill as viewed from the exterior.
4. When stacking units vertically, place a temporary 1” shim between the units as shown in Figure 77. The shims are used to hold the unit in the nominal
installed position.
5. Lower the jamb unit down into position to engage the unit hanger load clips (FM41) at the stack joint. The hook anchors should also be hooked onto the slab
anchor. (See Figure 58 on page 28) The unit should now be setting hard on the shims.
6. The final adjustment and setting of a typical intermediate jamb condition unit is the same as the final adjustment and setting at sill units. See steps 5-8 on
page 31 for adjustment and final setting of the unit.
Section 10 - Setting Typical Intermediate Units
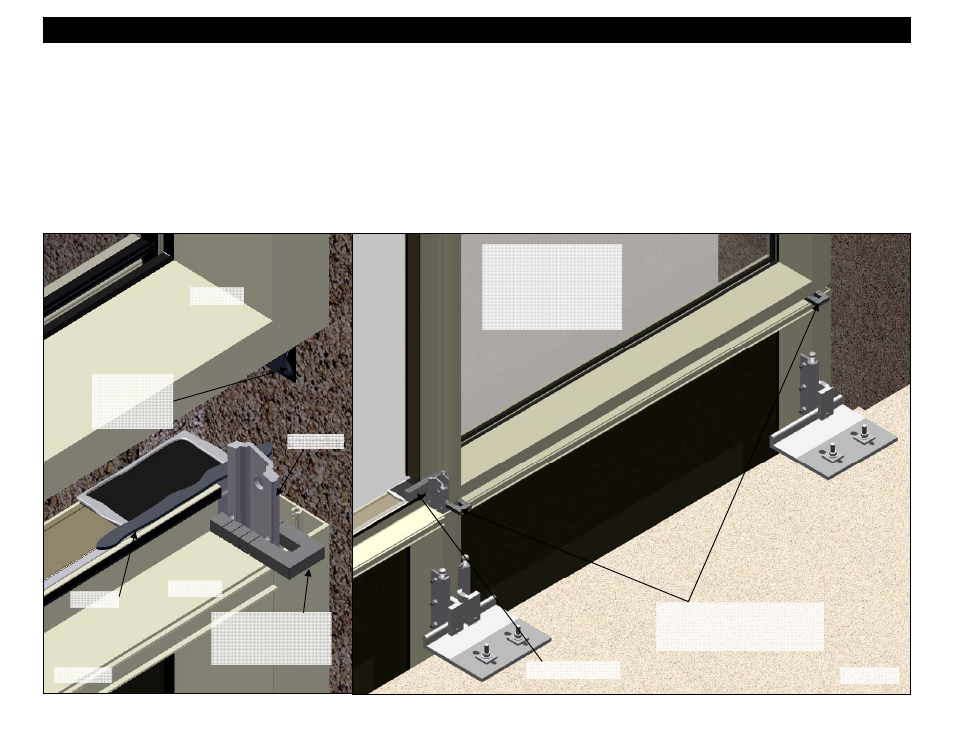
Figure 78
Figure 77
Splice Bar
1” shim pack placed
around the splice bar on
top of the mullion at the
head of the unit below.
Adjust the jack bolt as
required for the unit to set
hard on the shim pack at the
stack joint below. Rotate the
bolt clockwise to raise or
counterclockwise to lower
the unit.
Jamb Unit
Jamb Unit
HC05 caulk backer
Splice sheet
applied before
setting unit.
See page 26
Once the units are set and final
adjustments are made, remove the
shim by tightening the jack bolts
Sealant