Screen installation, Project-in screens – EFCO Special Purpose Windows Installation User Manual
Page 52
EFCO CORPORATION 3/5/2014 PART NO. YW40
Page 1 of 7
Window Installation Instructions - Screen Installation Section -
General Installation Instructions for Window Screens
Completely read the General Installation Instructions and all other sections which pertain
to your project before starting work. These recommendations are for general erection
procedures only. For actual job conditions, see the details on the shop drawings. For
perimeter anchor types and spacing, refer to the approved shop drawings or consult the
project design professional.
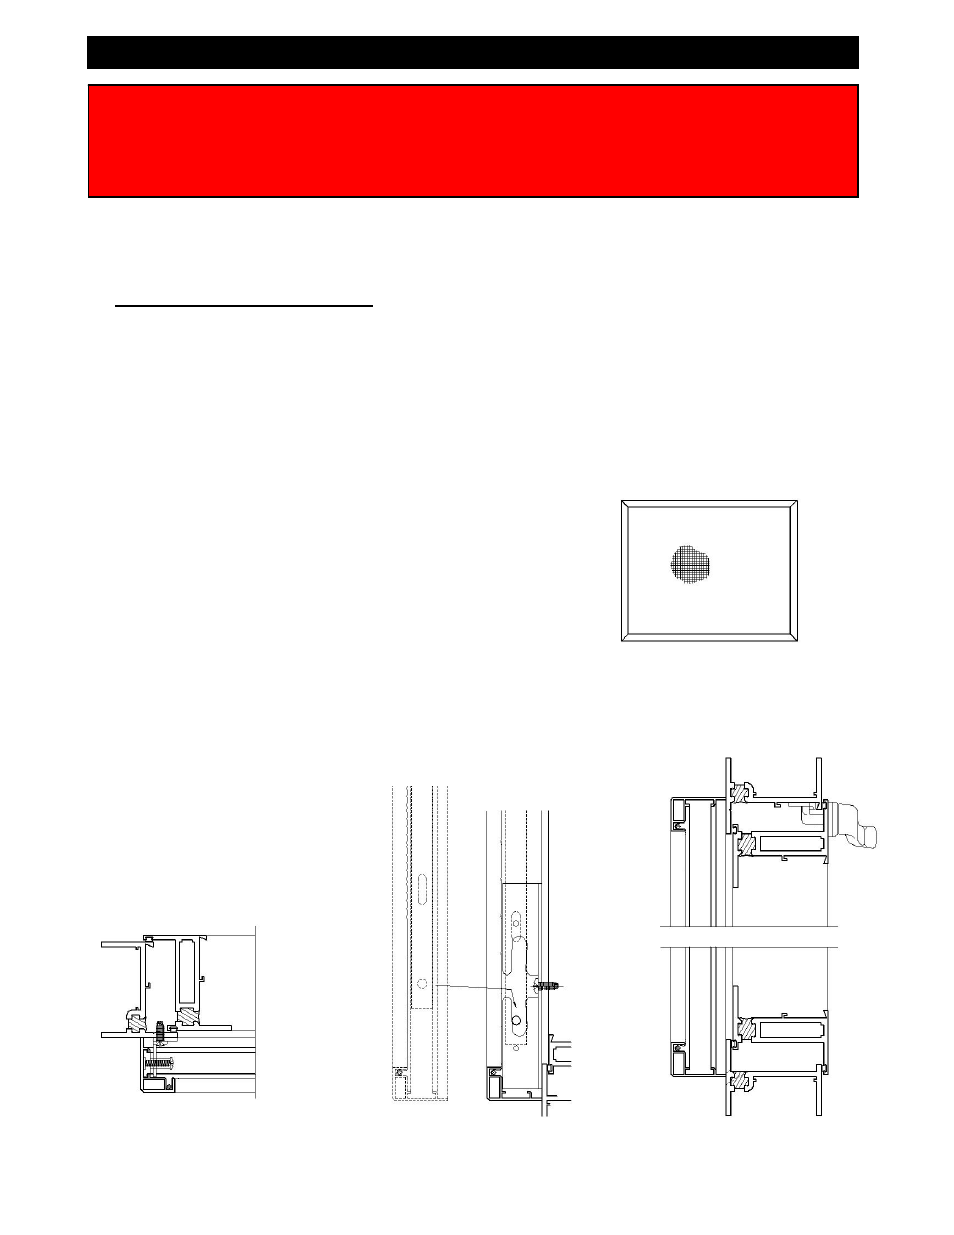
Project-In Screen Installation
1. Attach the screen clips to the window with short side
of the angle towards D.L.O. (must be parallel with the
frame).
NOTE: Clip screws are thread cutting fasteners.
Thread cutting into the aluminum should be done with
a screw wax or a silicone based lubricant to improve
cutting action and reduce the required torque. If the
screen clips are being reapplied, no lubricant on the
screw is required, and the screws should be started
by hand or a hand driver should be used to prevent
cross threading.
2. Pass the screen through the window opening.
3. Hang on to the slide pins and pull the screen toward
the window.
4. Lower the slide pins in to the screen clips.
5. Release after the pins are seated, and press the pins
down to snug to the frame.
Typical elevation viewed
from exterior