Tilt sash removal, Tilt window sash removal and cleaning instructions – EFCO Special Purpose Windows Installation User Manual
Page 20
EFCO CORPORATION 3/5/2014 PART NO. YW40
Page 3 of 10
Window Installation Instructions - Hung Window Installation Section -
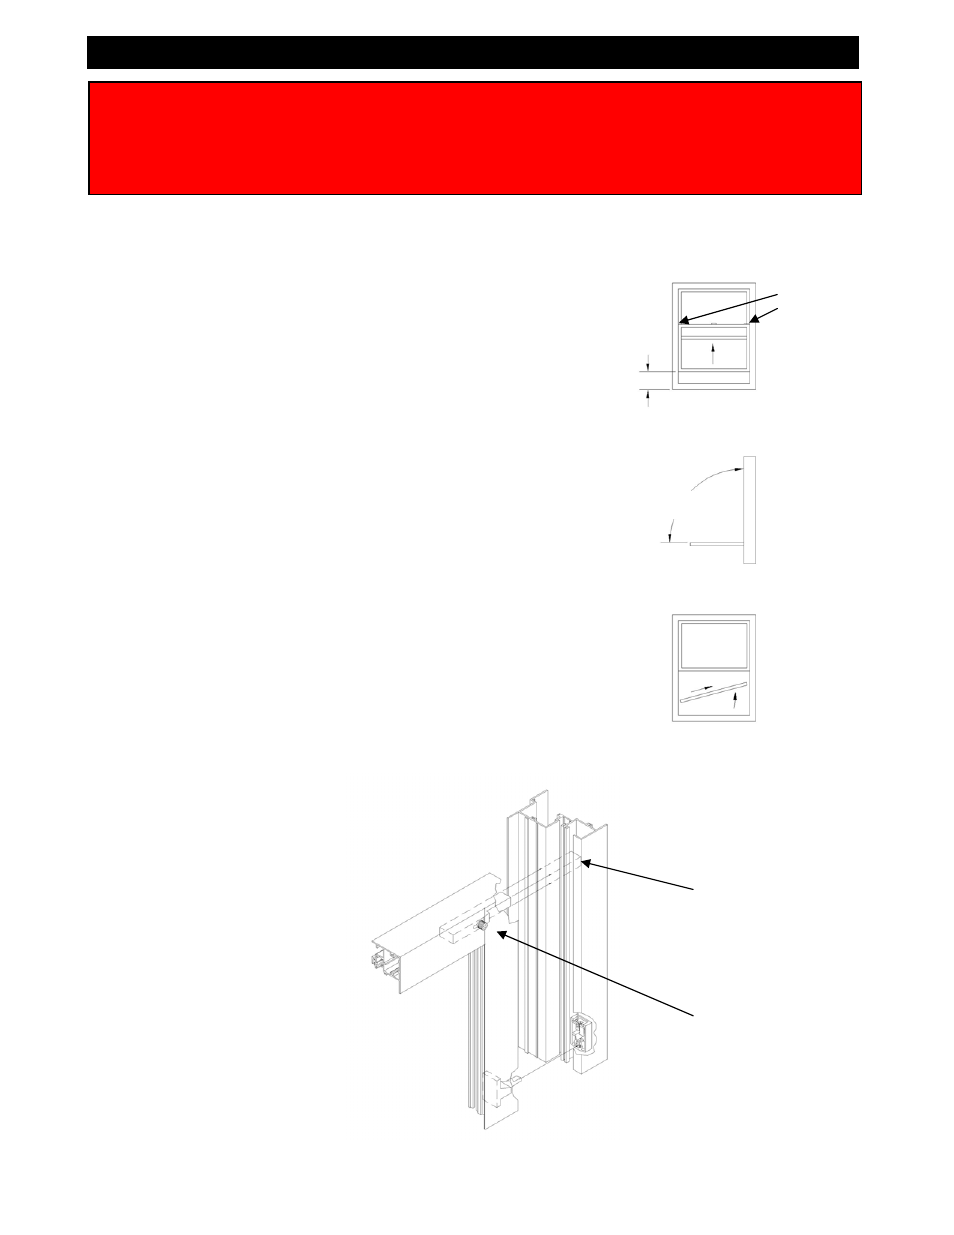
Tilt Window Sash Removal and Cleaning Instructions
1. Unlock the bottom sash and raise it a minimum
of 4”. Note: On double hung units, remove the
bottom sash first, then lower the top sash a
minimum of 4”.
2. Remove the sash by disengaging the tilt lock
from the jamb and tilting the top of the sash
down to a horizontal position. Lift or rotate one
side of the sash to disengage the tilt pin from the
pivot shoe assembly. Lift the other side of the
sash up and remove it from the window frame.
Note: Sash that are removed must go back into
the same frame from which it was removed.
3. Proceed with specified glass care and cleaning
instructions for the appropriate glass type in the
unit.
4. If the unit is double hung, the top sash can be
removed in the same fashion as the bottom sash
by repeating steps 1 and 2.
5. To reinstall sash, repeat the procedure in
reverse.
Completely read the General Installation Instructions and all other sections which pertain to
your project before starting work. These recommendations are for general erection
procedures only. For actual job conditions, see the details on the shop drawings. For
perimeter anchor types and spacing, refer to the approved shop drawings or consult the
project design professional.
Tilt to Horizontal
Rotate and
remove
lower sash.
Unlock and
raise a
minimum of 4”.
Side view
Elevation View
Elevation View
Tilt Lock
Warning
The Tilt lock must fully
engage the jamb.
Warning
The set screw must be
tightened down to
almost flush with the
surface of the sash.
Warning
When installing sash, be
sure the tilt pins are
properly engaged into the
pivot shoe assembly, and
that the tilt locks are fully
engaged into the jamb
with the set screw
properly locked down.
Personal injury or damage
to the window may result
if instructions are not
followed.