EFCO Special Purpose Windows Installation User Manual
Page 25
EFCO CORPORATION 3/5/2014 PART NO. YW40
Page 8 of 10
Window Installation Instructions - Hung Window Installation Section -
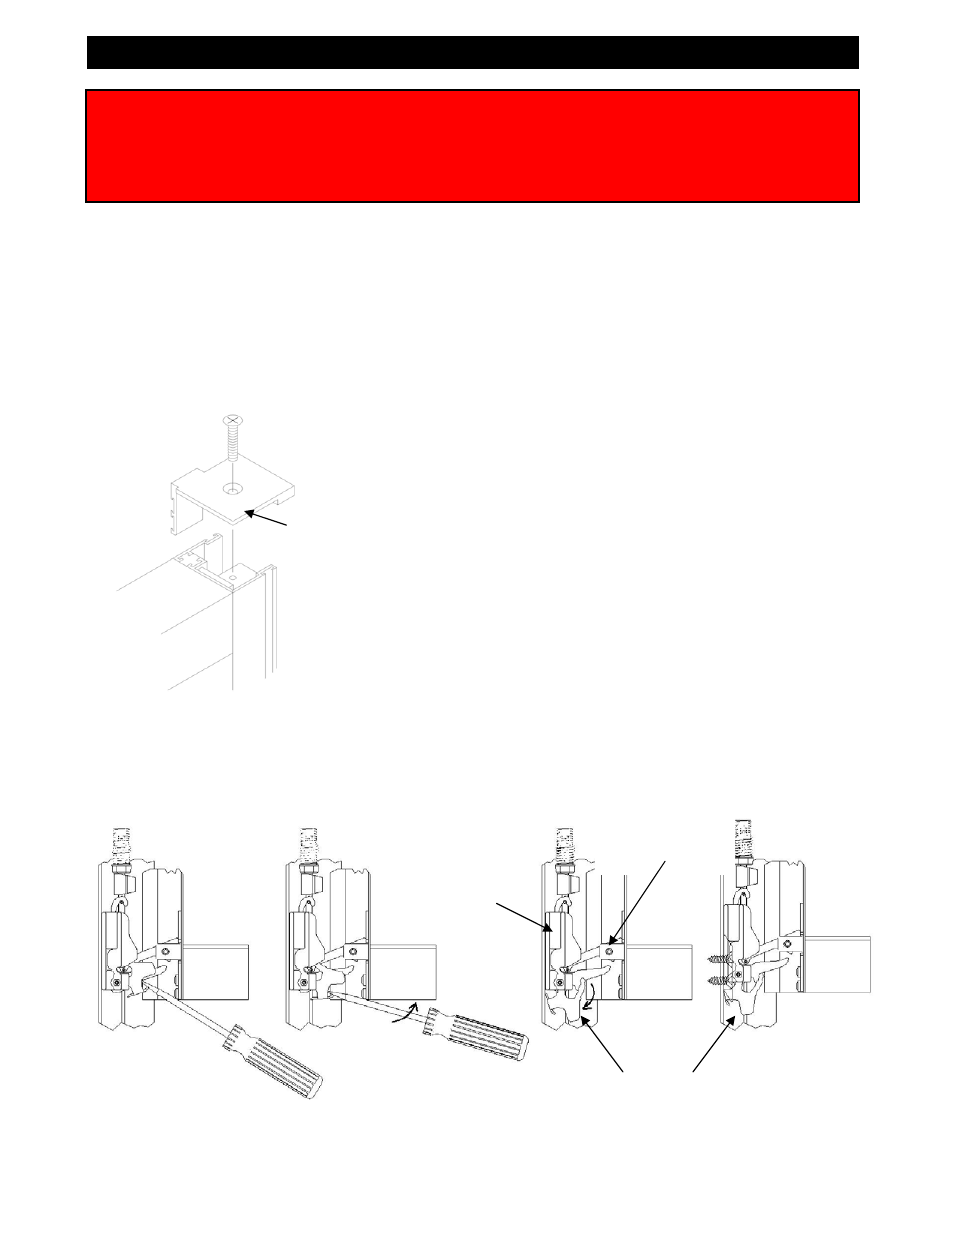
Side Load Sash and Balance Removal
for Class 5 Balances With Third Generation Carriers
Sash Removal
Remove both lower sash end caps.
1. Raise the lower sash so you can comfortably reach the
underside of the sash handle rail. If the sash travel has
been limited, the limit stops may have to be removed.
2. The carrier body is located in the jamb pocket at the
bottom end of the sash side rails. A hook in the bottom of
the carrier body is held in place by a flex spring. Insert a
flat blade screwdriver between the upturned edge of latch
and bottom of carrier. Pry screwdriver towards center
using corner of sash as a pivot point until latch snaps free
of carrier guide.
3. Latch should now be hanging against the back of the
jamb channel. Lower the sash slowly until the carrier
body hook is below the jamb hold down blocks. Raise the
sash again until the hooks engage the jamb hold down
blocks. The carrier body will be held in place when the
sash is removed
Lower sash
end cap
Completely read the General Installation Instructions and all other sections which pertain to
your project before starting work. These recommendations are for general erection
procedures only. For actual job conditions, see the details on the shop drawings. For
perimeter anchor types and spacing, refer to the approved shop drawings or consult the
project design professional.
Carrier
body hook
HC02
Carrier body
assembly in
the jamb
HC01
Arm bracket
attached to the
sash