Casement installation, Casement window installation – EFCO Special Purpose Windows Installation User Manual
Page 30
EFCO CORPORATION 8/5/2014 PART NO. YW40
Page 1 of 3
Window Installation Instructions - Casement Window Installation Section -
General Installation Instructions for Casement Windows
1. Before installing the casement window, field
drill through the window frame at the two
unused holes in the hinge.
2. Set the window in position as shown on the
approved shop drawings. Apply blocking at
hinge points and other anchorage locations to
stabilize the frame in a plumb and level
position.
The weight of the vent must be supported
during the installation process. Apply blocking
prior to opening the vent. Opening the vent
may cause the jambs to deflect or rack if they
are not solidly blocked.
3. Open the vent and match drill hinge supports
and blocking at the hinge anchorage holes.
Run 1/4” fasteners through the frame, hinge,
hinge support, and blocking, and into the
surrounding condition. Repeat for each hinge.
Completely read the General Installation Instructions and all other sections which pertain
to your project before starting work. These recommendations are for general erection
procedures only. For actual job conditions, see the details on the shop drawings. For
perimeter anchor types and spacing, refer to the approved shop drawings or consult the
project design professional.
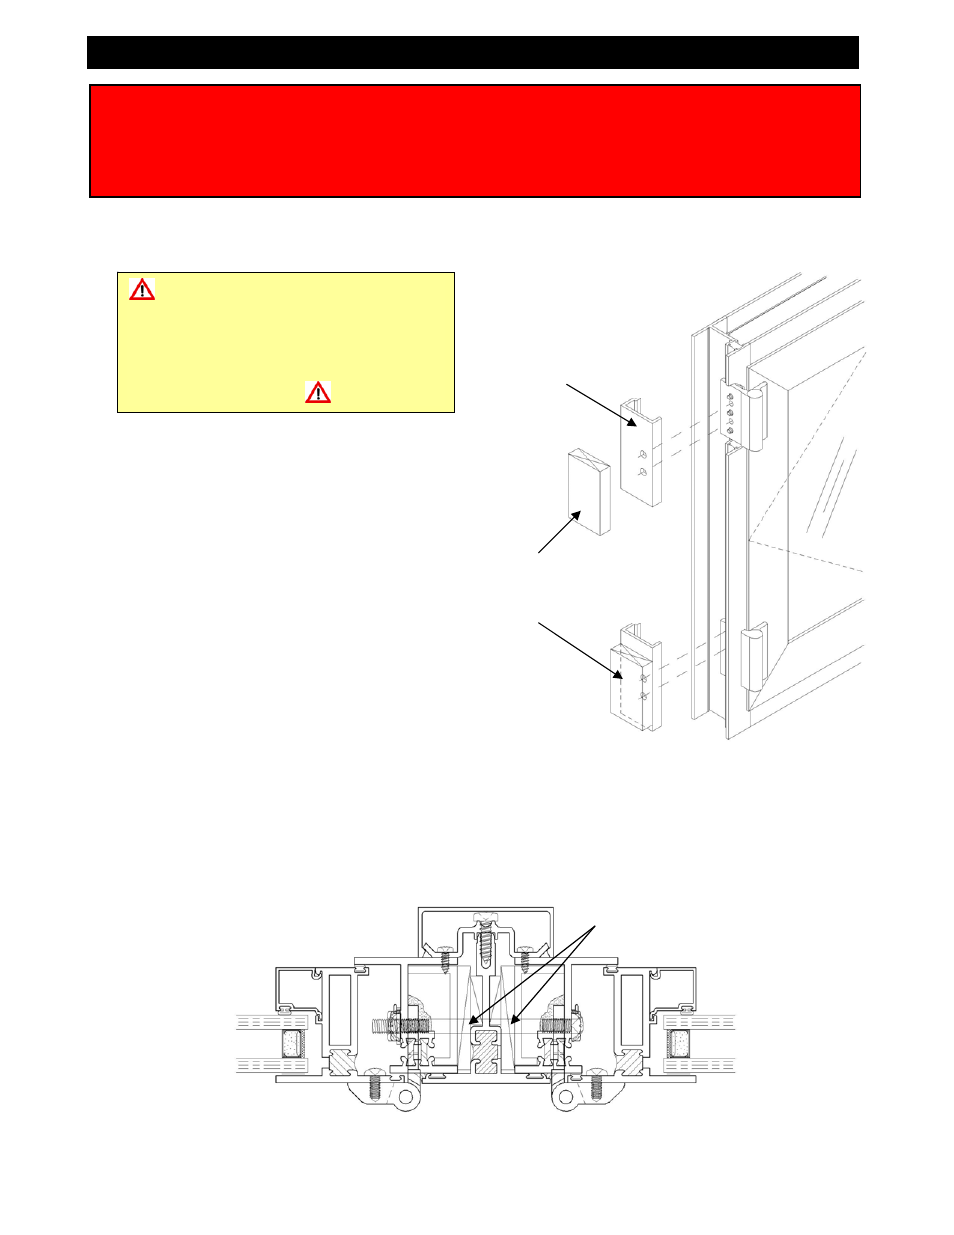
Aluminum channel
hinge support
Block at the hinge points
prior to opening the vent.
Typical casement hinge anchorage at window mullion
Through bolt supplied by EFCO. Drilling of mullions, frames, and
support materials or notching of glazing hooks Not by EFCO.
Blocking and
Drilling Not by
EFCO
A casement window must be
installed plumb and secure. All hinges
must be securely blocked and anchored
to the window opening or mullions
through the hinge leaves or as close as
possible to the hinges.