Tilt window balance removal and installation – EFCO Special Purpose Windows Installation User Manual
Page 21
EFCO CORPORATION 3/5/2014 PART NO. YW40
Page 4 of 10
Window Installation Instructions - Hung Window Installation Section -
Tilt Window Balance Removal and Installation
Completely read the General Installation Instructions and all other sections which pertain to
your project before starting work. These recommendations are for general erection
procedures only. For actual job conditions, see the details on the shop drawings. For
perimeter anchor types and spacing, refer to the approved shop drawings or consult the
project design professional.
Removal of lower sash and balance
1. Follow sash removal procedures as outlined in steps 1 and 2 of the
previous page.
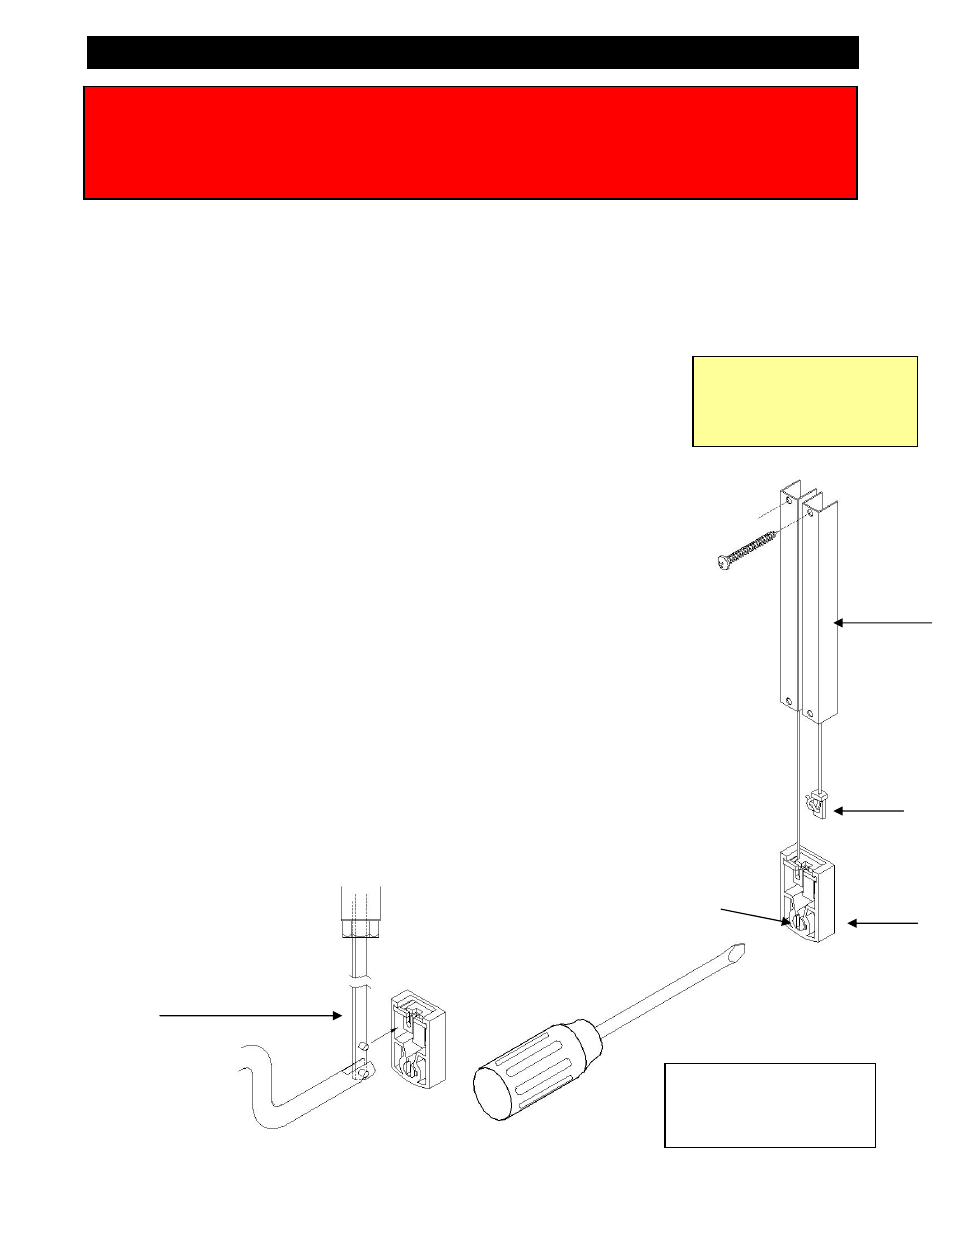
2. Insert a large flat screwdriver in the pivot shoe assembly cam. With
caution, while maintaining downward pressure, slowly rotate the cam until
the cam slot is horizontal. Using the screwdriver as a lever, allow the pivot
shoe assembly to rise to within 2 inches of the balance housing, relieving
most of the tension on the balance. Rotate the cam back to a vertical
position to relock the pivot shoe assembly.
3. Using needle nose pliers, release the balance cord clip(s) from the pivot
shoe assembly allowing the cord to retract into the balance slowly. Use
caution not to damage the cord.
4. Again rotate the pivot shoe cam to the horizontal allowing the assembly to
drop to the bottom of the jamb.
5. If only one balance is in the track, remove the screw at the top of the
balance and remove the balance from the track.
With two balances in the track, slide one balance to the bottom of the jamb
while holding the second balance in position at the top. Twist the bottom
balance from the bottom end and gently work it out where it overlaps the
other balance at the midpoint of the jamb. Remove the top balance if
required.
If you have an unequal sash with dual balances, some proportions require
that you must remove the window unit and disassemble the sill member
from the jamb members. This allows for removal of the balances by sliding
them out the bottom. Failure to remove the balances in this manner will
result in damage to the window members and both balances.
Caution
Balances can be under
extreme tension.
Balance
cord clip
Balance
attachment
screw
Pivot shoe
assembly
Pivot shoe assembly cam
(shown in locked position)
Class 5 balance type
Block
and
tackle
balances
Removal of upper sash and balances
6. Lower upper sash approximately 4 inches and repeat the above steps
To install balances and
sash, start with the upper
sash and reverse removal
procedures.