Interface roller assembly installation – Dynojet 224x: Installation Guide User Manual
Page 70
Above Ground Model 224 Automotive Dynamometer Installation Guide
A P P E N D I X C
Interface Roller Assembly Installation
C-2
. . . . . . . . . . . . . . . . . . . . . . . . . . . . . . . . . . .
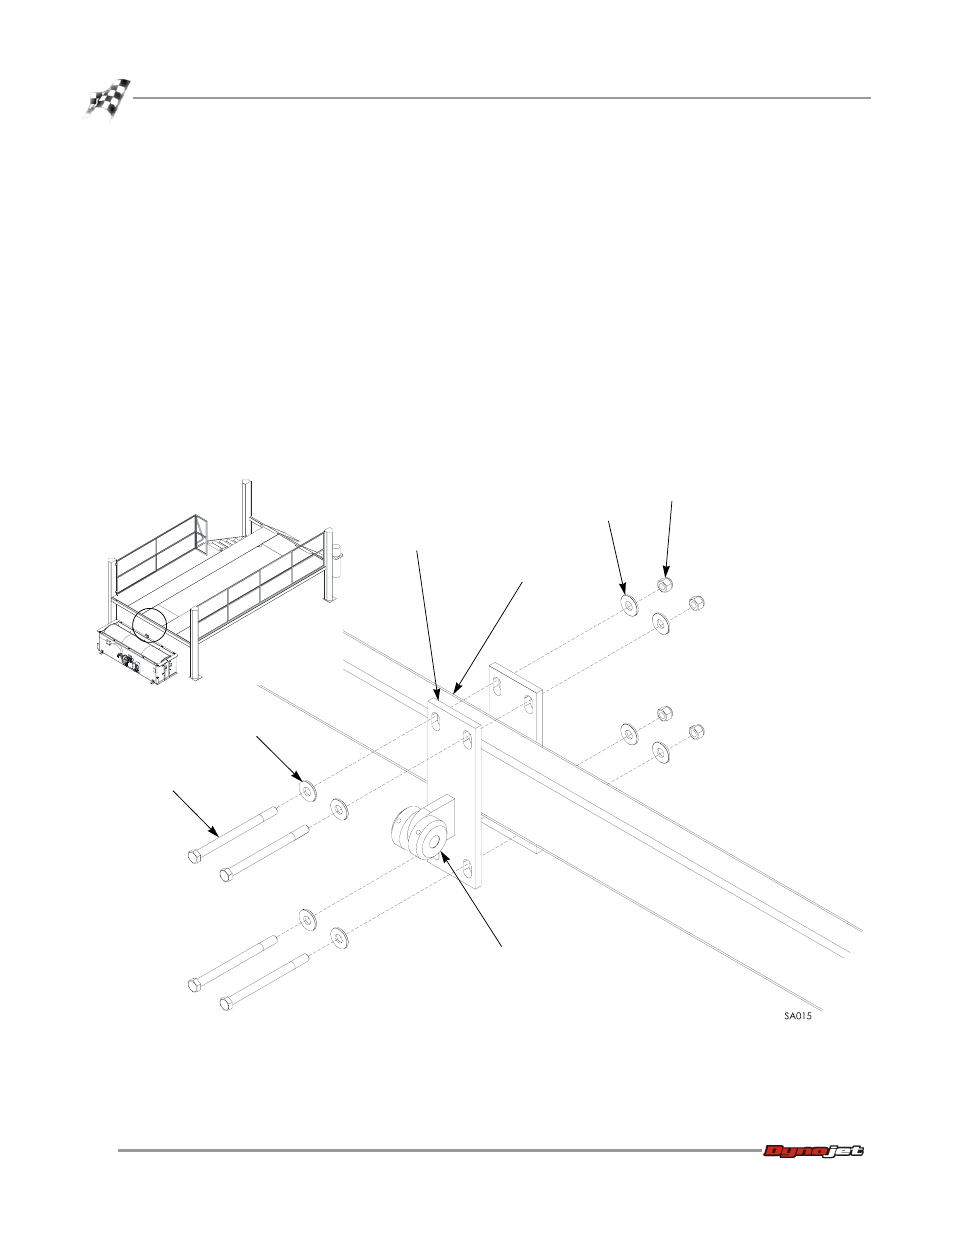
INTERFACE ROLLER ASSEMBLY INSTALLATION
The roller assembly secures the dyno to the four-post lift. It is a good idea to install
your interface roller assembly before anchoring your dyno to the ground. If you have
the interface guide, refer to “Installing the Interface Guide” on page 2-7.
Note: If you did not purchase the Above Ground Kit you will not have the
interface roller assembly.
1
Raise the lift until the bottom of the lift is approximately 86.36 cm (34.00 in.)
above the floor.
2
Loosely attach the interface roller assembly to the lift cross member using
four 3/8 x 5-inch bolts, eight 3/8-inch flat washers, and four 3/8-inch nylock nuts.
Note: Be sure to attach the interface roller assembly with the roller facing the
dyno near the bottom of the lift cross member.
Figure C-1: Interface Roller Assembly and Lift Cross Member
lift cross member
interface roller assembly
nut
washer
bolt
washer
roller facing the dyno
near the bottom of the
lift cross member