Edge Lighting Cirrus Channel, Tubular 1" Lens User Manual
Page 2
2
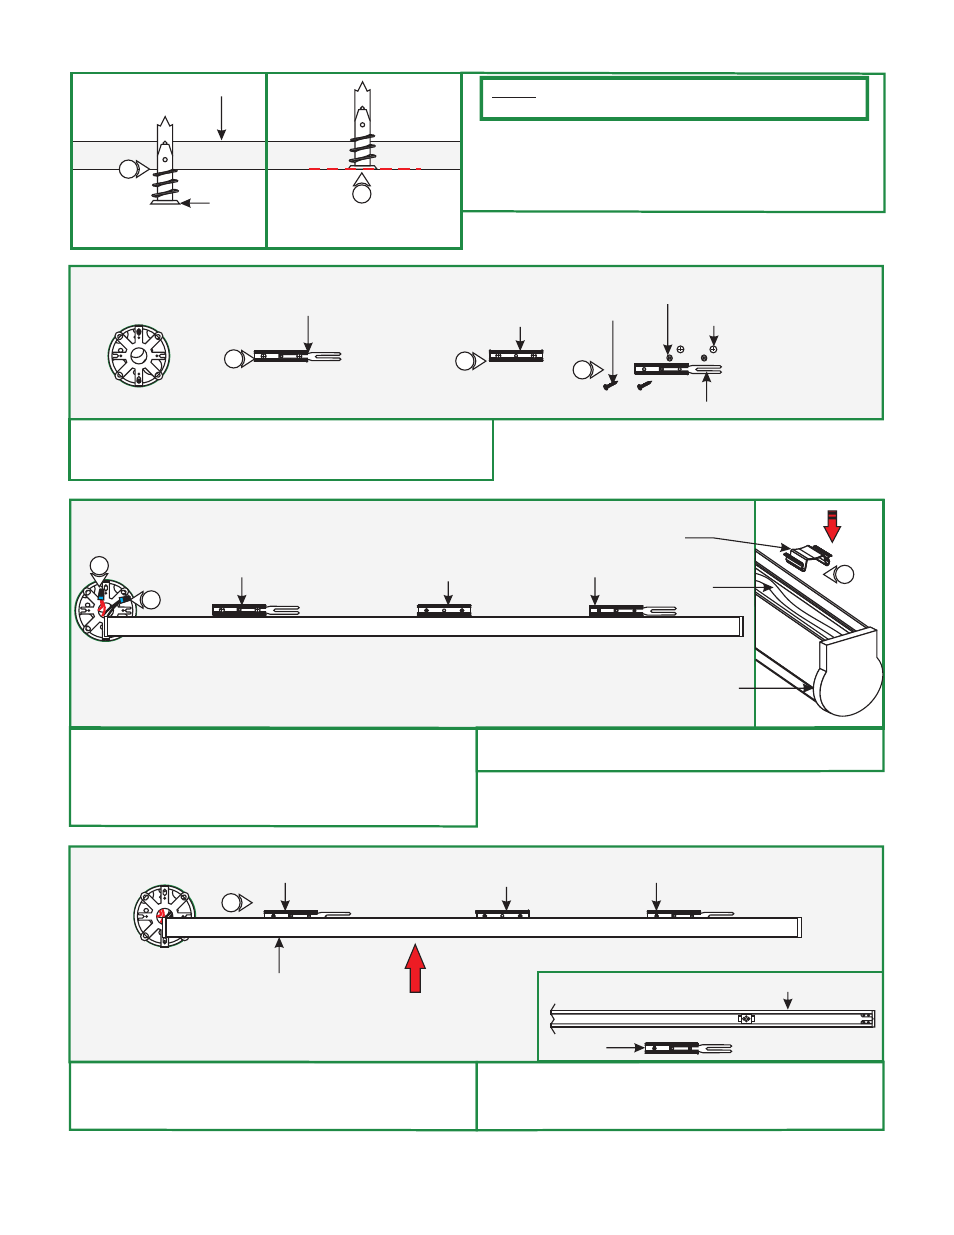
D
SURFACE
NOTE:
if mounting the clips to a wood surface directly.
Steps 3 and 4 are for drywall mounting. Omit these steps
4: Tap the anchors onto the marked points up to the threaded
portion with a hammer.
5: Screw in the threaded portion of the anchors with a Phillips
screwdriver.
4
5
ANCHOR
ANCHOR MUST
BE FLUSH TO WALL
E
MOUNTING
CLIP (C-MCL)
LOCKING CLIP
6
6: Line up the locking clips & mounting clips to anchor holes
and secure them by tightening the two #6 screws through
the clip holes followed by the washers into the anchors.
WASHER
(OPTIONAL)
6
F
MOUNTING
CLIP (C-MCL)
LOCKING CLIP
6
WIRE
MANAGEMENT
CLIP
CORD
CHANNEL
9
7
8
7: Connect the red power supply (24VDC+) wire to red strip
wire with a wire nut inside the Junction box.
8: Connect the black power supply (24VDC-) wire to black
strip wire with a wire nut inside the Junction box.
9: Snap the wire management clip to hold the cable in place if
necessary.
#6 SCREW
G
MOUNTING
CLIP (C-MCL)
LOCKING CLIP
10
CHANNEL
10: Carefully snap channel onto the locking/mounting clips
then slide 2" into receiving bracket to lock in place. Make
sure not to nick the wires.
11: If applicable, connect the remaining channels by following
"Connecting the Channel" on page 1. Then secure by
repeating step 10 (above).
ANCHOR
BACK OF CHANNEL
RECEIVING BRACKET
LOCKING
CLIP
LOCKING CLIP
LOCKING CLIP
LOCKING CLIP