Edge Lighting Crystal Shadow User Manual
Page 2
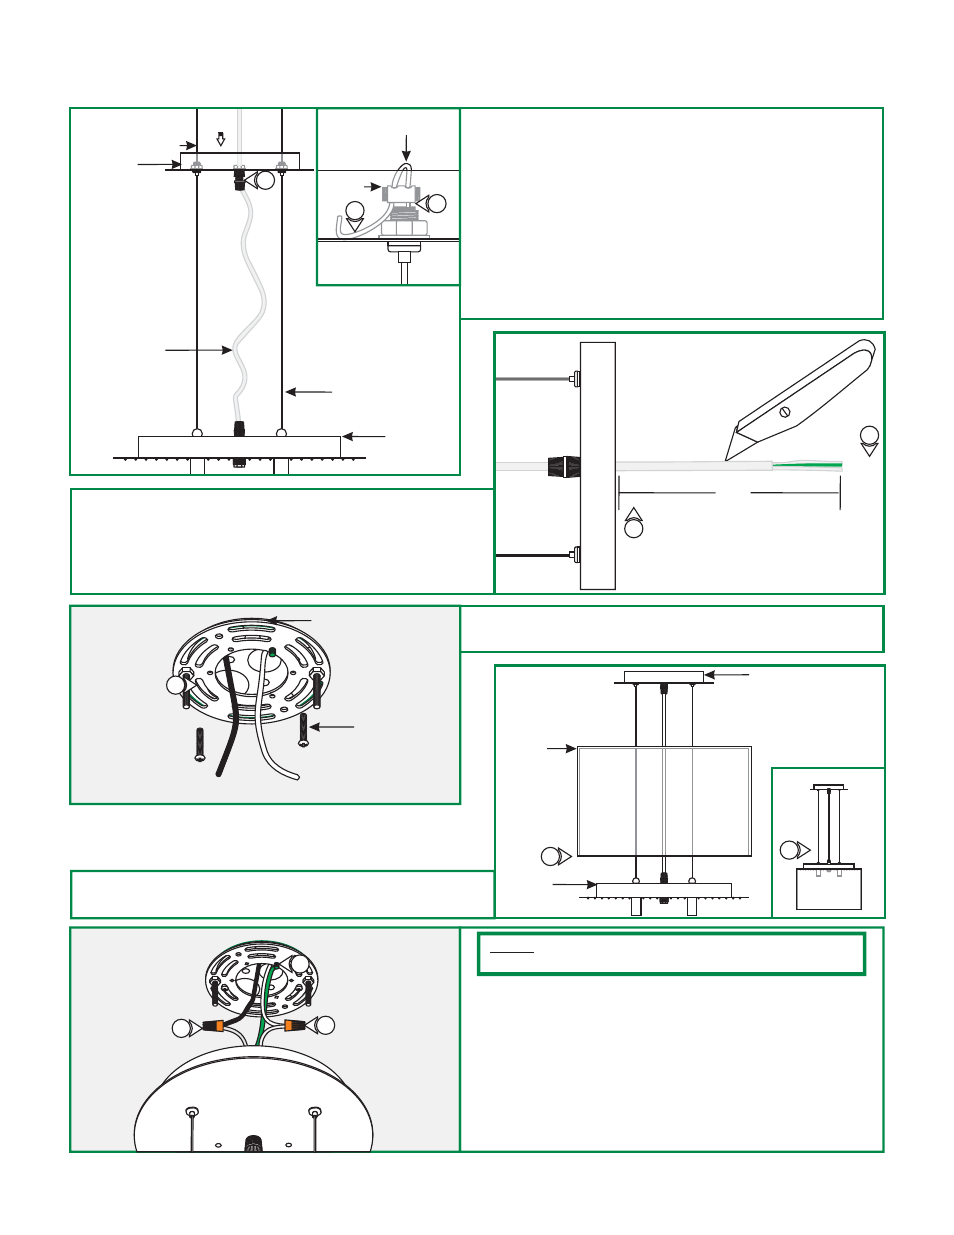
5:
6:
Loop the end of the aircraft cable into the other strain relief
hole and tighten the set screws.
Repeat steps 4 and 5 for remaining strain reliefs.
7: Trim off excess aircraft cable behind the strain reliefs with a
sharp cutter.
8: Loosen the cord grip and push the excess clear cord into the
canopy.
9: Tighten the cord grip to lock the clear cord in place.
D
8"
C
CLEAR CORD
SOCKET
ASSEMBLY
PLATE
CANOPY
AIRCRAFT CABLE
2
AIRCRAFT CABLE
10: Leave 8" of the clear cord exposed behind the canopy for
power connection. Trim off the excess clear cord.
11: From the end of the clear cord, strip 4" of the outer
insulation using a sharp knife. Make sure not to nick the
inner wires. Trim off the cut out insulation.
10
9
13: Slide the fabric shade down the fixture and lay it onto the
socket plate.
F
13
FABRIC
SHADE
CANOPY
SOCKET
PLATE
13
E
12: Mount the crossbar assembly to the electrical box holes
with the two #8-32 screws provided.
12
CROSSBAR ASSEMBLY
#8-32 SCREW
AIRCRAFT CABLE
STRAIN
RELIEF
5
7
G
17
16
15
14: Make sure the power to the electrical box is off.
15: Make sure that the canopy is grounded in accordance with
local electrical codes.
16: Connect the clear wire with a white strip to the neutral
power wire with a wire nut.
17: Connect the other clear wire to the hot power wire with a
wire nut.
NOTE:
It is recommended a person to hold the fixture while the
electrician connects the power to the fixture.
11