Quick start recording guide, How to receive the tv program, Manual recording – SONIQ DVR150 User Manual
Page 21
How to Receive the TV Program
According to the figure shown in section “System Connections- Connecting to TV set”, connect the system.
Connect the power plugs of the TV and this unit to the outlet.
Turn on this unit by pressing the [POWER] button, and switch the TV set to AV mode.
Press the [SETUP] button to enter the System Setup mode, and then perform the Channel Scanning and
Channel Fine Tuning according to the steps introduced in chapter “System Setup-Channel Turning” .
After finishing, please press [SETUP] button to exit setting mode.
Before receiving TV programs for the first time, you must do this step, the unit will save corresponding
information after you have done it.
Please press [SOURCE] button to enter the monitoring mode, and set “SOURCE” item to “TUNER”.
Press [CH+]/[CH-] to switch the TV program.
5
4
3
2
1
6
Manual Recording
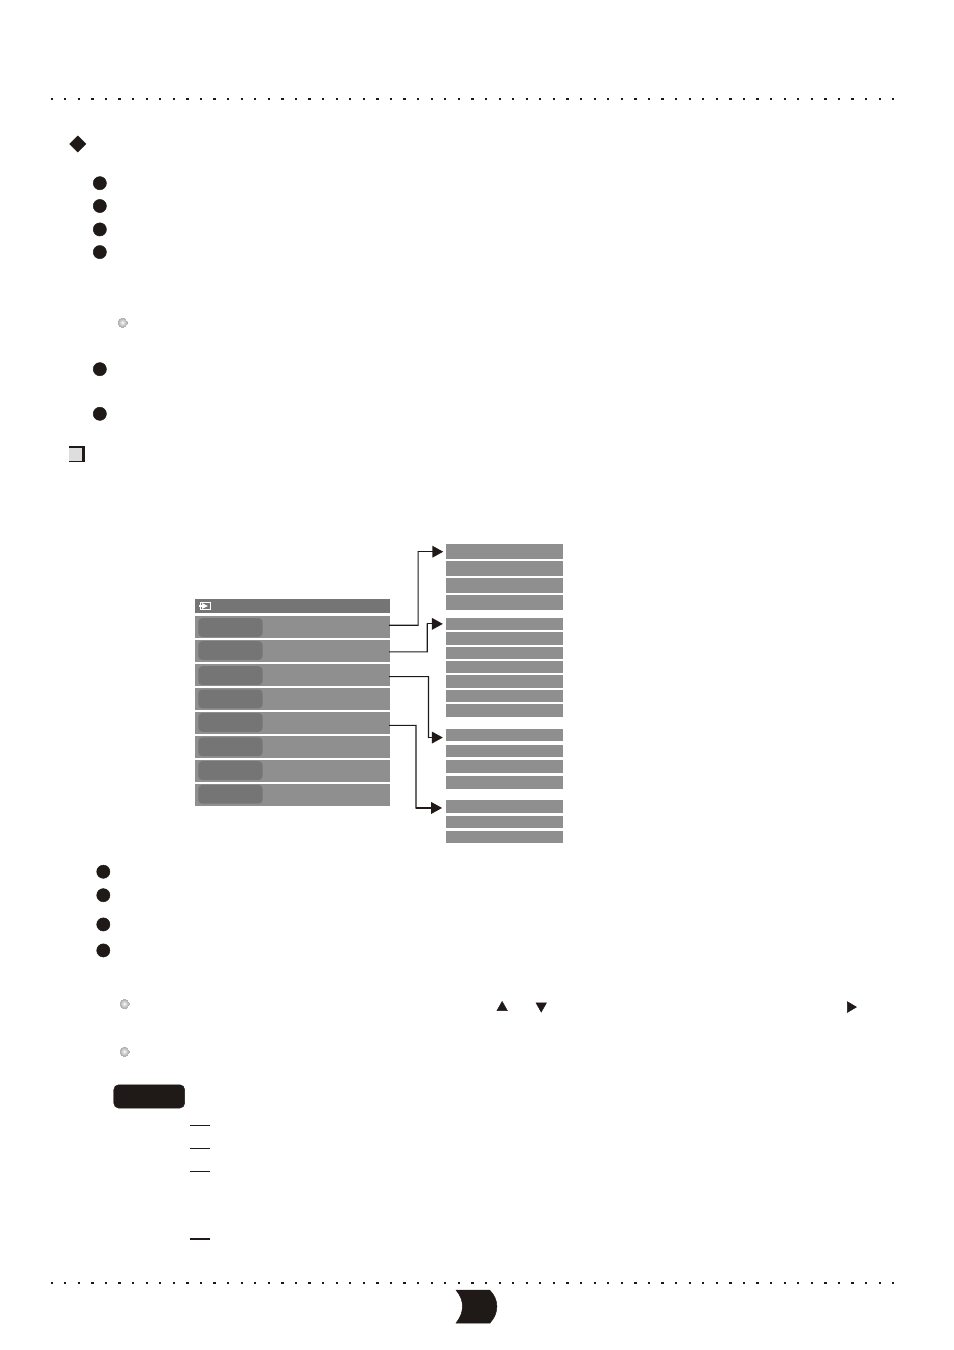
The following figure shows the construction of the menu in recording mode. The last three items can not be
controlled in this mode. Please follow the following steps to finish a recording task.
RECORD (DVD+RW)
MODE
SOURCE
QUALITY
REC TO
New Title
Front S-VIDEO
SP
DVD-VIDEO
TRICK
TITLE
CHAPTER
TIME
Stop
01/01
01
0:02:45/2:07:09
New Title
Append title
Overwrite title
Overwrite disc
Front CVBS
Front S-VIDEO
Rear CVBS
Rear S-VIDEO
DV
SCART
Tuner
HQ
SP
EP
SLP
Stop
Pause
Record
Mode list of recording
source list
recording quality list
recording process control item list
The menu construction in recording mode
Load an unfinalized DVD R or unfull DVD R/RW disc.
Select the desired external signal source to be recorded by [SOURCE] button.
Press [DISPLAY] button to display the record control menu.
Refer to the menu construction figure, rightly set the values of “MODE” and “QUALITY”. You can
refer to following contents to realize this step.
±
±
H i g h l i g h t t h e d e s i r e d m e n u i t e m b y c u r s o r [ ] , [ ] b u t t o n s , p o p o u t t h e s u b m e n u b y [ ] o r
[ E N T E R ] b u t t o n , a n d c o n f i r m b y [ S E L E C T ] b u t t o n .
M e a n i n g s o f s o m e v a l u e s i n t h e d r o p d o w n l i s t s a r e a s f o l l o w i n g .
1
2
3
4
New title: Add a new title when recording.
Append title: Append the recording content to the current title, and does not add a new title.
Overwrite title: Overwrite the current title as the recording content, and the previous
recorded content of that title will be lost. During recording by this mode,
when meet the end of the title, the recording will auto stop on this menu.
Overwrite disc: Overwrite all the recorded content in the disc as new one on this menu.
MODE
MODE
MODE
MODE
MODE
*
*
*
*
16
QUICK START RECORDING GUIDE