Kenco Engineering SmartSonic Transmitter (Integral) User Manual
Page 4
Page 4
MOUNTING INSTRUCTIONS
Precautions:
•
Ensure that the transmitter is mounted in an area that meets the stated temperature, pressure and technical
specifications.
•
Ensure that high voltage (ac) sources or cables are at least 1 yard away from the transmitter and its cable.
•
Installation and Operation of this transmitter must conform to the National Electric Code and any applicable local
codes.
1.) If this transmitter is to be flange mounted, screw the 2” NPT transmitter process connection into the flange. Hand
tighten only. Non-metallic flanges are recommended. If a metallic flange is used, a soft gasket is recommended
to eliminate the transmission of sound through the flange to the vessel wall.
2.) Bolt the flange to the vessel.
3.) If no flange is used, screw the transmitter into the 2” NPT vessel connection. Hand tighten only.
4.) If you are planning to mount the transmitter into a standpipe (stilling well) contact Kenco Technical Support for
directions prior to proceeding.
WIRING
It is recommended that flexible conduit be installed onto the ½” NPT connection on the transmitter housing. A seal drain
fitting should be used to prevent moisture from entering the transmitter. In high humidity areas, use a breather drain to
minimize moisture intrusion
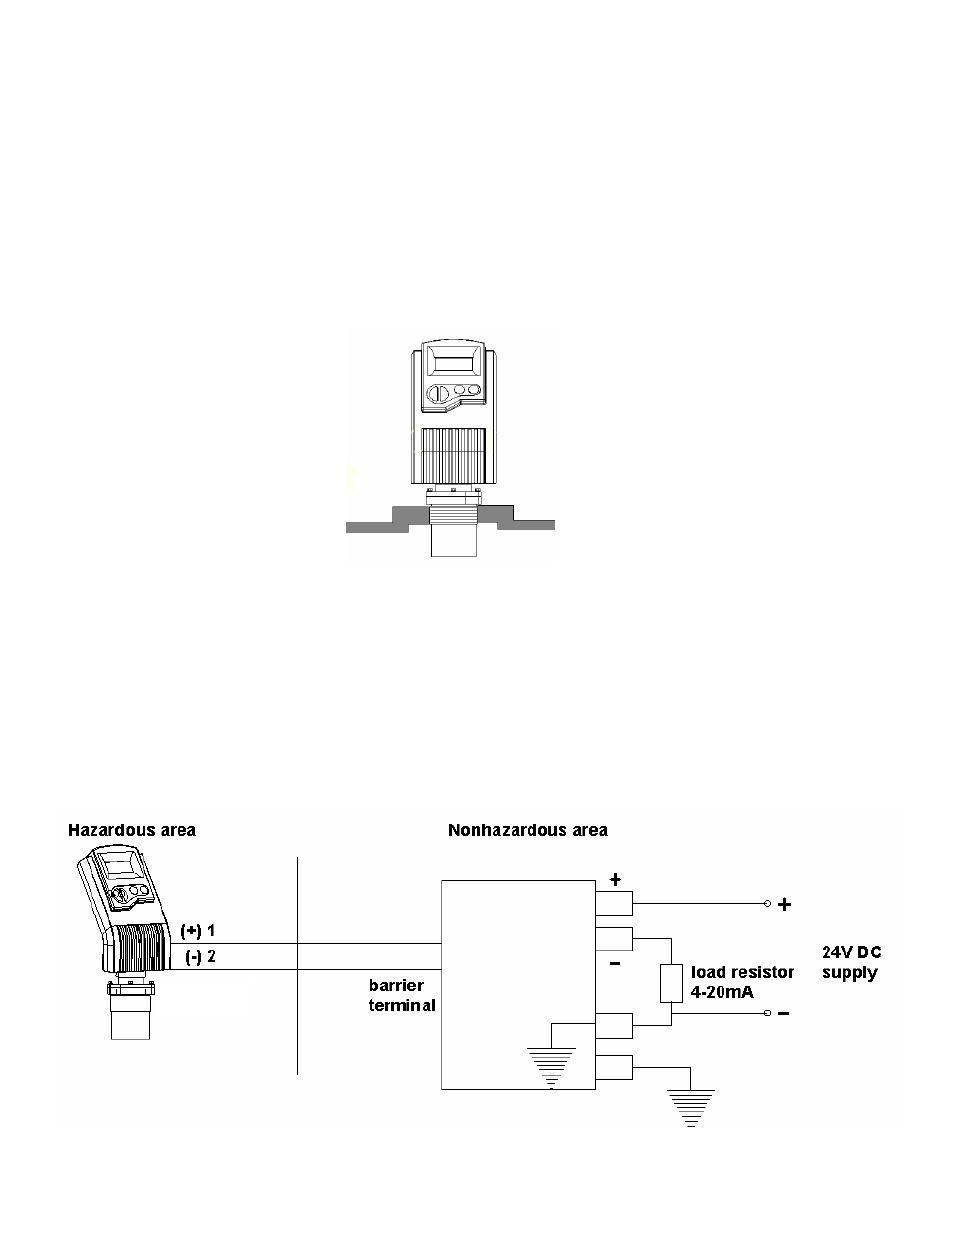
All wiring, conduit, and fittings must conform to local electrical codes for the location selected. If the transmitter is to be
used in a Hazardous Area, the applicable sections of the National Electric Code must be followed as well.
See the following for the Hazardous area installation drawing:
Entity Parameters:
Vi = 28 V
Ci=0pF
Ii = 93mA
Li=0µH
Pi = 1.71 W