Kenco Engineering SmartSonic Transmitter (Integral) User Manual
Page 16
Page 16
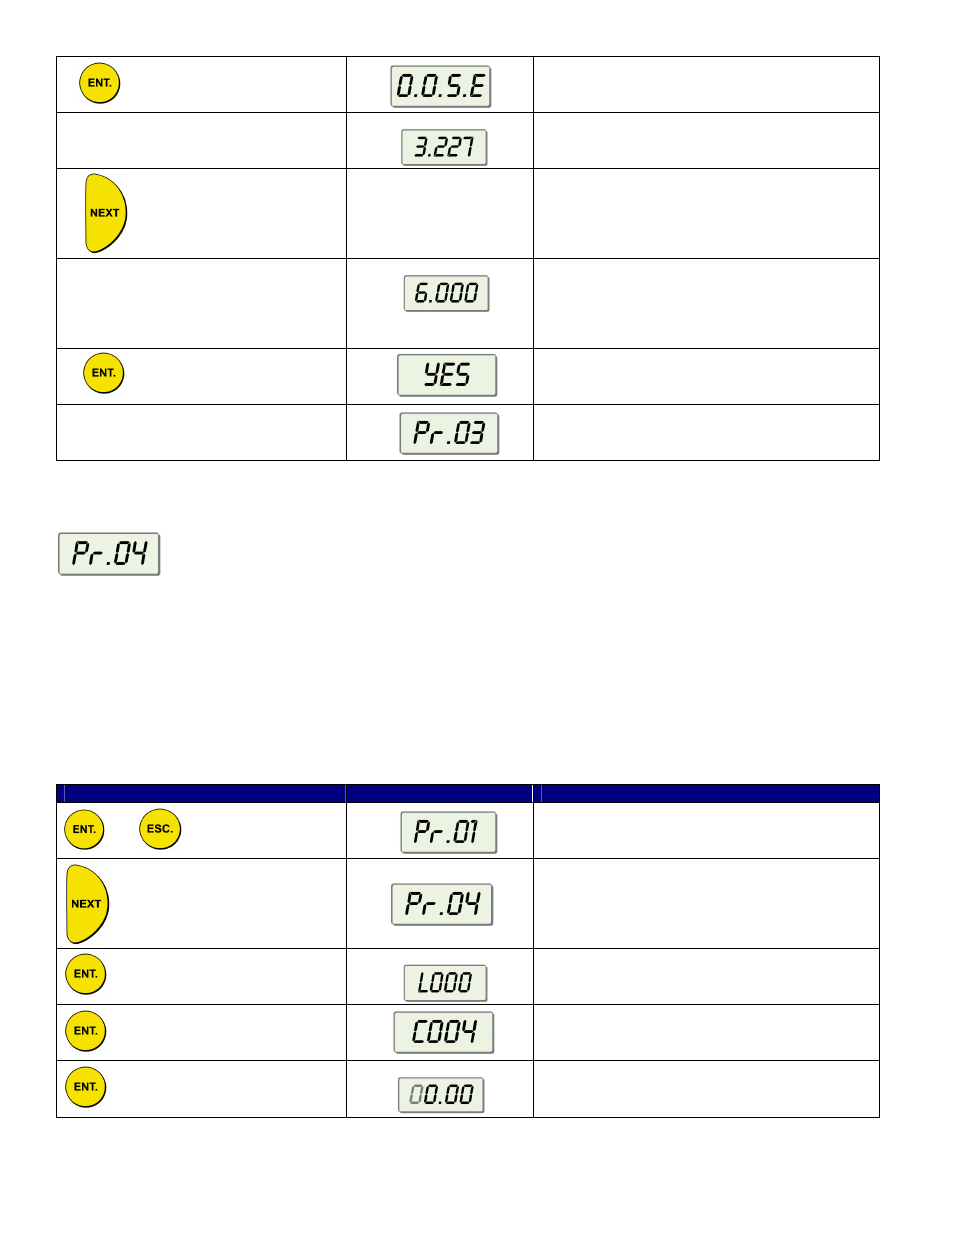
Temporary display while SmartSonic searches
for Interfering Signals
After a brief pause
For Example:
Distance to Interfering Signal
Saves the Interfering Signal, then searches
again and displays the next reading. Continue
to press this button to save up to six
interference readings. If you get to the real
echo, go to the following steps.
For Example:
Real echo reading (confirmed by manually
measuring the distance from the sensor to the
bottom of the tank). The correct reading
indicates that there are no more Interfering
Signals
Saves the entered values.
Returns to
Pr.03
NOTE: If the value represents an interference or false echo, press NEXT. If the value represents the real target, real
distance, or real echo, press
ENT.
Configuring the 4mA Point
The
Pr.04 program enables you to set the location of the 4mA output. You can define the location of 4mA in Level, Flow,
or Distance measurements. The selection of Level, Flow, or Distance will also apply to program
Pr.05 (20mA Point).
For example, if you set a Tank Height (
Pr.02) of 15 feet, and you have selected LEVEL, the 4mA Point will be at or near
the minimum fluid level (for example, 0.000 ft.). The 20mA Point will be the maximum fluid level (15.00 ft. – Dead Zone).
In other words, 4mA represents an empty tank, and 20mA represents a full tank. Level and Flow work the same.
However, if you select DISTANCE, with a Tank Height of 15.00 ft., the 4mA Point is the maximum fluid level (15.00 –
Dead Zone), and the 20mA Point is the minimum fluid level (for example, 0.000 ft.). In other words, 4mA represents a full
tank, and 20mA represents an empty tank.
Press / Action
Display
Description
and
simultaneously
Enter the Program Menu
Three Times
Cycle to Program #4
For Example:
Use
BACK or NEXT buttons to cycle between
Level (
L000), Distance (d000), and Flow (F000)
Indicates that you are about to change the 4mA
Point
For Example:
Displays either the last entered, or default
value.