Kenco Engineering 512-TB (old style) User Manual
Kenco engineering company
KENCO ENGINEERING COMPANY
P.O. BOX 470426 TULSA, OK 74147-0426
PHONE: (918) 663-4406 FAX: (918) 663-4480
www.kenco-eng.com
e-mail:[email protected]
UPDATE FOR MODEL 512 OIL LEVEL CONTROLLERS WITH –TB(TEST BUTTON) OPTION
The Test Button makes it easy to check for proper oil controller wiring installation. It also allows the user to
simulate a low oil level condition.
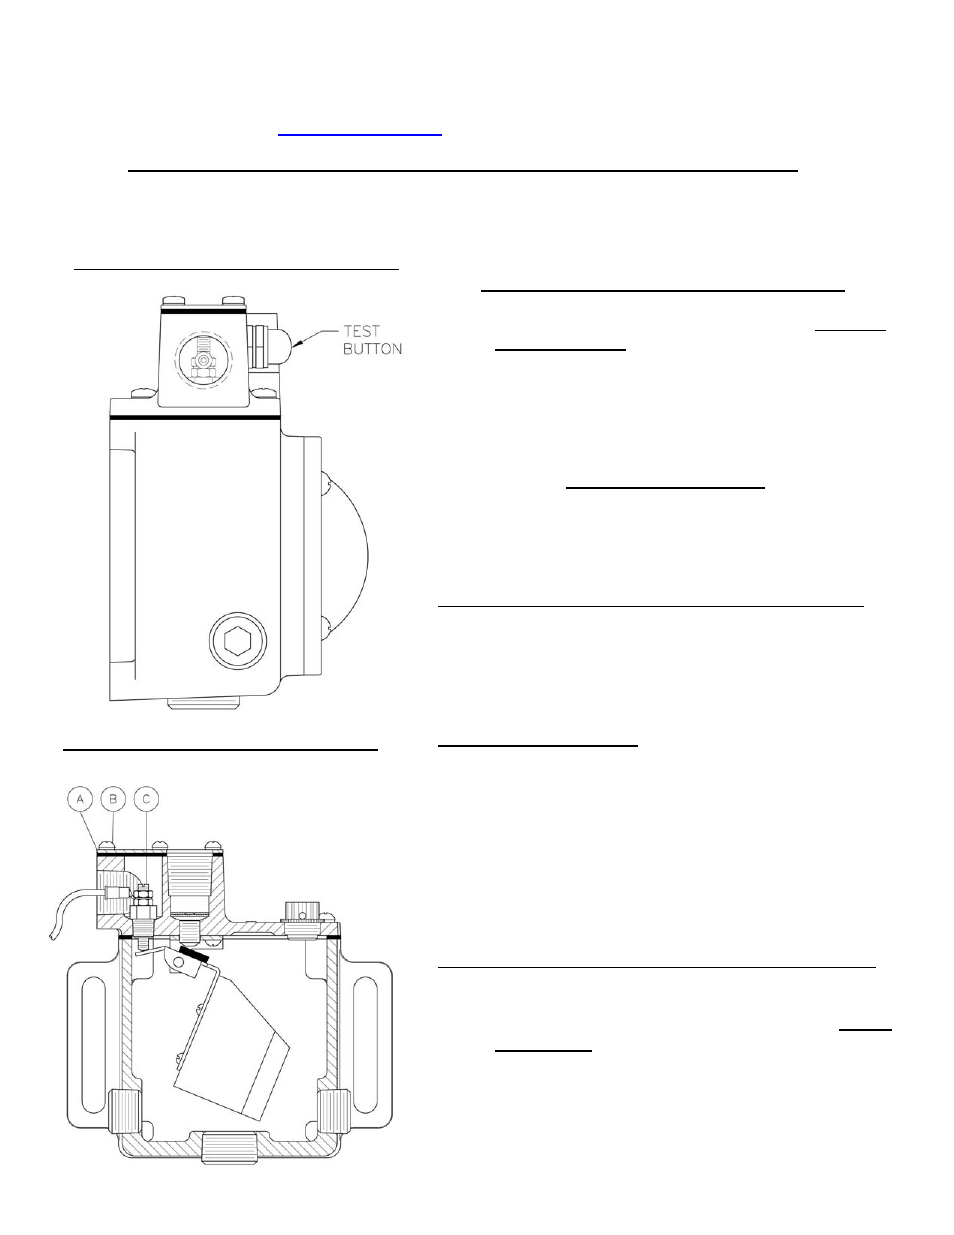
Figure 2- Side View for Switch Adjustment
TEST BUTTON OPERATING INSTRUCTIONS:
1. To check for proper wiring installation or to check
system response to a low oil level condition, Press and
Hold Test Button.
2. To return controller to normal operation, simply
release test button.
SWITCH SPECIFICATIONS: Case to Ground: 2 AMP,
30 VAC/30 VDC
SWITCH ADJUSTMENT:
Switch adjustment is not recommended. Improper setting
may result in damage to engine. Switch is factory set at 1/2”
below center of sight window. The test button must be
removed for switch adjustment.
Removing the test button assembly for switch adjustment:
• Unscrew the test button using a deep 5/8” socket.
Make sure the socket completely covers the test
button, not just the rubber boot. If the rubber boot is
inadvertently removed, care must be taken to ensure
the return spring and actuation pin are not lost.
Actual Switch Adjustment: Refer to figure 2 and follow these
instructions:
• Remove the cover of the condulet housing (A) by
unscrewing the 6 screws(B).
• Rotate the slotted set screw(C) counter-clockwise to lower
the switch trip point.
• Rotate the slotted set screw(C) clockwise to raise the
switch trip point.
• Attach the wire from the controller to the low tension
terminal on the magneto.
Replacing the test button assembly after switch adjustment:
• Before reinstalling the test button, check the O-ring
for any damage. If damaged, replace O-ring.
• Re-install the test button using the 5/8” socket.
Do not
overtighten! A snug fit is all that is required to
retain the test button and provide a water-tight
seal.
Figure 1: Side View of 512 Test Button Assembly