Rudder and tail wheel installation – E-flite Extra 300 32e ARF User Manual
Page 22
22
E-flite Extra 300 32e ARF Assembly Manual
Rudder and Tail Wheel Installation
Required Parts
Fuselage assembly Rudder
CA hinge (2)
Rudder control horn screw
Tail wheel assembly Nylon control horn (2)
Tail wheel
Wheel collar with setscrew
Required Tools and Adhesives
Low-tack tape
Medium grit sandpaper
Pin vise
Drill bit: 1/16-inch (1.5mm)
Petroleum jelly
30-minute epoxy
Thin CA
T-pins
Toothpick
Hobby knife with #11 blade
Pliers (2)
Hex wrench: 1.5mm
Mixing cups
Mixing sticks
Rubbing alcohol
Paper towels
Ruler
Threadlock
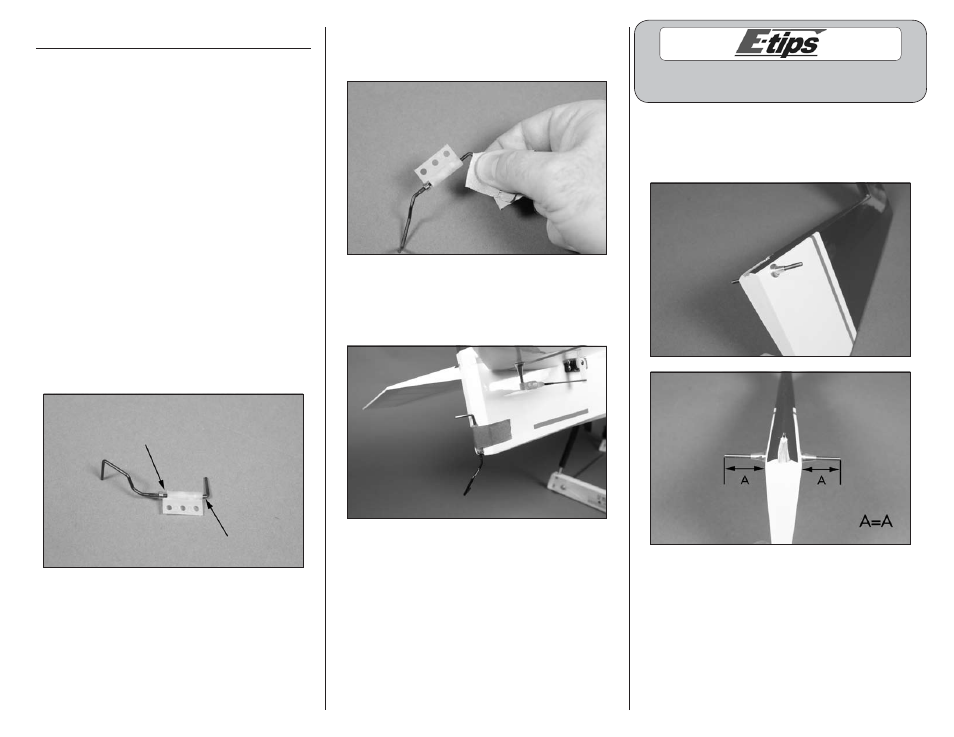
1. Apply a small amount of Petroleum jelly using
a toothpick at the top and bottom of the tail gear
bushing. Work the jelly into the bushing to prevent
epoxy from entering the bushing. If epoxy enters, it
could glue the wire to the bushing.
2. Use medium grit sandpaper to roughen the
section of the wire that will enter the rudder. This
provides a surface for the epoxy to adhere to.
3. Apply 30-minute epoxy to the bushing where
it fits into the fuselage. Insert the bushing in
the fuselage and use low-tack tape to hold the
assembly in position until the epoxy fully cures.
Always use threadlock on metal-to-metal fasteners
to prevent them from vibrating loose.
4. Insert the rudder control screw through the
rudder. Position the screw equally on both sides
of the rudder. Use two pair of pliers to tighten the
tapered nuts to secure the screw.