E-flite Extra 300 32e ARF User Manual
Page 16
16
E-flite Extra 300 32e ARF Assembly Manual
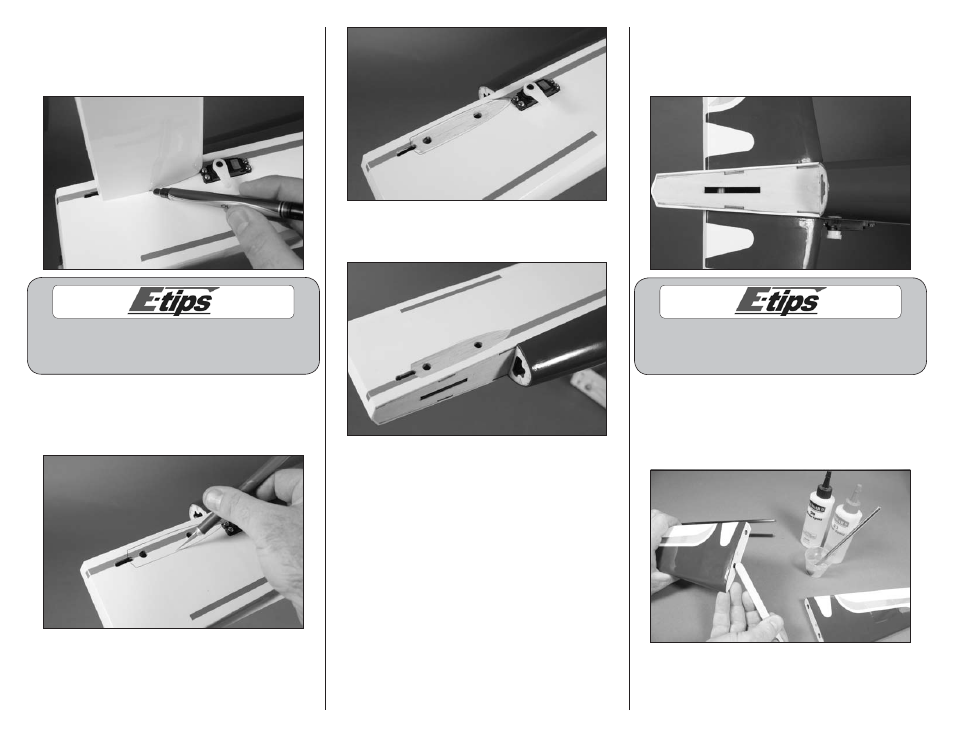
6. Slide the tubes into the holes at the rear of the
fuselage. The stabilizer will fit tight against the
fuselage. Use a felt-tipped pen to trace the outline
of the stabilizer on the fuselage.
Use caution when trimming the covering.
Accidentally cutting into the wood will weaken
the structure and may cause failure in flight.
7. Remove the stabilizer from the fuselage. Use
a hobby knife with a new #11 blade to trim the
covering 1/16-inch (1.5mm) inside the lines drawn
on the fuselage.
8. Repeat Steps 5 through 7 to prepare the
opposite side of the fuselage.
9. Check the fit of both stabilizers to the fuselage.
They must fit tightly to the fuselage as shown. If not,
the stabilizer tubes will need to be shortened until
they both fit tight as shown.
Read through the following steps to understand
them completely. These steps must be performed
before the epoxy begins to cure.
10. Remove the stabilizers from the fuselage as
well as the tubes from the stabilizer halves. Mix
1/4 ounce (15mL) of 30-minute epoxy. Apply a
small amount of epoxy in the holes of the stabilizer
for the stabilizer tubes.