Relay (optional) – Watts Autotrol 263 / 268 (Logix Series) User Manual
Page 54
54
VALVE SERVICE
Rev A
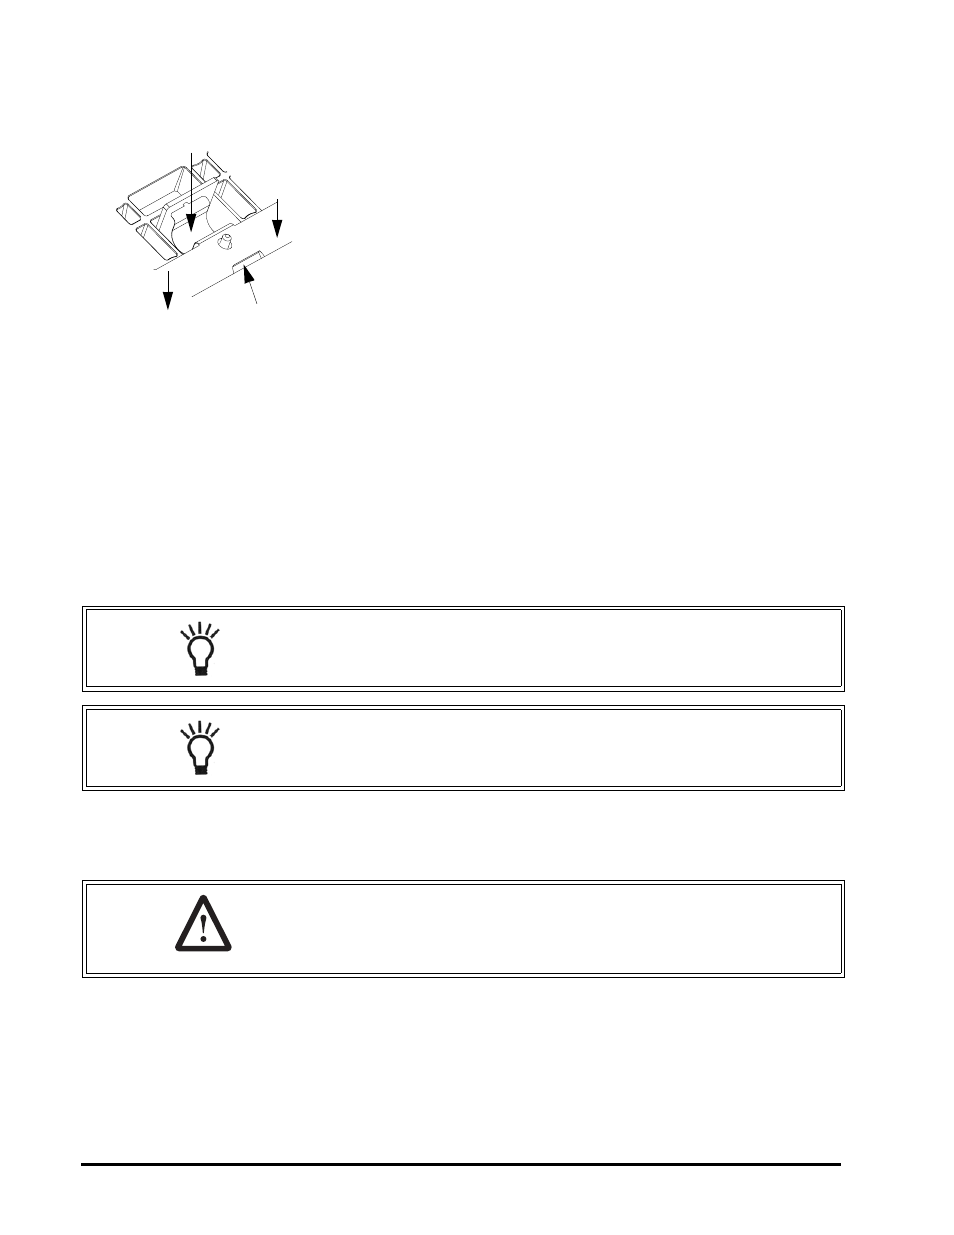
To install spring:
1. Inspect the spring for damage. Do not attempt to repair a bent spring.
2. Position yourself on the spring side of the valve discs.
3. Position the spring over the valve body close to final position. The wide
spring segments will be located at the wide valve discs. The curve of
the spring will be down into the valley.
4. The long flat close edge is inserted first. This edge slides into a channel
on the valve body.
5. Rock the spring back and place the flat edge into the channel.
6. Lower the springs until they rest on top of the valve discs.
7. A tool (phillips screwdriver) will be needed to push the springs in place.
8. The spring posts will guide the spring into position.
9. Hold the flat part down with one hand.
10. Spread your fingers apart to cover the length and push down.
11. With the other hand use the tool to push down in the valley of each
spring segment.
The spring will slide off the top of the valve disc downward. The small
projection on the end of the spring will drop into the hole in the valve disc
to provide secure positioning. Repeat for all spring segments.
Relay (Optional)
Holes are provided to mount a standard relay. It is located under the cover
on the top plate. This relay is wired to the controller and changes the
digital signal from controller into a signal that can be used to run
accessories.
1
2
3
2
NOTE:
If a spring segment goes beyond the locating hole, it can be pulled
back using a small flat blade screwdriver.
NOTE:
In high pressure (80 psi and higher) applications, the standard single
valve disc springs can be installed on top of the one piece spring.
WARNING: The Autotrol valve is rated for low voltage (less than
48 volts) microswitch components only. Using a high voltage switch
may result in damaged valves or fire and may interfere with electronic
control function.