Working modes/hdmi/aux2/aux3 switch setup, Gimbal working mode switch set, Notices – DJI Z15 User Manual
Page 20: Tips, Hdmi switch set
©2012 DJI Innovations. All Rights Reserved.
20
Working Modes/HDMI/AUX2/AUX3 Switch Setup
Gimbal Working Mode Switch Set
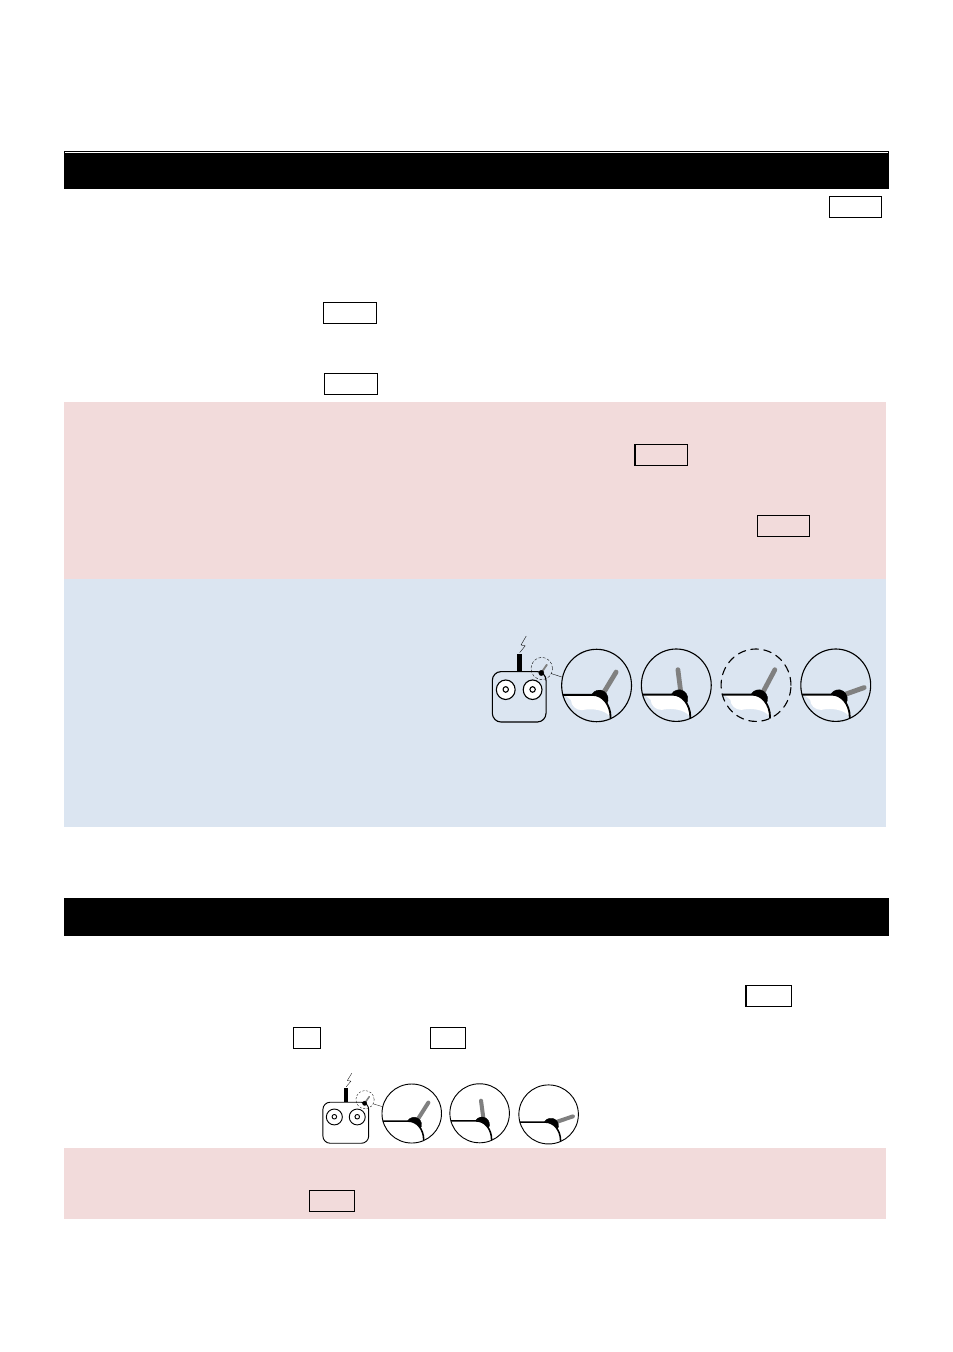
Whichever 3-position switch selected as working mode switch, wire the right channel of receiver to MODE
port. At each switch position, use end-point fine tuning, set the channel AUX2(JR) /7(Futaba/Hitec) for the
three Working modes.
Orientation-locked Mode MODE channel end-point 60%~90%
FPV Mode (Reset) back to center
Non orientation-locked Mode MODE channel end-point 60%~90%
Notices:
The gimbal will work in Orientation-locked Mode, if not connect to MODE.
Gimbal default works in FPV Mode after power on.
The gimbal will maintain the Working Mode from last moment, if the cable between MODE and RC
receiver is disconnecting while working.
Tips:
For 3-position switch, you may assign:
Position-1 to Non orientation-locked
Position-2 to FPV Mode (Reset)
Position-3 to Orientation-locked
Position-1 and Position-3 can be reverse assigned.
One 2-position switch can be assigned for any two of the working modes as you like.
HDMI Switch Set
HDMI-AV module can be set on/off by TX. Please ensure camera HDMI port is connected to gimbal correctly.
Whichever 2-position switch selected as HDMI switch, wire the right channel of receiver to AUX1 port.
You may assign: Position-1 to ON; Position-2 to OFF; or reverse the assignment.
Notices:
The camera HDIM will be on if AUX1 and RC receiver is disconnected.
Tx
1
2-position
switch
2
Tx
1
2
3
3-Position
Switch