Shutter control, Notices, Tips – DJI Z15 User Manual
Page 16
©2012 DJI Innovations. All Rights Reserved.
16
When disconnect the cable between HDMI-AV module and camera, dismount the camera, and
unplug the HDMI-AV interface.
(Z15-N) Make sure the infrared signal emission unit is aligned to the remote sensor.
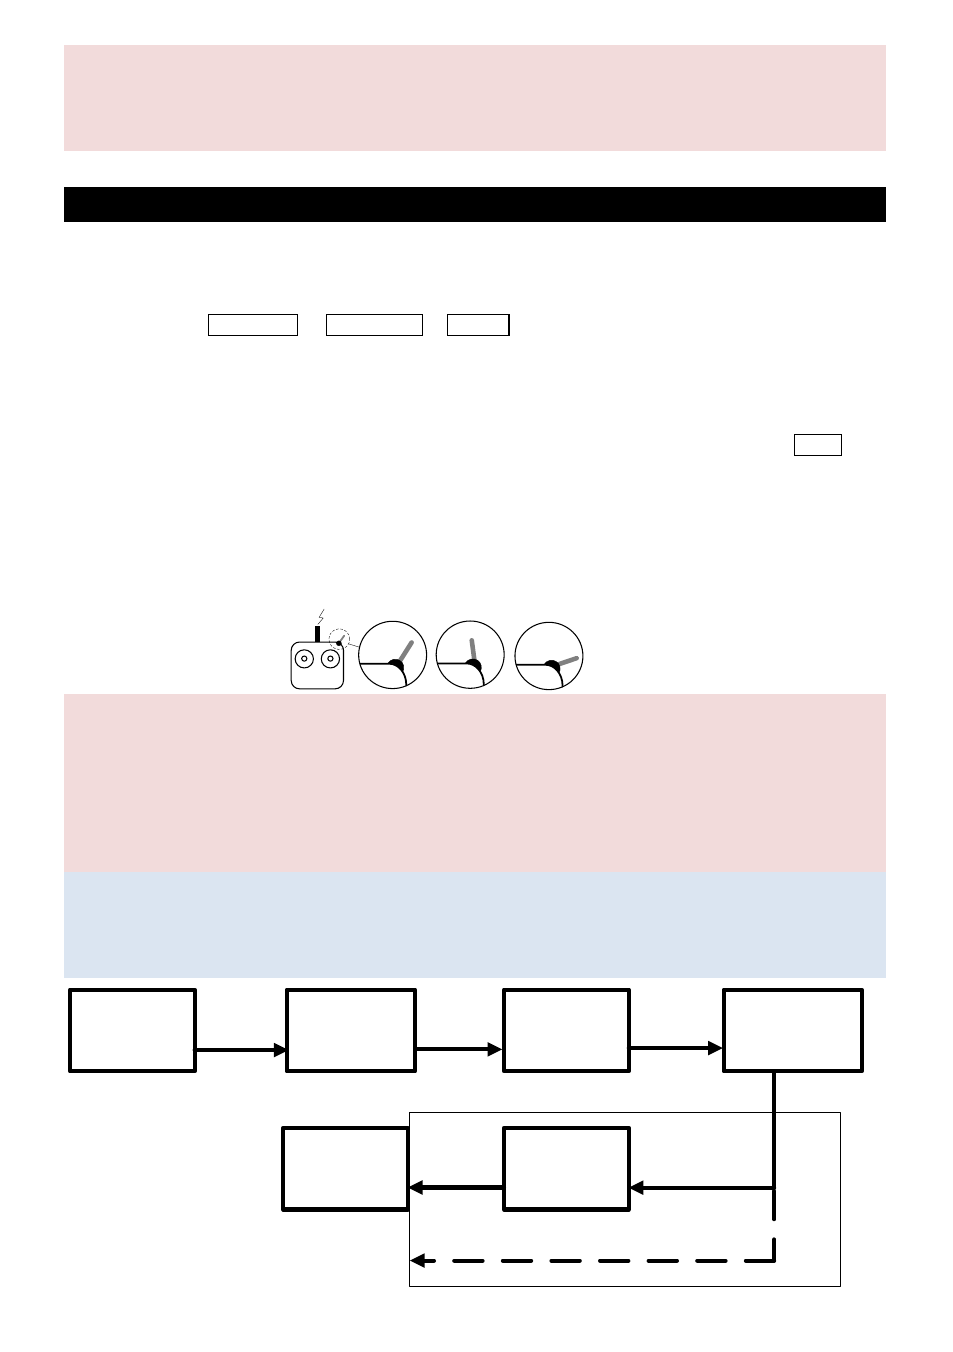
Shutter Control
Z15 enables transforming TX command into shutter control signal, please set one
2-position
switch/channel
for remote shutter control.
For Z15-N, set the Drive Mode as Remote Cdr. in Camera Menu, and make sure the shutter control module
is correctly mounted and wired.
For Z15-G, make sure camera shutter control cable is correctly wired.
Whichever 2-position switch on your transmitter selected, wire the right channel of receiver to SHUT port.
One switch toggle is for one shooting.
For example, toggle twice will achieve two shootings.
Position-1 Position -2
:
First shooting
Position -2Position -1
:
Second shooting
Notices:
Set the camera of Z15-
G to “Manual Video”, the shutter can be used to record video. One toggle is
for start/stop recording.
The video recording of Z15-N is available by setting the AUX3 channel of the GCU. Please refer to
the AUX3 Switch Setup for details.
Tips:
Following diagram shows how the shutter control works.
If the shutter control works abnormally, please check each step.
TX
2-Position
Switch
RC Receiver
2-Position
Switch Channel
TX Command
GCU
SHUT
Gimbal
HDMI-AV Module
Wireless
Internal Cable
Camera Shutter
Control Module
Infrared Unit
Shutter Control Signal
2-Pins Cable
Camera
Shutter
TX Command
TX Command
Wireless
Shutter
Control Signal
3-Pins Cable
Z15-N
Z15-G
Camera Shutter Control Cable
Tx
1
2-Positon
Switch
2