Bendix Commercial Vehicle Systems XVISION NIGHT VISION SYSTEM 8/11 User Manual
Page 15
15
IR CAMERA WINDOW HEATER REPLACEMENT
1. Unlock the IR camera by turning the two IR camera
aiming adjusters and the IR camera standoff 1/4
turn counterclockwise.
2. Remove the IR camera from the IR camera bracket
to gain easier access to the connectors.
3. Disconnect the 6-pin IR camera connector and the
2-pin window heater connector of the IR camera
harness from the IR camera.
4. Lay the IR camera face-up for easier access to the
bezel retaining plug. Refer to Figure 27.
5. Remove the bezel retaining plug.
6. Turn the bezel heater assembly 1/4 turn
counterclockwise, until it separates from the IR
camera. Use care to prevent the window from falling
and breaking.
7. Turn the new bezel heater assembly 1/4 turn clockwise
onto the IR camera. Note: Ensure the window has
not moved or it will be damaged.
8. Lock the new heater in position with the bezel
retaining plug.
9. Plug the 2-pin connector of the IR camera harness
into the window heater. Refer to Figure
24.
10. Plug the 6-pin connector of the IR camera harness
into the IR camera connection. Refer to Figure 24.
11. Position the IR camera onto the factory-installed
aiming assemblies.
12. Rotate the pivot locks on the end of the aiming
assemblies 1/4 turn clockwise, using the aiming
adjuster tool. This will lock the IR camera in position.
13. Aim and adjust the IR camera. Refer to
Aiming the
IR Camera on pages 21 and 22.
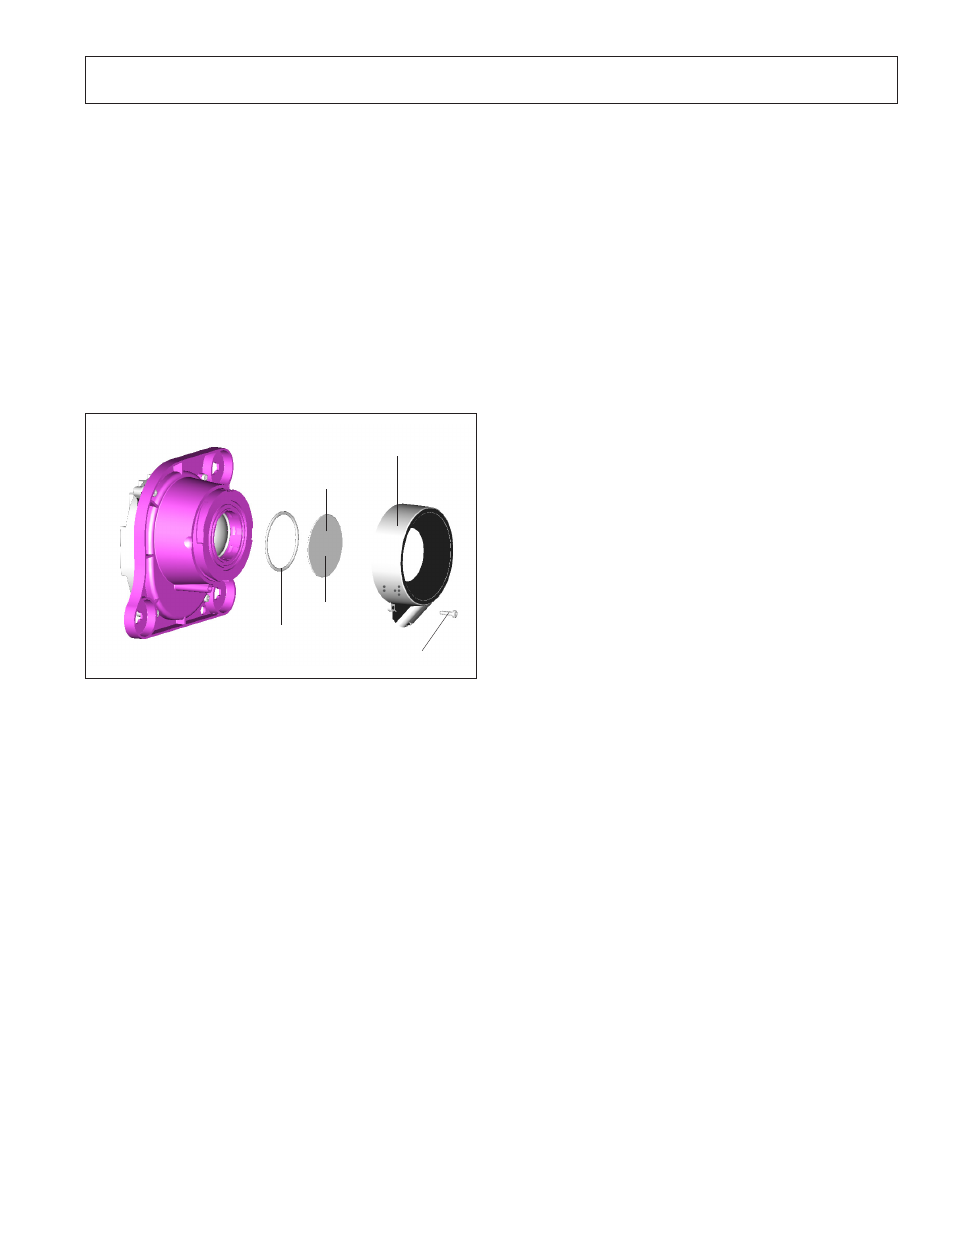
FIGURE 27 - BEZEL HEATER ASSEMBLY AND
RETAINING PLUG
IR Camera
Bezel Heater
Assembly
Bezel Retaining Plug
Black side
IR Camera
Window Seal
IR Camera
Window
Parts/kits listed are now obsolete and are no longer serviceable through Bendix.