Bendix Commercial Vehicle Systems XVISION NIGHT VISION SYSTEM 8/11 User Manual
Page 11
11
7. Verify that the mounting bracket is level. If it is not, use
the shims included in the mounting bracket kit.
8. Apply sealant between all contact areas (between
the roof and the shims, between each shim, between
the shims and the bracket, and between the bracket
and stud plates).
9. Install the stud plates on both sides of the replacement
mounting bracket.
10. From inside the cab, tighten all mounting hardware to
90-100 in-lbs.
11. Insert the four 5/16 in. bolts through the mounting
bracket into the new IR camera bracket and hand
tighten. Allow enough mobility for adjustments to be
made during the aiming procedure.
12. Reconnect the 2-pin and 6-pin harnesses.
13. Aim and adjust the IR camera. Refer to
Aiming the
IR Camera on Pages 21-22.
2. Disconnect the IR camera connector (6-pin) and the
window heater connector (2-pin) of the IR camera
harness.
3. Remove the IR camera and IR camera harness from
the IR camera bracket. The IR camera harness should
be tied to the bracket with a cable tie. Cut the tie to
remove the harness.
4. Loosen and remove the four 5/16 in. bolts from the IR
camera bracket.
5. Remove the old IR camera bracket.
6. Place the new IR camera bracket in the same location
as the old.
7. Insert the four 5/16 in. bolts through the mounting
bracket and new IR camera bracket into the threaded
inserts, and hand-tighten.
8. Replace the camera shroud.
Attach the IR camera harness
9. Pull the IR camera harness through the opening
between the IR camera bracket and mounting bracket.
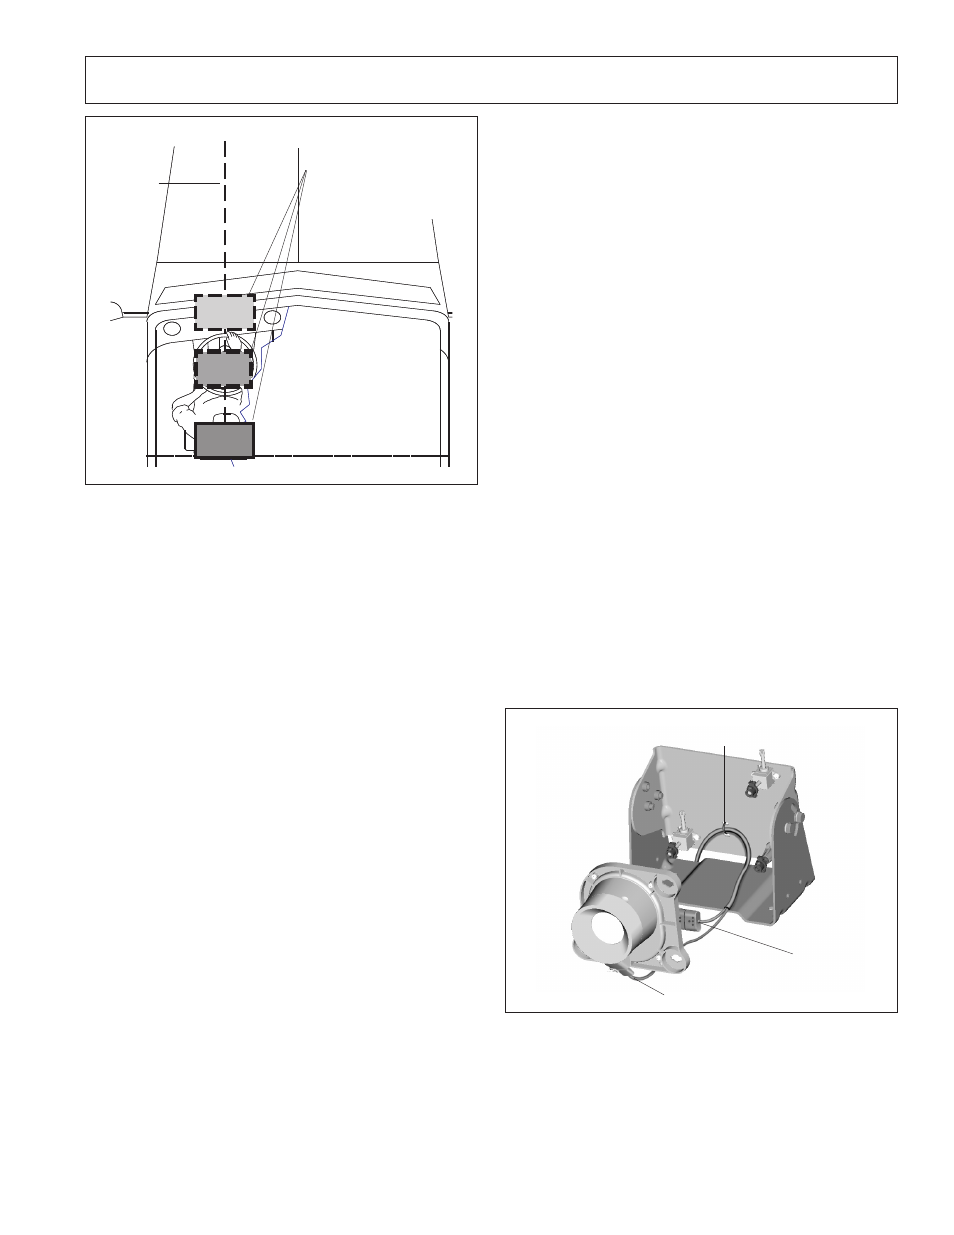
10. Plug the 2-pin connector of the IR camera harness
into the window heater. Refer to Figure 21.
11. Plug the 6-pin connector of the IR camera harness
into the IR camera connection. Refer to Figure 21.
12. Loosely install the harness cable tie around the
harness.
Cable Tie
6-pin connector
2-pin connector
FIGURE 21 - CONNECTING THE CAMERA HARNESSES
FIGURE 20 - MOUNTING BRACKET AND LATERAL AXIS OF
VEHICLE
Lateral
Axis of
Vehicle
Mounting bracket can be any-
where along driver’s center line
of sight and must be parallel to
lateral axis of vehicle
Driver’s
Center line
of Sight
Parts/kits listed are now obsolete and are no longer serviceable through Bendix.
IR CAMERA BRACKET REPLACEMENT
The new IR camera bracket will have factory-installed
aiming adjusters and standoff base/pivot assembly.
1. Remove the camera shroud, if equipped. Unlock
the IR camera by turning the two IR camera
aiming adjusters and the IR camera standoff
1/4 turn counterclockwise using the adjuster tool.