Flowbar iom, Step 5. install diffuser in ceiling – Titus FlowBar IOM User Manual
Page 9
9
Installation Manual - FlowBar
FlowBar IOM
Redefine your comfort zone. ™ | www.titus-hvac.com
FlowBar Installed After Hard Ceiling Installation
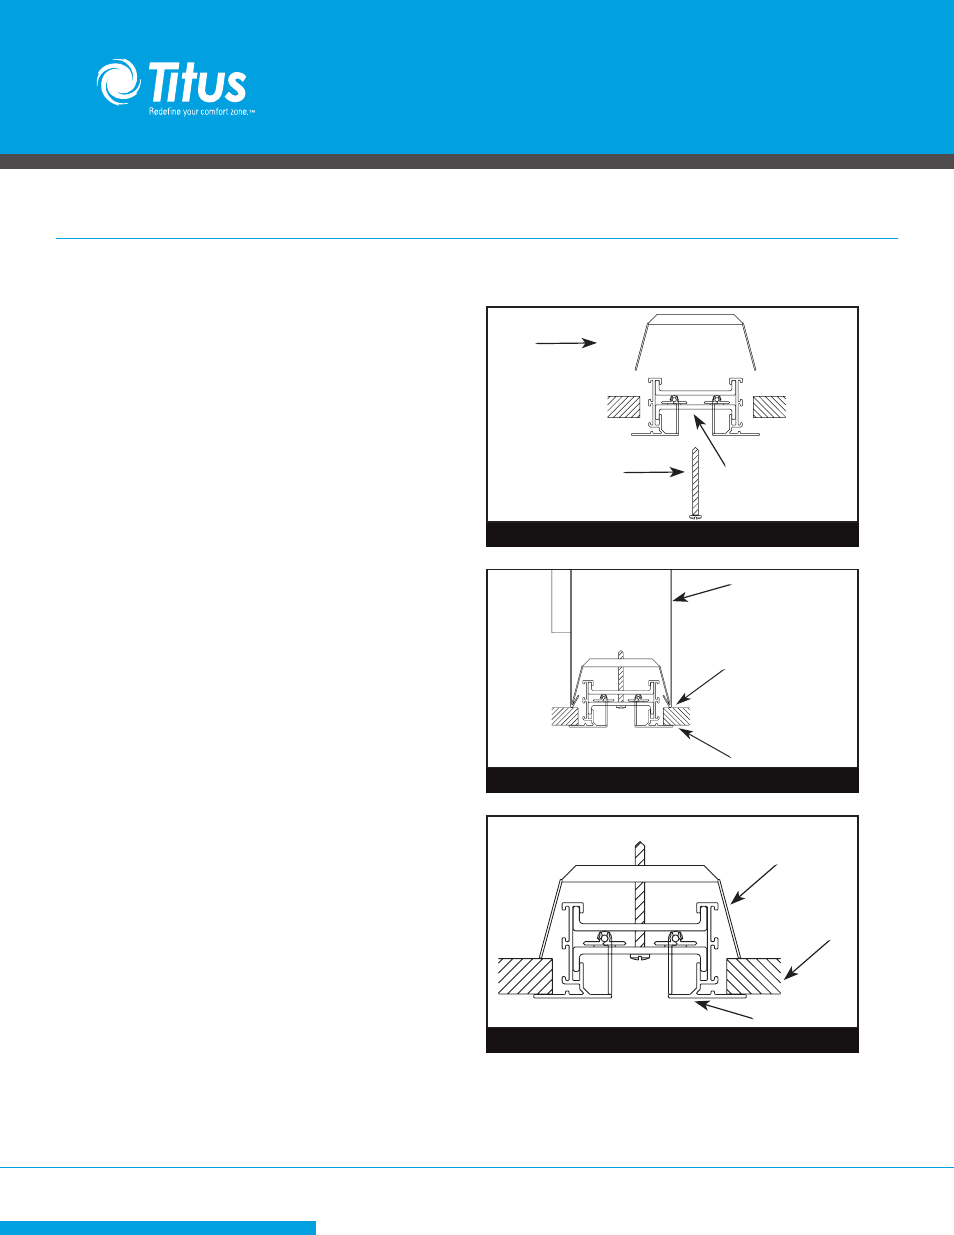
STEP 4. Install Concealed Fasteners
̷ Install the QuickClip® Mounting Bracket to the FlowBar Spacer at the
desired interval by pushing the #10 x 2-1/2” long screw through the
hole in the spacer from the face of the Diffuser. Start the threaded
end of the screw into the bracket as shown in Figure 13.
̷ The recommended spacing is 48” maximum between hangers.
STEP 5. Install Diffuser in Ceiling
̷ If continuous FlowBar is being installed using multiple sections,
assemble the sections together using Spline Support Clips (SS1).
Attach end caps or end borders as required. See Hard Ceiling
Installation, Step 4.
̷ Lift the Diffuser into the Plenum until the Mounting Brackets spring
into the hemmed edge. Using a slotted screw driver, tighten the
screw until the Diffuser is snug against the ceiling as shown in
Figure 14. Before securing the Diffuser, make sure that the Diffuser
Flange overlaps the ceiling opening.
̷ Make sure that at least two QuickClip® Mounting Assemblies line
up with each Plenum.
̷ Where Mounting Brackets do not line up with a Plenum, the Drywall
can be used to support the FlowBar Diffuser. Use a slotted screw
driver to tighten the screws until the Diffuser is snug against the
ceiling as shown in Figure 15.
Mounting
Bracket
#10 x 2 1/2” screw
FlowBar Spacer
Plenum
Mounting bracket
catches in hemmed
edge of plenum
Diffuser flange over-
laps ceiling opening
Mounting Bracket
Ceiling
Diffuser Flange
Figure 13. Bracket / Diffuser Assembly
Figure 14. Diffuser Installation with Plenum
Figure 15. Diffuser Installation without Plenum