Flowbar iom, Step 6. attach inlet damper (if required), Step 7. install drywall – Titus FlowBar IOM User Manual
Page 6: Flowbar installed during hard ceiling installation
6
Installation Manual - FlowBar
FlowBar IOM
Redefine your comfort zone. ™ | www.titus-hvac.com
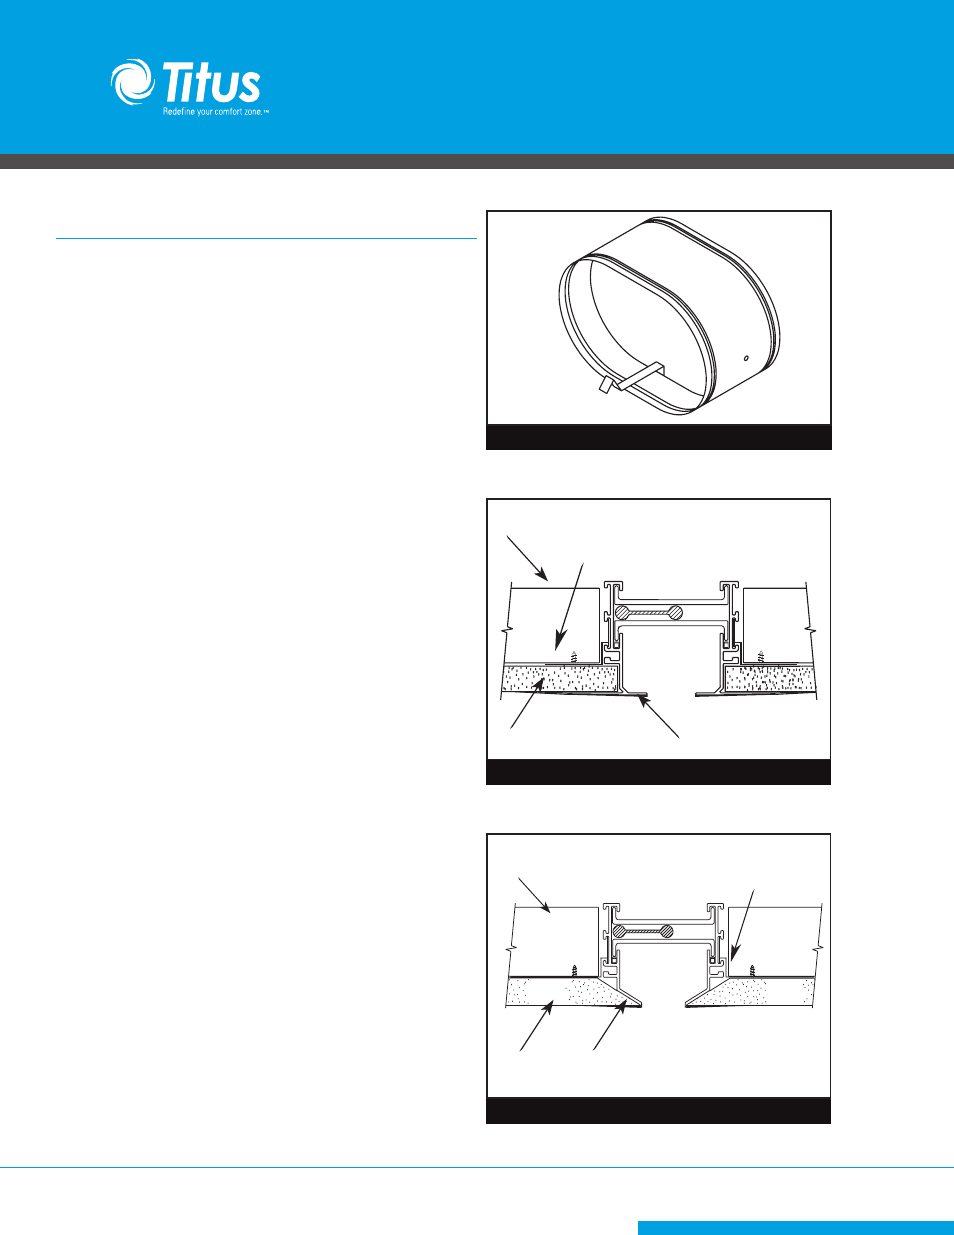
STEP 6. Attach Inlet Damper (if required)
Last edited: 5-30-95
Last edited by:
[761a]
̷ Attach optional Inlet Damper assembly (if supplied) to the Inlet
Collar. Position the lever inside the Plenum on the bottom of the
Inlet Collar.
̷ Install the Inlet Duct on the Plenum Inlet Collar using the methods
prescribed by the sheet metal specification.
STEP 7. Install Drywall
̷ Slide the Drywall tightly between the mounting clips and the
FlowBar Flange as shown in Figure 8. For ease of installation, insert
the tapered edge of the Drywall into this opening. For the best fit,
slide the edge of the Drywall all the way to the vertical leg of the
frame.
̷ Every 12” and between the Hard Ceiling Clips, attach screws
just beside the Diffuser Flange, through the Drywall and into the
Framing Member.
̷ For Border 55 only, before installing the sheetrock or wood ceiling,
the leading edge must be trimmed at a 45° angle to match the
Diffuser as shown in Figure 9.
DRYWALL
DIFFUSER FLANGE
FRAMING MEMBER
HARD CEILING CLIP
HARD CEILING CLIP
DRYWALL
FRAMING MEMBER
Drywall cut at 45° angle to match dif-
fuser flange
FlowBar Installed During Hard Ceiling Installation
Figure 7. View of Inlet Damper
Figure 8. Drywall Installation
Figure 9. Drywall Preparation - (Border 55 Only)