Skyjacker T422 User Manual
Page 7
IT422/432
Pg 7
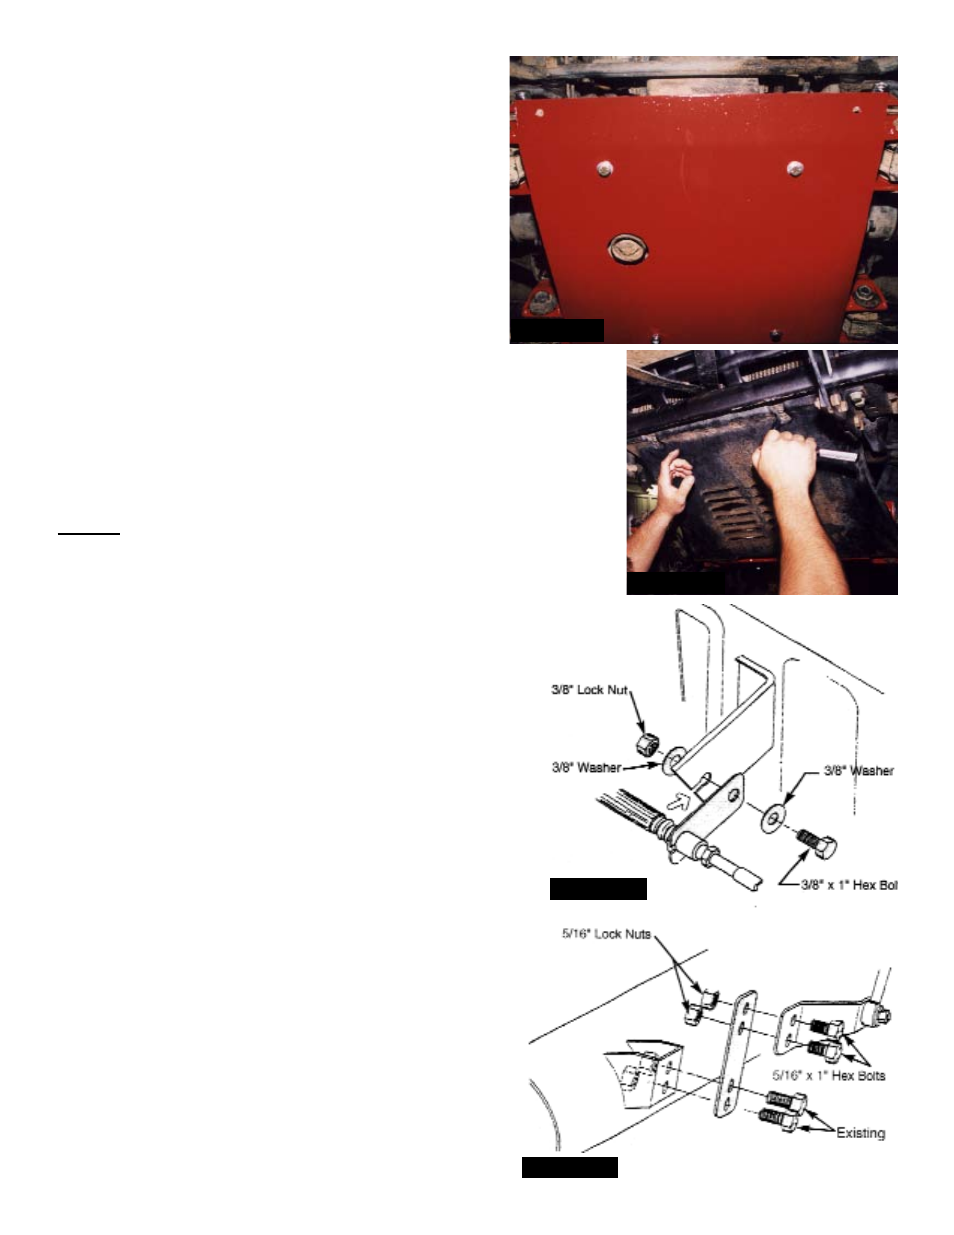
18. Install new lower skid plate to both new front and
rear A-Arms crossmember assemblies using 3/8”
x 2” bolts, 3/8” washers (one under each bolt
head, and 1 under each nut), and 3/8” lock nuts.
Install as shown with bolt head underneath skid
plate, except on the rear at passenger side, bolt
was installed in step #8 from top of cross
member down through the skid plate (install
washer and nut underneath skid plate). Torque
bolts to 37 Ft. Lbs. (See Photo #16).
19. If equipped with original front skid plate, reattach
it to front frame mounts using original hardware.
Attach bottom of OEM skid plate to front holes in
new lower skid plate using 5/16” x 1” bolts with
5/16” washers (1 under each bolt head, and 1 under each nut).
and 5/16” lock nuts. Tighten upper frame bolts. Next tighten
bottom bolts, being careful not to crush OEM mounting tabs.
See Photo #17
20. Install the front tires and lower vehicle to ground.
REAR:
21. Place floor jack under rear axle and raise vehicle. Place jack
stands under frame to support vehicle. Set emergency brake
and block front wheels, in front and behind tires. Remove
wheels and shocks.
22. Cut OEM bracket to center of hole to remove
brakeline/clip from bracket (See arrow in Photo #18).
Attach rear brake line drop down bracket to existing
bracket using 3/8” x 1” hex bolt, 3/8” flat washers and
3/8” lock nut. Torque to 37 Ft. Lbs. Install brake line
into lower bracket hole and reinstall OEM brake line
clip.
Note: Extended dOT approved braided
stainless steel hoses are available from Skyjacker.
(Part #RBL30)
23. Unbolt brake equalizer arm bracket from axle. Install
new rear brake cable extension bracket to original axle
mount with OEM hardware. Mount equalizer bracket to
top of new extension bracket using 5/16” x 1” hex
bolts with locknuts. Torque to 20 Ft. Lbs. (See
Photo #19)
24. Loosen emergency brake cables by removing
cotter pin, pulling pin out from back side of brake
backing plate at adjuster.
25. Remove the axle U-Bolts and lower axle down a
few inches. Care should be taken because when
U-Bolts are removed, axle can move freely.
Photo #16
Photo #17
Photo #18
Photo #19