Front – Skyjacker T422 User Manual
Page 4
FRONT :
2. Place floor jack under front axle and raise vehicle. Place jack
stands under frame to support vehicle. Set emergency brake and
block rear wheels, in front and behind tires. Remove front tires
and wheels.
3. Remove clip from front brakeline and bracket. Cut a slot in original
brake line bracket (to center of hole) and remove brakeline out of
bracket. Install new brakeline drop bracket to OEM bracket and
put 3/8” flat washer on top. Insert 3/8 x 1” bolts and washers
through both brackets and tighten with 3/8” lock nuts on bottom.
You may need to reform line slightly. Be sure not to kink or cause
any interference of line. Reinstall OEM brakeline clip to hose at
bracket. See Photo #1 and #2. Note: Extended DOT approved
stainless steel brakelines are available from Skyjacker. (Part #
FBL30)
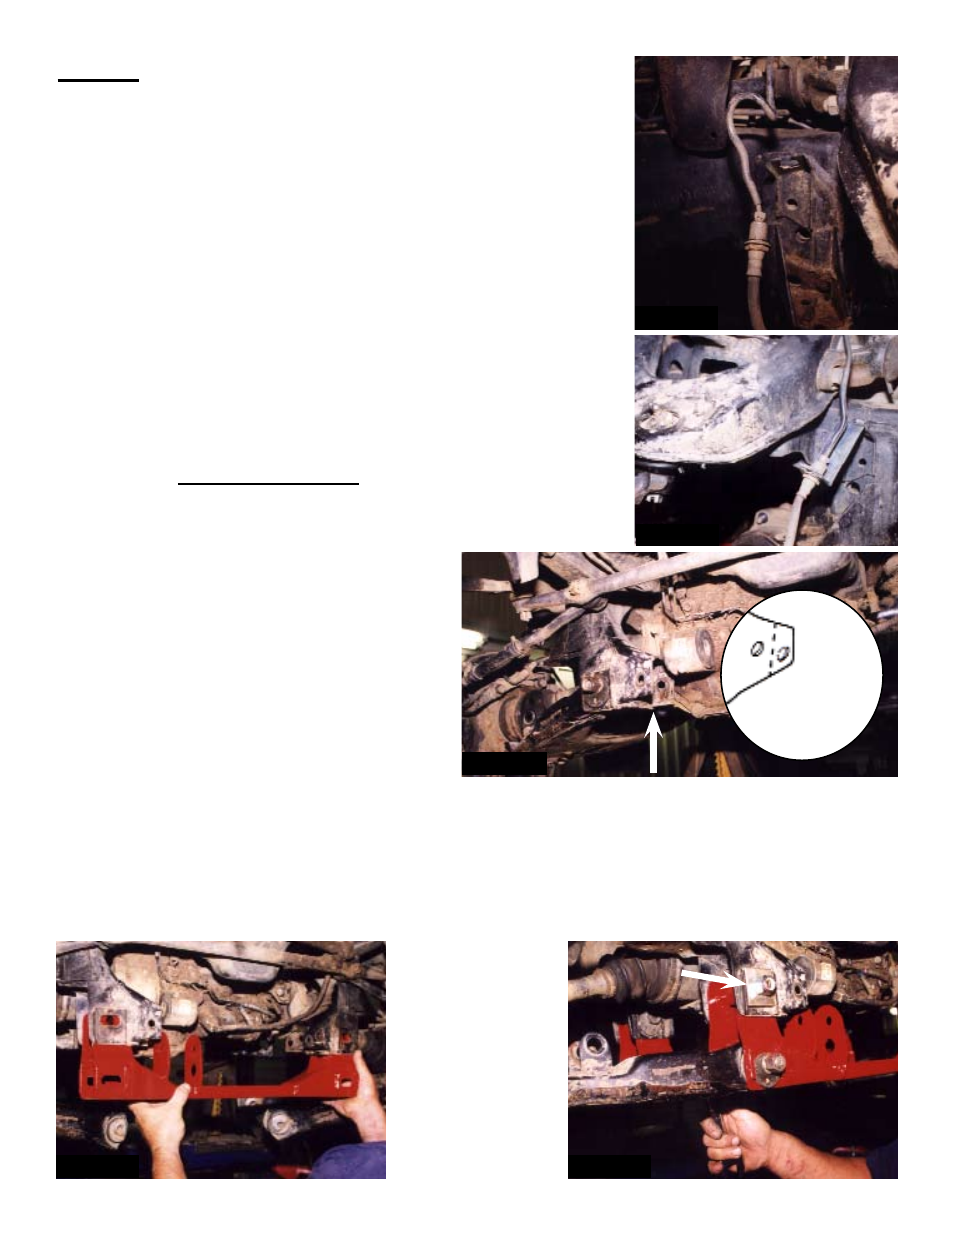
4. Remove shocks and sway bar plus bump stops on each side (4
bump stops total). Remove eccentric adjustment bolt nuts from
front and rear. Remove front cross member from mounting
bracket. On
passenger side only, cut off both existing mounting
tabs between the two bolt holes for differential clearance. See
Arrow in Photo #3. (Shown after tabs have been cut away).
5. Remove eccentric bolts (front and rear) from
the original front lower A-Arms.
6. Install the new front A-Arm drop
crossmember assembly into the OEM
brackets (See Photo #4). Use new 5/8” x 4
1/2” hex bolts and 5/8” lock nuts, placing the
1 7/8” x 2” locating spacers on the outsides
(see arrow in Photo #5) ; torque to 150 ft. lbs.
Reinstall OEM eccentric bolts, OEM Cam
washers, and nuts at bottom; torque to 103 ft.
lbs.
IT422/432
Pg 4
Photo #1
Photo #4
Photo #5
Cut Tab Here
Existing OEM
Bracket
Photo #3
Photo #2