Skyjacker T422 User Manual
Page 5
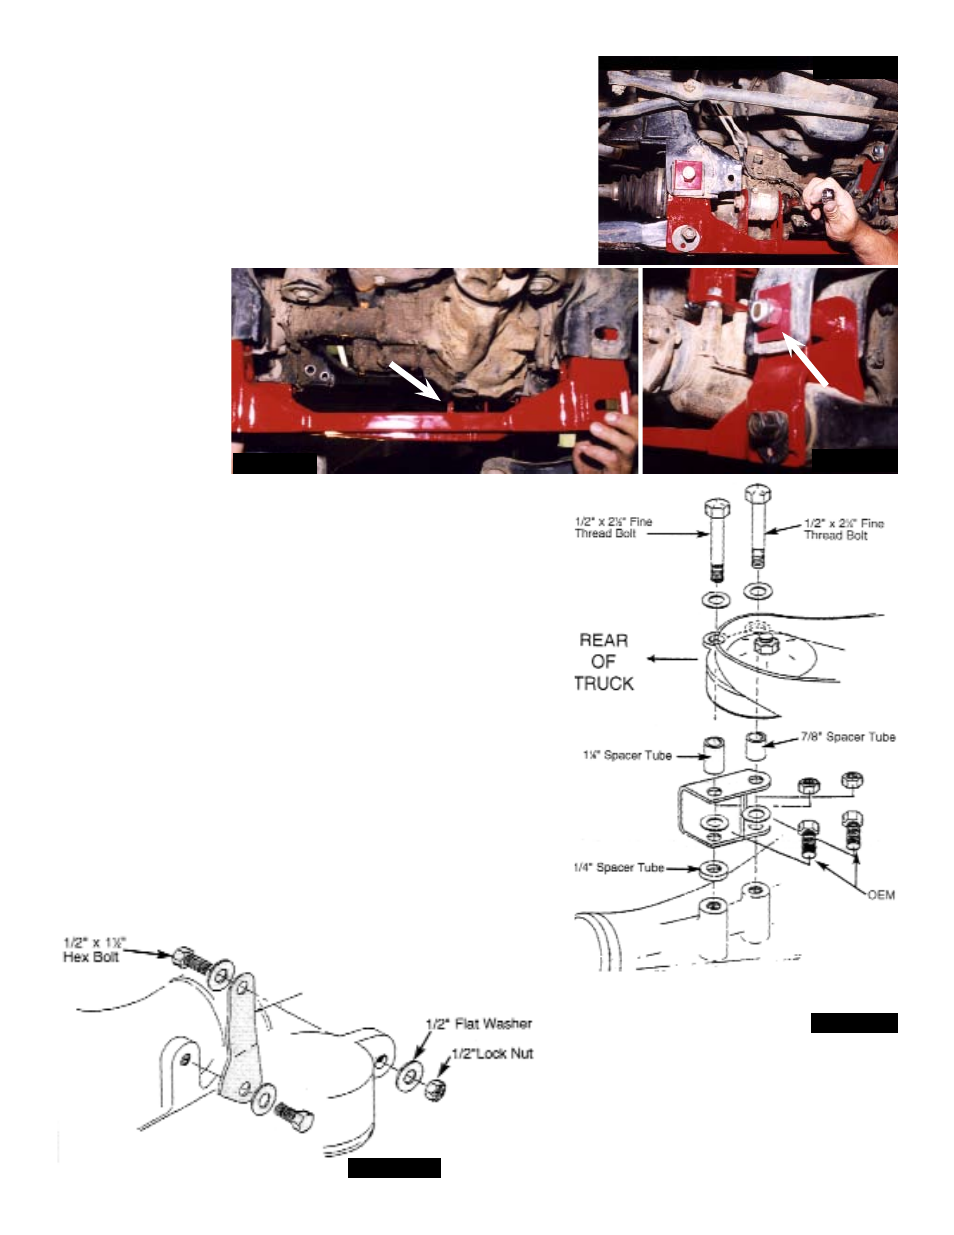
7. Using original bolt and nut, install front differential to new front
cross member and tighten. (See Photo #6)
8. Install new rear A-Arm drop crossmember assembly into OEM
brackets. (See Photo #7). Use new 5/8” x 4 1/2” hex bolts
and 5/8” lock nuts, placing the 1 7/8” x 2” locating spacers on
the outsides (See arrow in Photo #8); torque to 150 Ft. Lbs.
Reinstall OEM eccentric bolts with hole in OEM Cam washer
at bottom; torque to 103 Ft. Lbs.
Note: under differential
insert a 3/8” x 2” bolt and washer through hole in new rear
cross member
assembly ( See
Arrow in Photo
#8). Do not install
nut at this time;
there will be
room to install
later.
9. Lower differential
being careful not
to pull out front
driveshaft. Install new center differential as shown in Photo
#9. (A) Install the 1/4” spacer tube at rear lower mounting
between differential and bracket. Install existing OEM bolts
through bracket, spacer and into the two bottom holes
(use loctite), and torque to 70 Ft. Lbs. (B) Install 1 1/8”
spacer tube at rear of upper OEM rubber mount with 1/2”
x 2 1/2” hex bolt, 1/2” flat washer and lock nut. (C) Install
7/8” spacer tube at rear of upper OEM rubber mount with
1/2” x 2 1/4” bolt, 1/2” flat washer and 1/2” lock nut. Torque
1/2” bolts to 85 Ft. Lbs.
10. Install passenger side differential drop bracket using 1/2”
x 1 1/2” hex bolt with two 1/2” flat washers and lock nut
into upper hole of OEM rubber mount. Install bottom using
original bolt and washer (wide part of bracket should be at
bottom with hole towards front). Apply loctite and tighten to
70 Ft. Lbs. (See Photo #10).
IT422/432
Pg 5
Photo #6
Photo #7
Photo #8
Photo #9
Photo #10