Seat belts save lives, please wear your seat belt – Skyjacker HB-TU760MS User Manual
Page 9
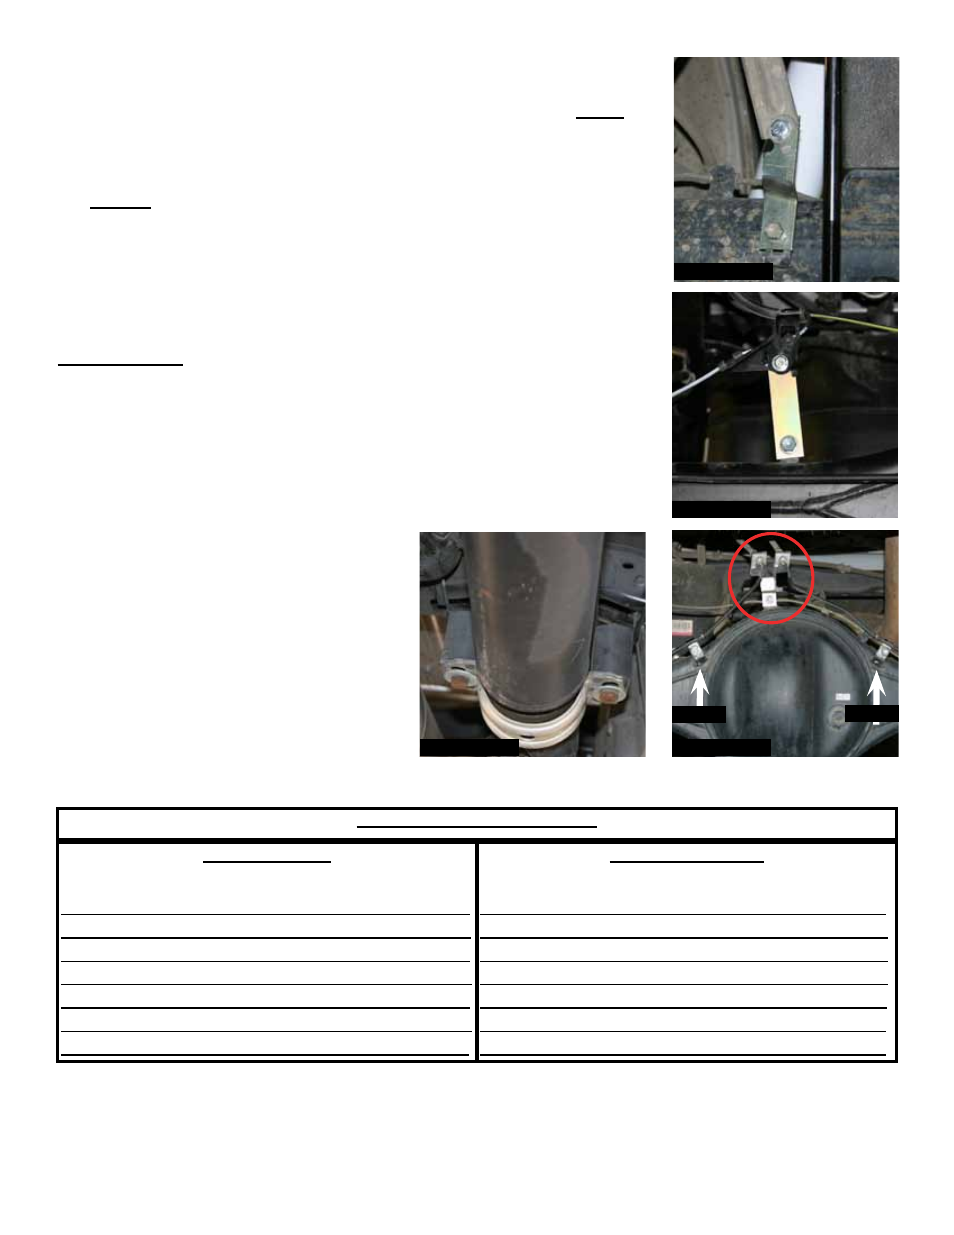
6. Install the new Skyjacker E-brake cable brackets, ABS line bracket,
& rear brake line bracket to the rear differential using the supplied
5/16" x 3/4" bolts & nuts. (See Photos # 36, # 37, & # 38)
Note: The
OEM rear brake line cable clamps must be inverted to raise the
OEM brake line up from the rear differential. (See Photo # 38)
7.
6" Lift: Models equipped with an OEM carrier bearing will need to
install the new Skyjacker carrier bearing lowering spacers using the
supplied 10mm x 80mm bolts & washers. (See Photo # 39)
8. Install the rear tires / wheels & lower the rear of the vehicle to the
ground.
FINAL NoTeS:
• After the installation is complete, double check that all nuts & bolts are
tight. Refer to the following chart for the proper torque specifications.
(Do not retighten the nuts & bolts where thread lock compound was
used.)
• With the vehicle on the ground, cycle the steering lock to lock &
inspect the steering, suspension, brake
lines, front & rear drivelines, fuel lines,
& wiring harnesses for proper operation,
tightness, & adequate clearance.
• Have the headlights readjusted to the
proper settings.
• Have a qualified alignment center realign
the vehicle to the OEM specifications.
• After the first 100 miles, check all of the hardware for the proper torque & periodically thereafter.
Seat Belts Save Lives, Please Wear Your Seat Belt.
I-TU746SP
Pg 9
ToRque SPeCIFICATIoNS
INCH SYSTeM
Bolt Size Grade 5 Grade 8
5/16 15 FT LB 20 FT LB
3/8 30 FT LB 35 FT LB
7/16 45 FT LB 60 FT LB
1/2 65 FT LB 90 FT LB
9/16 95 FT LB
130 FTLB
5/8 135 FT LB 175 FT LB
3/4 185 FT LB
280 FT LB
MeTRIC SYSTeM
Bolt Size Class 8.8 Class 10.9
6MM 5 FT LB 9 FT LB
8MM 18 FT LB 23 FT LB
10MM 32 FT LB 45 FT LB
12 MM 55 FT LB 75 FT LB
14MM 85 FT LB 120 FT LB
16MM 130 FT LB 165 FT LB
18MM 170 FT LB 240 FT LB
•
The above specifications are not to be used when the bolt is being installed with a bushing.
Photo # 36
Photo # 37
Photo # 38
Photo # 39
Invert
Invert