Skyjacker HB-TU760MS User Manual
Page 6
15. Install the new Skyjacker rear cross member using the supplied
18MM x 50MM bolts, washers, & nuts.
Note: Do not tighten the
hardware completely at this time. The new rear cross member
should be installed with the bolt flanges on the front side of the OEM
cross member flanges. (See Photo # 16)
16.
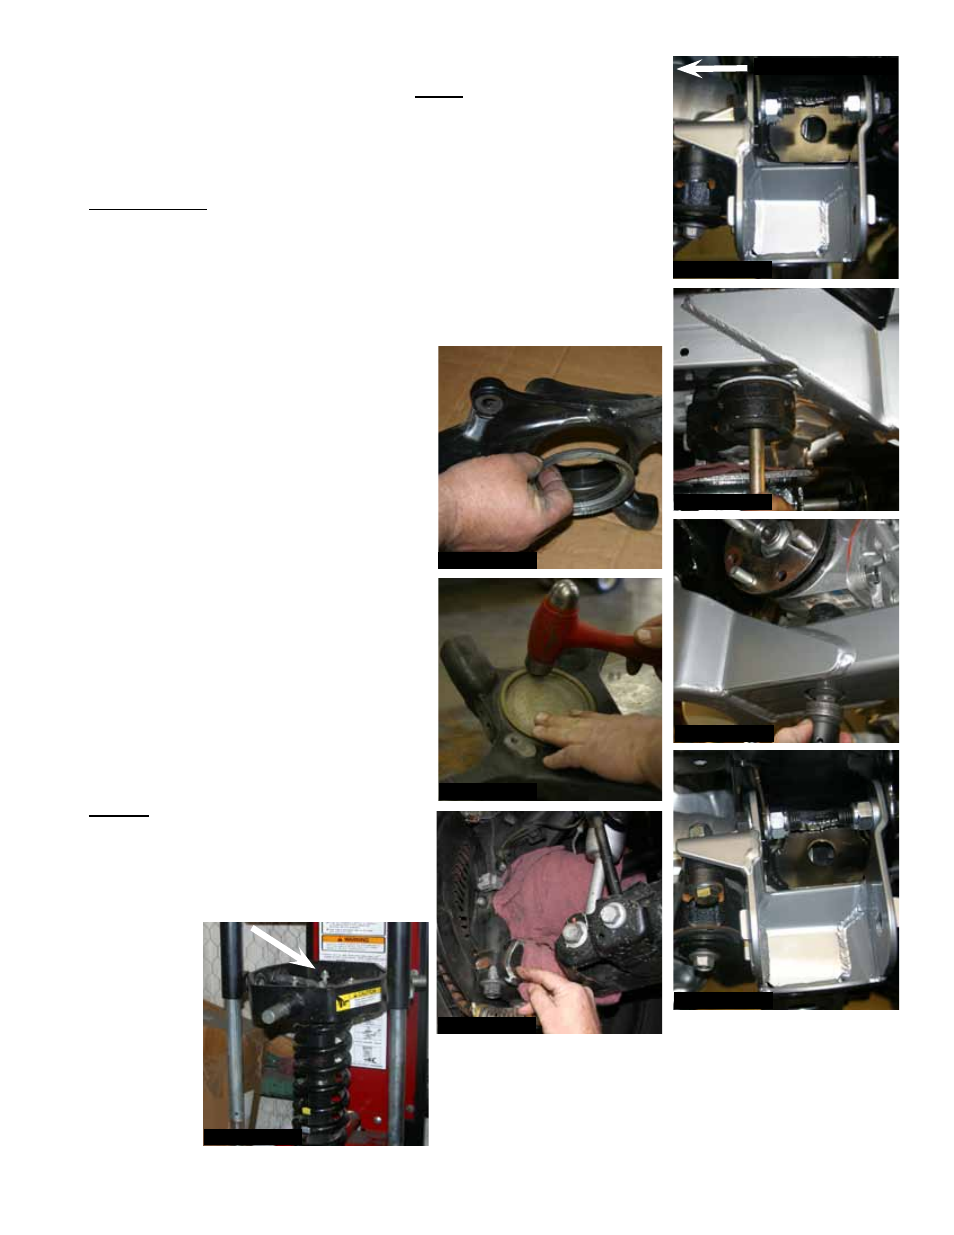
4Wd Models: Raise & safely support the front differential into place
using the supplied 9/16" x 6" bolts, washers, & nuts. Loosely bolt the
differential to the new Skyjacker front cross member. (See Photo
# 17) Attach the OEM differential pinion support bracket, under the
pinion, to the new rear cross member using the OEM hardware &
the supplied 9/16" x 2 1/2" bolt, washers, & nut. (See Photos # 18 &
# 19) Install the new Skyjacker differential vent hose & tighten all
cross member & differential hardware at
this time.
17. Remove the OEM hub bearing
assemblies from the OEM steering
knuckles & reinstall to the new Skyjacker
steering knuckles using the OEM
hardware. Make sure the OEM seals
(4WD Models) or OEM hub plugs (2WD
Models) are reinstalled square in the new
Skyjacker steering knuckles. (See Photos
# 20 & # 21)
18. Weld in place the new Skyjacker steering
stop spacers. Match these new steering
stop spacers with the contour of the OEM
steering stops. Weld in place by placing
a weld across the top & bottom of the
supplied spacers. (See Photo # 22)
19.
6" Lift: For upper strut mount alignment
purposes, mark the location of the OEM
upper strut mount & OEM coil spring prior
to disassembly. Using a strut spring
compressor, compress the coil spring of
each OEM
strut
assembly.
Remove the
upper strut
retaining nut
& upper strut
mount. (See
Photo # 23)
I-TU746SP
Pg 6
Front of Vehicle
Photo # 16
Photo # 17
Photo # 18
Photo # 19
Photo # 20
Photo # 21
Photo # 22
Photo # 23