Opticon DFM 1000 User Manual
Page 8
Exercise caution at all times when
working with AC and DC-powered
equipment.
Turn off your devices before
installation.
We advise you to connect the
DFM1000 to your host as shown in the
figures in this chapter.
Before connecting the additional
communication cables, take notice of
the pin-out specifications (chapter 5)
Do not plug the DB25 male connector of
the scanner directly into the RS232 or
parallel port from computer (or printer).
The pinout is not compatible and will
cause damage without using an adapter.
Minimize noise interference and
ground loops. Therefore pay attention
to the grounding diagram.
!
!
!
!
!
U
SER
’
S MANUAL
DFM1000
8
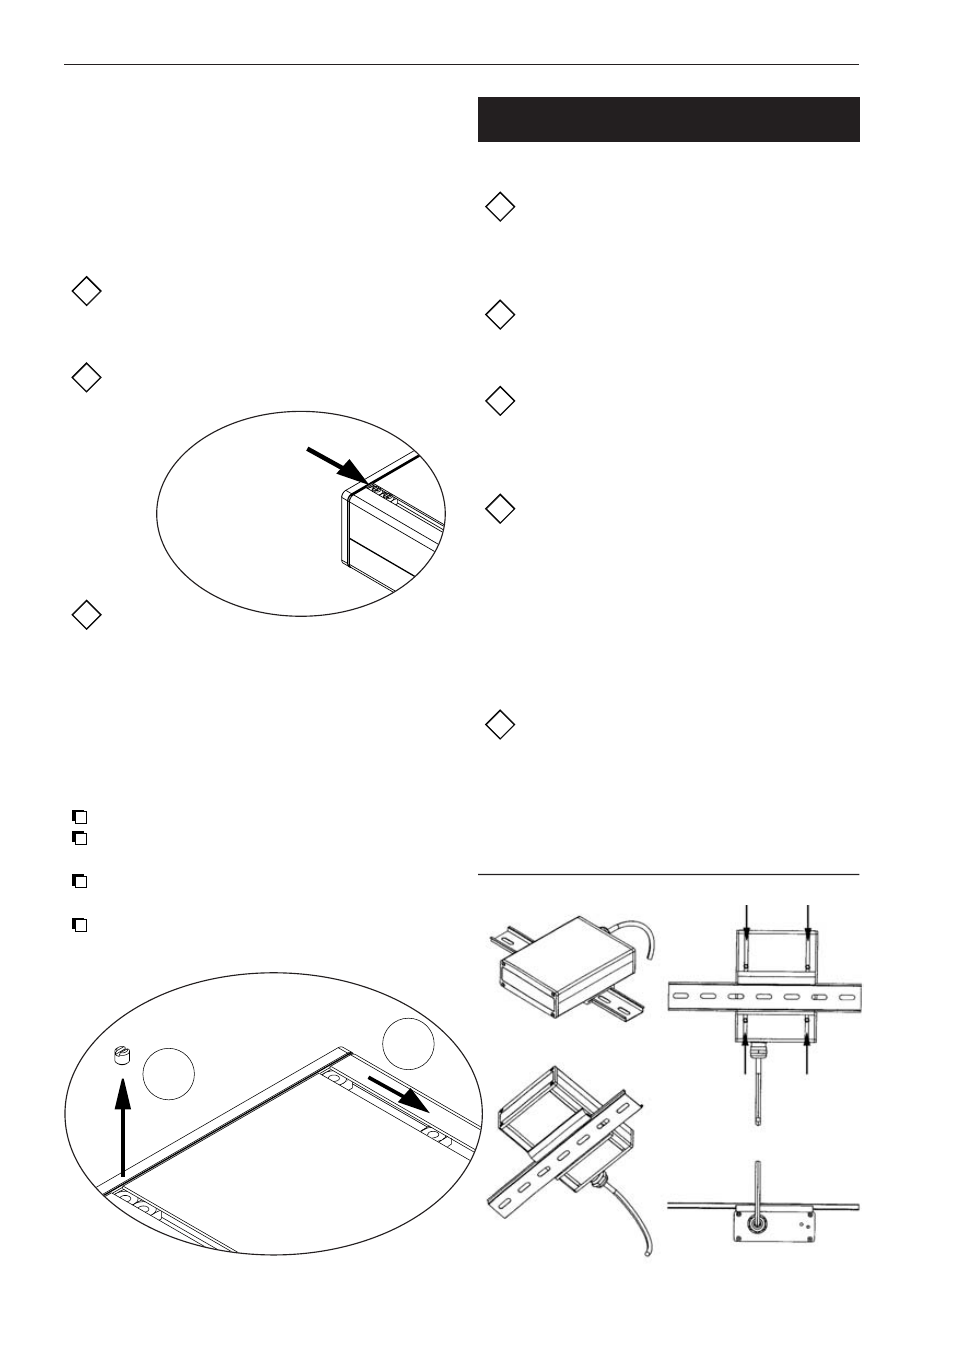
2.4.3. Mounting suggestions
The DFM1000 can be placed on a flat surface
or can be permanently mounted (fixed).
The bottom of the scanner is provided with 2
slots with adjustable bolts and nuts for mounting
on e.g. a DIN-rail.
In every mounting situtation make
sure that the bottom of the scanner
is positioned under straight angle.
When you do not fix the scanner, do
not loosen the
bolts.
To mount
the scanner on a DIN-rail, we
recommend you to use a DIN-rail
adapter. (as shown in example below)
Follow the next instructions to mount the
scanner.
First remove the bolts. (ref. 1)
When an adapter for mounting is used,
take the adapter to fix the scanner.
Adjust the nuts to the position that is
needed for mounting. (ref. 2)
Screw the bolts into the nuts until
the scanner is secured.
!
!
!
2.5 POWER CONNECTION
KEEP THE
BOLTS
LOCKED
NON-MOUNTING
1
2
BEFORE
MOUNTING