Stile, Installation of flashing around chimney – Metal Sales Stile Installation User Manual
Page 33
STILE
32
© Metal Sales Manufacturing Corporation/ Subject to change without notice
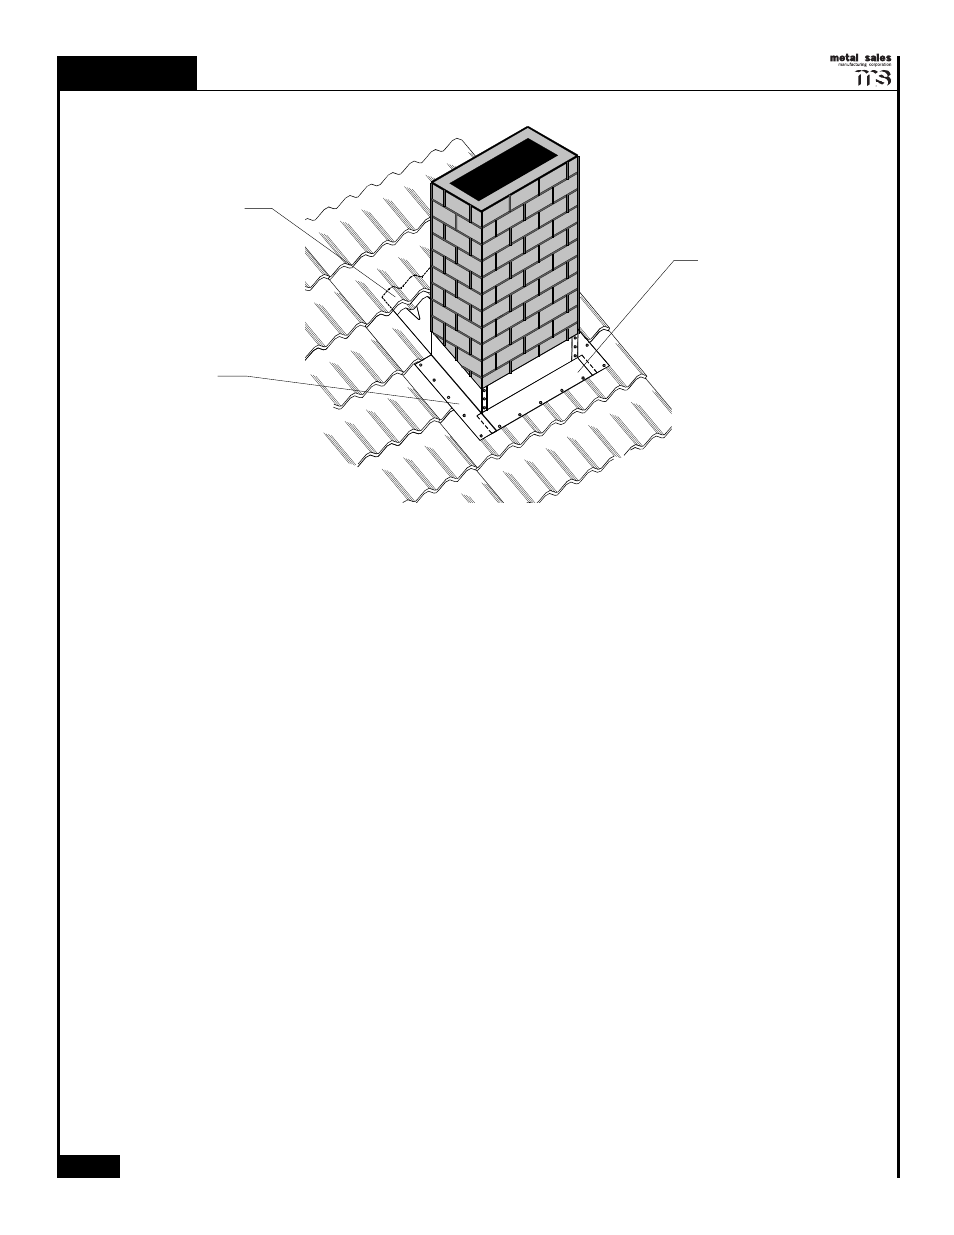
INSTALLATION OF FLASHING AROUND CHIMNEY
1. Roofing felt should extend up the sides of the penetration at least 6" and fit snugly around all
sides of the penetration.
2. Stile panels should be field cut so that they fit close to the penetration on the sides and lower
end. The top Stile panel should be cut so that it stops 6" from the penetration at the upper end
so as to allow the Junction Sheet to fit properly.
3. Cut three pieces of Pitch Break flashing so that each piece extends 6" past each end of the
penetration. Cut a slit at the base of each end of the Pitch Break flashing so that the 6" section
can be bent around the edge of the projection to form a corner.
4. Install Pitch Break flashing at the lower end of the penetration. Place Stile C-Closure between
the bottom leg of the Pitch Break flashing and the Stile panel.
5. Install Pitch Break flashing on each side of the penetration, lapping it over the installed piece at
the corners. Place Tube Sealant between the bottom leg of the Pitch Break flashing and the Stile
panel.
6. The Junction Sheet will next be installed at the top edge of the penetration. Field cut the
Junction Sheet so that it extends 6" past the penetration on each side.
7. Fit the formed section of the Junction Sheet under the lower leg of the Stile panel. Bend the
flat section of the Junction Sheet so that it extends up the back of the penetration. The
Junction Sheet should be cut so that it extends 6" past each side of the penetration. Cut a notch in
the base of this section so that it can be bent to form a corner.
8. Place Tube Sealant between the two flashings where they overlap at the corner of the penetration
and at the top edge of the flashing.
9. Attach the Pitch Break flashing to the Stile panel with
1
/
8
" Pop Rivets at the top of each panel rib and
at the top of each step of the sides of the penetration. The Junction Sheet is attached to the Stile
panel with a Woodscrew XL fastener at the bottom of each valley of the panel.
10. Use
1
/
8
" Pop Rivets to fasten the two pieces of flashing together at each of the corners of the
penetration.
11. Apply field formed cricket to junction sheet with 1/8" x 3/16" pop rivets and two beads of tube sealant.
JUNCTION SHEET
PITCH BREAK
FIELD CUT AND
BEND PITCH BREAK
AROUND CORNERS
AND POP RIVET
TOGETHER