Locating the target site, Drilling – Leica Biosystems ANGLE TWO User Manual
Page 45
Using the Instrument
Leica Angle Two
™
User Manual Rev A02 © Leica Biosystems Richmond Inc. 2010
45
Locating the Target Site
22. Click To Target (see “To Target” on page 27) to view the distances to the target site.
23. Use the ML and AP drives to position the probe directly ‘above’ the target. As the target site is
approached the ML and AP distances count down.
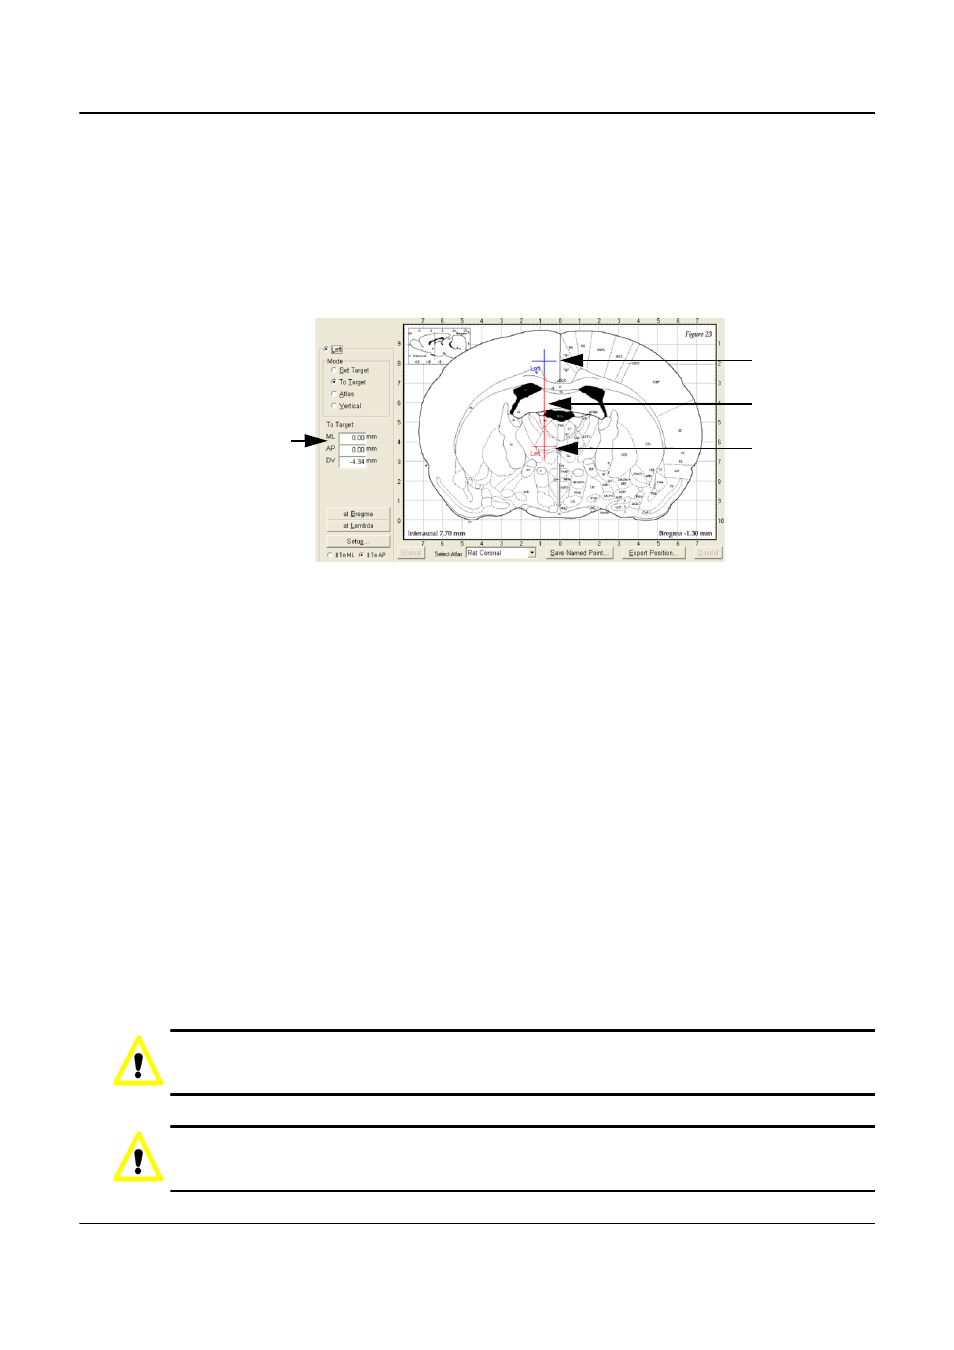
24. Continue to move the probe until the AP and ML axis displays read zero. A line appears on
screen showing the path of descent (DV) towards the target.
Figure 49. When the ML and AP coordinates read zero the probe crosshair (blue)
shows a line of descent to the target crosshair (red).
25. Stop moving the drives.
Note: you can preview the probe’s path through the brain to the target site by removing the probe
and lowering the shaft using the DV drive.
Drilling
26. Lower the probe using the DV drive so that the probe is just above the skull and mark the spot
on the skull.
27. Unlock the swing-out clamp (see “Swing-Out” on page 19) and move the manipulator out of
the way.
Using the swing-out ensures the probe is returned to its exact position later, so you do not
have to relocate the target site.
28. Set up the drill and select the drill bit.
We recommend using a manual drill with settable depth stops. This reduces the risk of drilling
too far and into the brain tissue below. Select the smallest possible drill bit.
29. Drill into the skull at the marked spot. Gently rotate the drill taking care not to drill too far.
Caution
Drill bits have a spherical head so the center of the drilled area is deeper than the edges. Be careful
that the center of the drill does not go too far and strike a blood vessel beneath the bone.
Caution
After drilling the hole, bone might remain hidden around the outer edges of the drill site. Be careful
when inserting the glass probe, as the bone can easily break the probe tip.
ML and AP at
zero
Probe
crosshair
Line of
descent
Target site
position