4 assembling the handwheel, 5 electrical connections, Assembling the handwheel – Leica Biosystems RM2245 User Manual
Page 20: Electrical connections, Instrument setup
18
Instructions for Use V 1.9 RevC - 06/2013
4. Instrument Setup
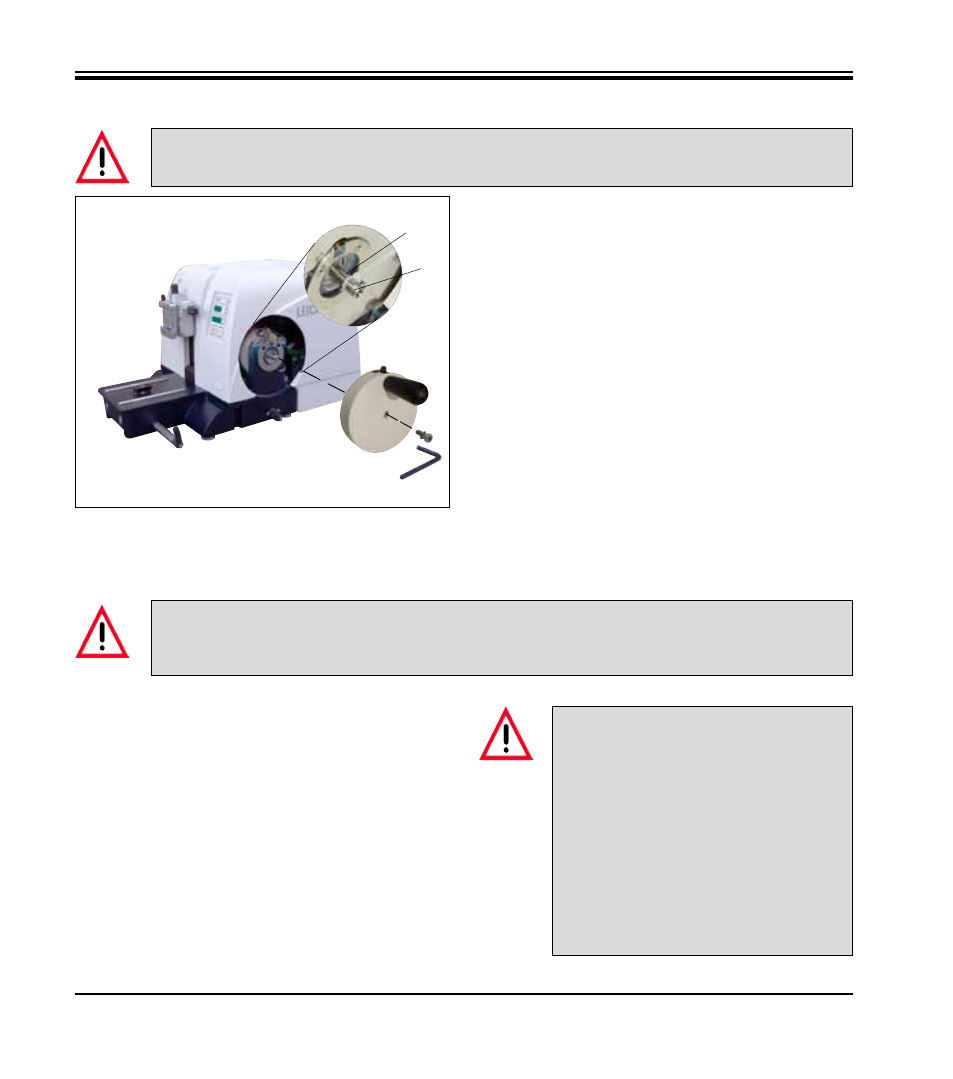
The feather key (4) is loosely placed in the hand-
wheel shaft (1) and fixed in place with a cable tie
during transport.
• Remove the cable tie.
Caution!
Make sure not to lose the feather key!
• Place the handwheel (2) on the handwheel
shaft (1) as shown.
• Tighten the screw (3) located in the center hole
of the handwheel with an Allen key size 4 (5).
• Remove the cover foil from the self-adhesive
cover disk (6) and fix the cover disk on the
handwheel.
4.4 Assembling the handwheel
4.5 Electrical connections
Checking the voltage
The Leica RM2245 can be connected to various
electrical power grids (depending on voltage and
frequency) and, for this reason, is always deliv-
ered with a set of various power cables.
New instruments are factory-set to 230 volts.
This is documented by a yellow label (230 VOLT)
on the rear of the instrument, which covers the
power switch and power socket.
4
1
2
5
3
The handwheel has to be assembled before attempting to use the instrument.
The necessary parts and tools can be found in the toolkit.
Fig. 11
The instrument MUST be connected to a grounded power socket. Use only the power cable
provided that matches the power supply (outlets) of the country of use. Do not use an extension
cable!
Before connecting the instrument to
the power supply, be absolutely cer-
tain to check that the voltage selec-
tor is set to the voltage in use in your
area!
Severe damage can be caused to the
instrument if the voltage selector is set
to an incorrect voltage!
Never change the setting of the volt-
age selector while the instrument is
connected to the power supply.