Heidolph Hei-VAP Precision User Manual
Page 27
Set-up and Start-up
Set-up and Start-up
52
53
1. Move the lift upward.
2. Attach the protective shield (1) on the edge of the heating bath (2) and position
so that the (possibly available) cover can be easily opened.
1. Turn the eccentric screw (3) by 180° and use it to attach the protective shield on
the heating bath.
When using the cover and the protective shield, take care that the two
parts do not jam.
1
Protective shield
3
Eccentric screw
2
Heating bath
Figure4-28: Assemble the protective shield
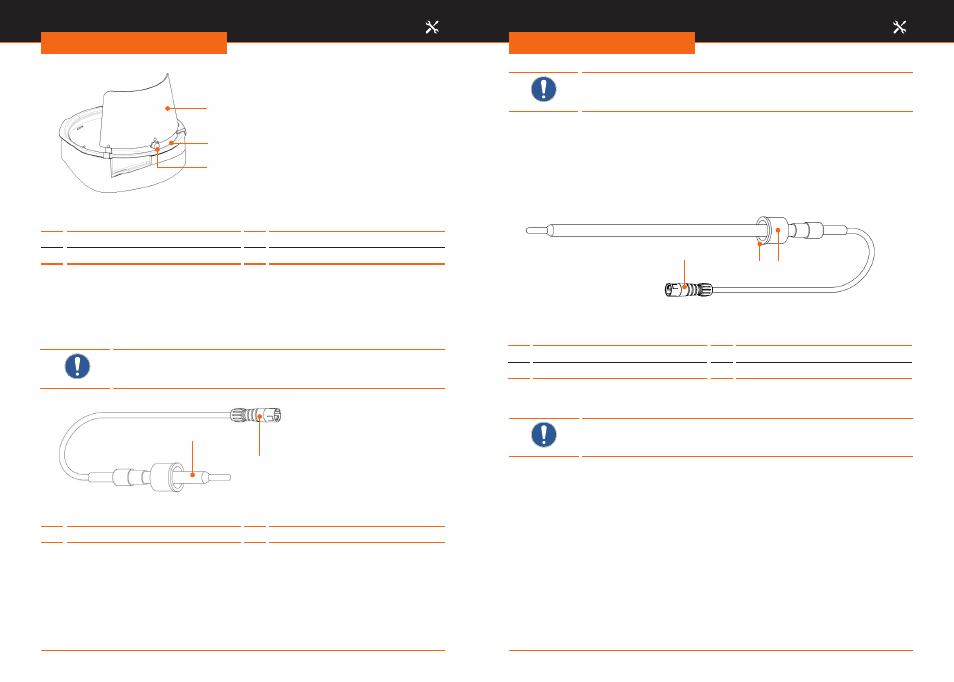
1
Plug
2
Seal
Figure 4-29: Vapor temperature sensor
1
3
2
1
2
1. Unscrew the threaded fitting on the condenser.
2. Insert the vapor temperature sensor so in the condenser that the white PTFE side of
the seal (2) points to the glass thread.
3. Screw the vapor temperature sensor together with the threaded fitting.
4. Connect the plug (1) in the socket on the tower to the left of the unit (see chapter
“Set-up and start-up” – “Setting up the basic unit”).
The vapor temperature sensor cannot be used when using the
temperature sensor Auto
accurate
sensor.
Only in conjunction with glassware sets G3 and G6.
1. Unscrew the threaded fitting on the vacuum port.
2. Insert the Auto
accurate
sensor into the vacuum port so that the white PTFE side (3)
of the seal points to the glass thread.
3. The depth of the Auto
accurat
e sensor is set on the condenser by adjusting the
Auto
accurate
sensor.
4. Screw together the Auto
accurate
sensor with the threaded fitting (1).
5. Connect the plug (2) in the socket on the tower to the left of the unit (see chapter
“Set-up and start-up” – “Setting up the basic unit”).
Set the depth at which the temperature sensor Auto
accurate
sensor
projects into the condenser so that the lower edge of the sensor is
located at 2/3 of the condenser‘s height.
1
Threaded fitting cap
3
PTFE side of the sealing tube
2
Plug
Figure4-30: Temperature sensor Auto
accurate
sensor
1
3
2