Graff Wall-mount thermostatic showering panel ED1.0, ED2.0 User Manual
Page 16
IOG 2321.00
16
Rev.1 January 2007
A
Wall-mount thermostatic showering panel ED1.0, ED2.0
Panneaux de douche thermostatiques à installer contre le mur ED1.0, ED2.0
Naścienne termostatyczne panele natryskowe ED1.0, ED2.0
R17
R18
R8
R13
R14
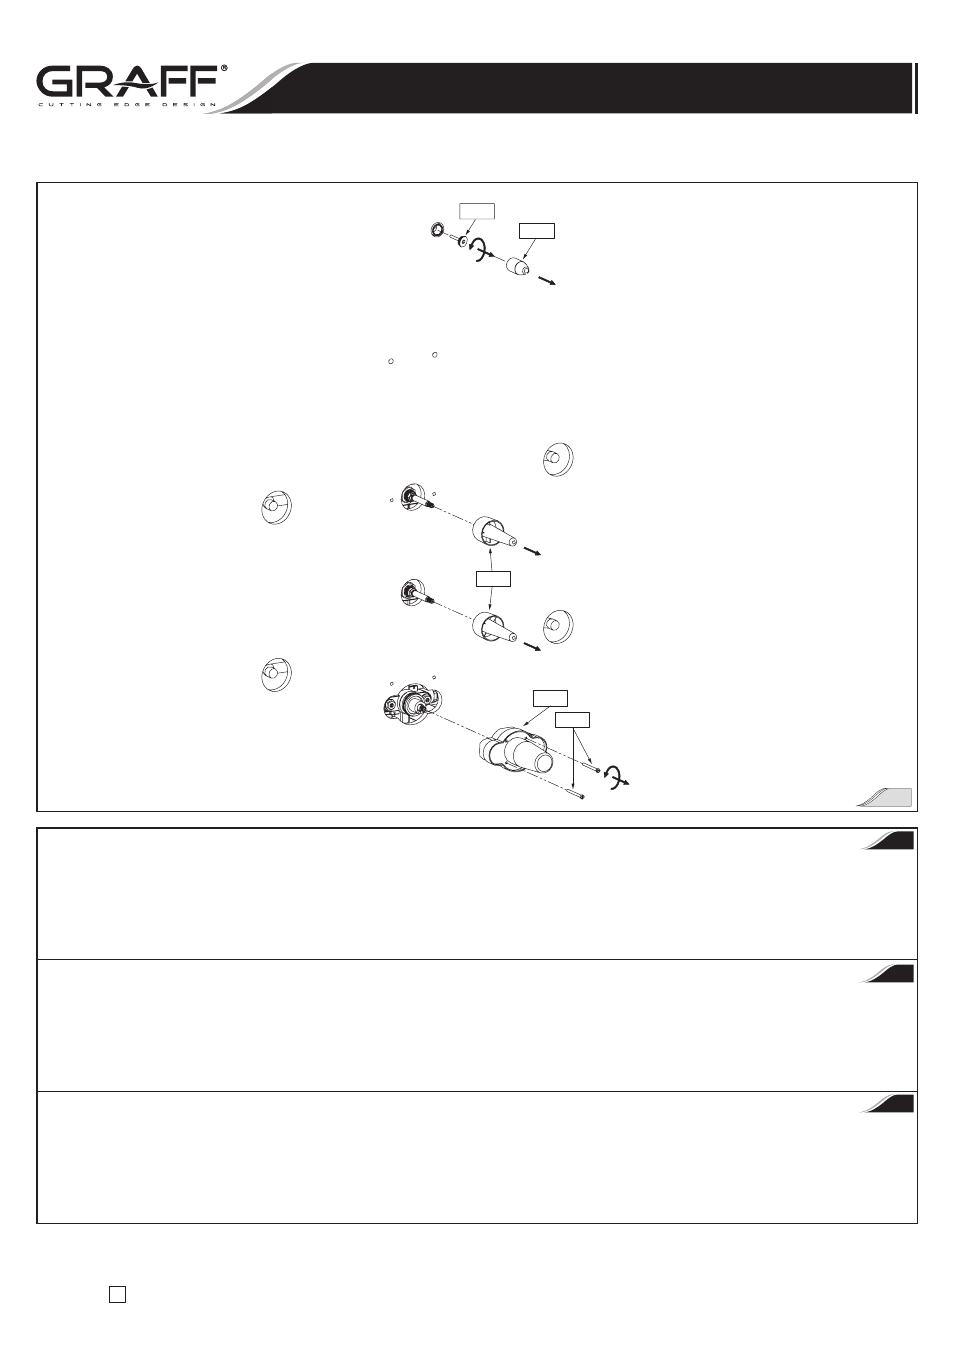
KROK 2
Patrz rys. 10
•
Załóż tuleje teflonowe
(R20) w przygotowane wcześniej otwory. Wkręć wkręty (R21) tak, żeby łby były ustawione w odległości
około 2,5mm od powierzchni ściany – stosuj się do szczegółowej informacji na rys. 10.
•
Załóż tuleje teflonowe
(R22) do 4 pozostałych otworów. Uwaga! Nie wkręcaj jeszcze śrub z gniazdami 6-kątnymi (R23).
•
Włóż wkręty
(R15) do otworów korpusu zaworu termostatycznego (R9).
STEP 2
See fig. 10
•
Put the Teflon sleeves
(R20) into holes that were earlier prepared. Thread the screws (R21) in so that the heads are positioned about 2.5mm
distance from the surface of the wall – refer to detail on the fig. 10.
•
Put the Teflon sleeves
(R22) into 4 remaining holes. Note! Do not screw in the socket head screws (R23) yet.
•
Put the screws
(R15) into the holes of thermostatic valve body (R9).
PAS 2
Voir fig. 10
•
Mettez les douilles en Téflon
(R20) dans les trous faits préalablement. Vissez les vis (R21) de manière à ce qu’elles soient placées en distance
de 2,5mm environ de la surface de la paroi, conformément au schéma sur la fig. 10.
•
Mettez les douilles en Téflon
(R22) dans les autres 4 trous. Attention ! Ne vissez pas encore les vis à trou à six pans (R23).
•
Vissez les vis
(R15) dans les trous du corps de la vanne thermostatique (R9).
GB
F
PL
Instrukcja Montażu i Obsługi
n
Instructions for assembly and use
n
Instrucción de Montaje y Servizio
9