Final installation, Connect power and data, Power – ETC Unison Paradigm 18-inch Touchscreen Rack Mount Kit User Manual
Page 2: Data, Power up, Paradigm 18" touchscreen rack mount kit
E T C I n s t a l l a t i o n G u i d e
Paradigm 18" Touchscreen Rack Mount Kit
Paradigm 18" Touchscreen Rack Mount Kit Installation Guide Page 2 of 2
Electronic Theatre Controls, Inc.
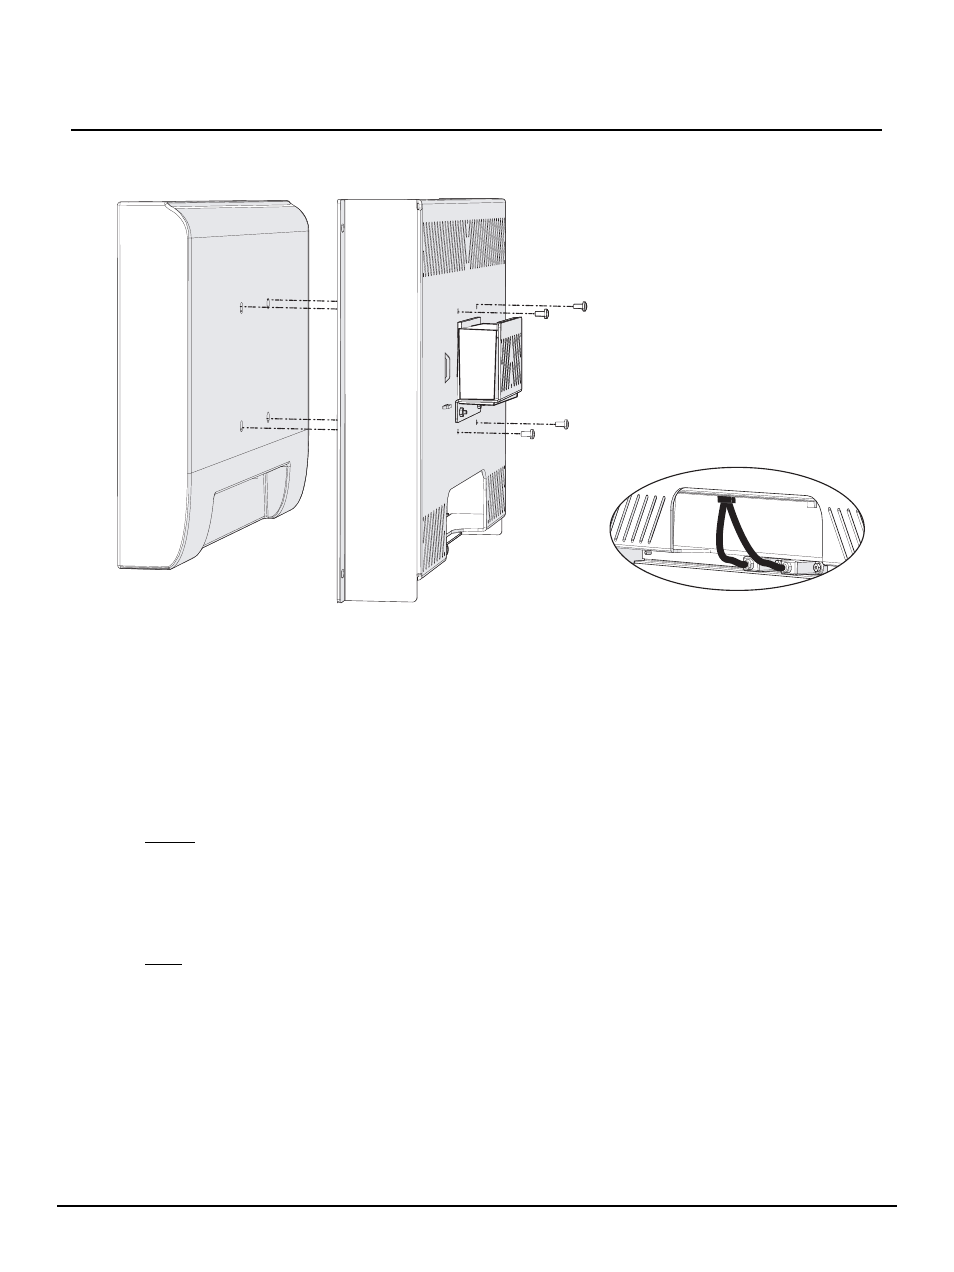
Step 3:
Attach the touchscreen to the rack mount panel using four screws provided in the
touchscreen accessory box.
Step 4:
The rack mount kit includes two USB cables that install between the USB ports on the
touchscreen and the USB port receptacles on the rack mount panel. Attach these cables
between the two products. This connection allows convenient use of the touchscreen
USB ports from the front of the rack mount panel.
Step 5:
Locate the international power supply and cables in the P-TS18 accessory box.
Step 6:
Slide the power supply (from either side) into the bracket on the back panel of the rack
mount.
Final Installation
Connect Power and Data
Power
Step 1:
Insert the power supply round plug into the “12V DC IN” receptacle located on the back
of the touchscreen.
Step 2:
Locate the correct IEC power cable for your region from the P-TS18 accessory box.
Step 3:
Attach the IEC cable between the power supply and the power source.
Data
Step 1:
Connect the touchscreen to the Paradigm network by plugging an Ethernet cable
between the P-TS18 “LAN1” connector and then into a network connection that is
connected to the Paradigm Central Control Server (P-CCS) or network switch.
Power Up
Step 1:
Attach the rack mounting panel with the touchscreen installed to a 19” rack enclosure
using the four M10 screws, washers and the spring clips provided with the rack mount kit.
Step 2:
Apply power to the circuit.
Step 3:
Reference the Paradigm 18” Touchscreen Setup and Connect Guide for further
instruction to use the touchscreen and Virtual Touchscreen (VTS) application.
Step 3:
international power supply
Step 6:
Step 4: