Maintenance instructions, Warning, Caution – COATS 6450 3D User Manual
Page 24
18 • Important:
Always read and follow the information box instructions.
12.
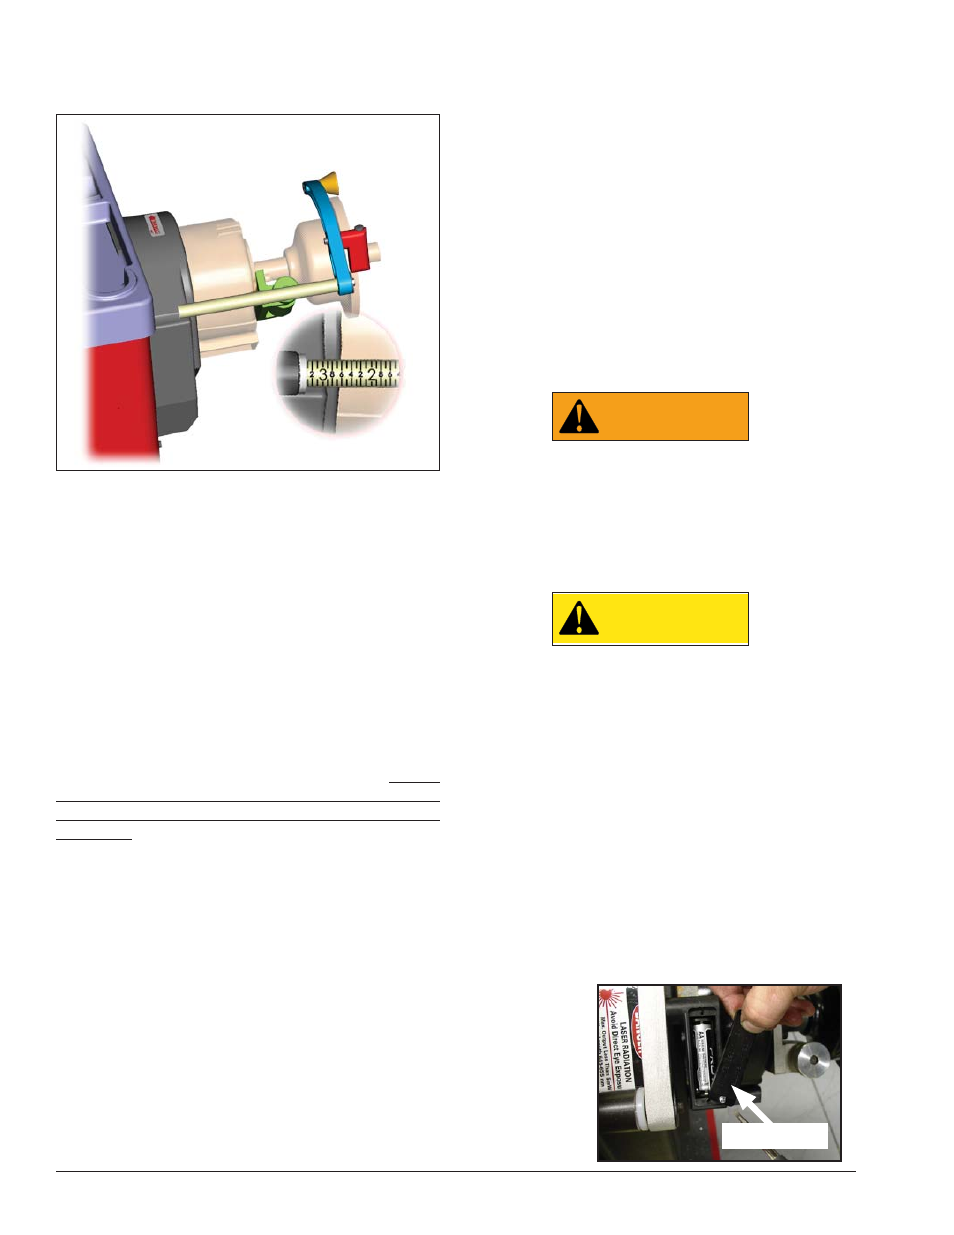
With the arm still at the edge of the faceplate,
enter the A dimension shown on the arm rod. Press the
NEXT key.
Figure 22 - While Holding Arm at Faceplate Edge, Enter A
13.
Move the arm to its home position and press the
NEXT key.
14.
Move the arm to the clip-on weight location on
the rim flange and hold it there while manually entering
the D dimension. Press the NEXT key.
15.
While still holding the arm at the clip-on weight
position on the wheel, enter the dimension read off the
arm rod. Press the NEXT key.
16.
Return the arm to home position; arm calibration
is complete.
Important: To redo the Arm Calibration procedure,
press and hold SHIFT and press 0, then press 19 to
bypass the Machine Calibration requirement. Always
use the same wheel assembly that was used during
the machine calibration or else the calibration will not
be correct.
17.
If machine calibration for the Car Mode/Lt. Truck
Mode is necessary then:
Car Mode - Hold SHIFT key and press 4 until Car
Mode LED is toggled on. Then, mount a 16-inch
steel tire/wheel assembly on the balancer and
repeat steps 2 through 16.
Note: Car Mode calibration covers both Car mode and
Light Truck mode.
Important: A balanced tire/wheel assembly is required.
Note: Position wheel so that no weights are on
either flange at the top-dead-center location. Turn the
machine OFF then ON.
Maintenance Instructions
The balancer requires only minor maintenance to keep
the unit operating properly.
1.
Keep the display clean and clear. Use a damp cloth.
Do not use cleaners or solvents which leave oily or filmy
residues behind.
2.
Keep the adapters, cones, faceplate, threaded
shaft, pressure cup, and hub nut clean. Grease and dirt
buildup will cause inaccurate balancing and premature
wear. Clean these items at least once a day with a
vaporizing solvent.
3.
Clean weight tray and any accessory posts, pegs,
or storage shelves with a vaporizing solvent. Weights
stored in a dirty tray may pick up grease and dirt which
may keep them from securely attaching to the wheel.
WARNING
Use common sense, this is an electrical
device. Exposing the balancer to water,
either by hose or bucket, or by exposure
to rain or snow, may cause risk of shock
or electrocution to operator or bystanders.
Place, store, and operate the balancer only
in a dry, sheltered location.
CAUTION
Do not hose down with water or bucket
wash the balancer. Extensive damage to
the balancer will result. Sensitive electronic
components, wiring harnesses, and other
devices housed in the balancer are not
intended to be exposed to water.
4.
Keep the area around and under the balancer
clear. Remove any tools or other items that are leaning
against the balancer. Remove any items that may cause
the balancer to not sit level. Be particularly cautious of
new or used wheel weights on the floor, as they may
cause personal injury due to falls.
5.
Use only COATS® accessories. Accessories from
other manufacturers may not fit or function properly,
and may damage the balancer.
6.
To replace Arm Laser battery, remove cover
(fig. 23). Discard
old battery. Install
a new battery and
replace the cover.
Figure 23 - Replacing
Arm Laser Battery
Arm Laser
Batter Cover