Video balancer – COATS Series XR 1750, 1750-2D, 1750-3D, 1750-3DI Balancer User Manual
Page 21
Important: Always read and follow the on-screen operating instructions.
• 15
Dynamic Modes
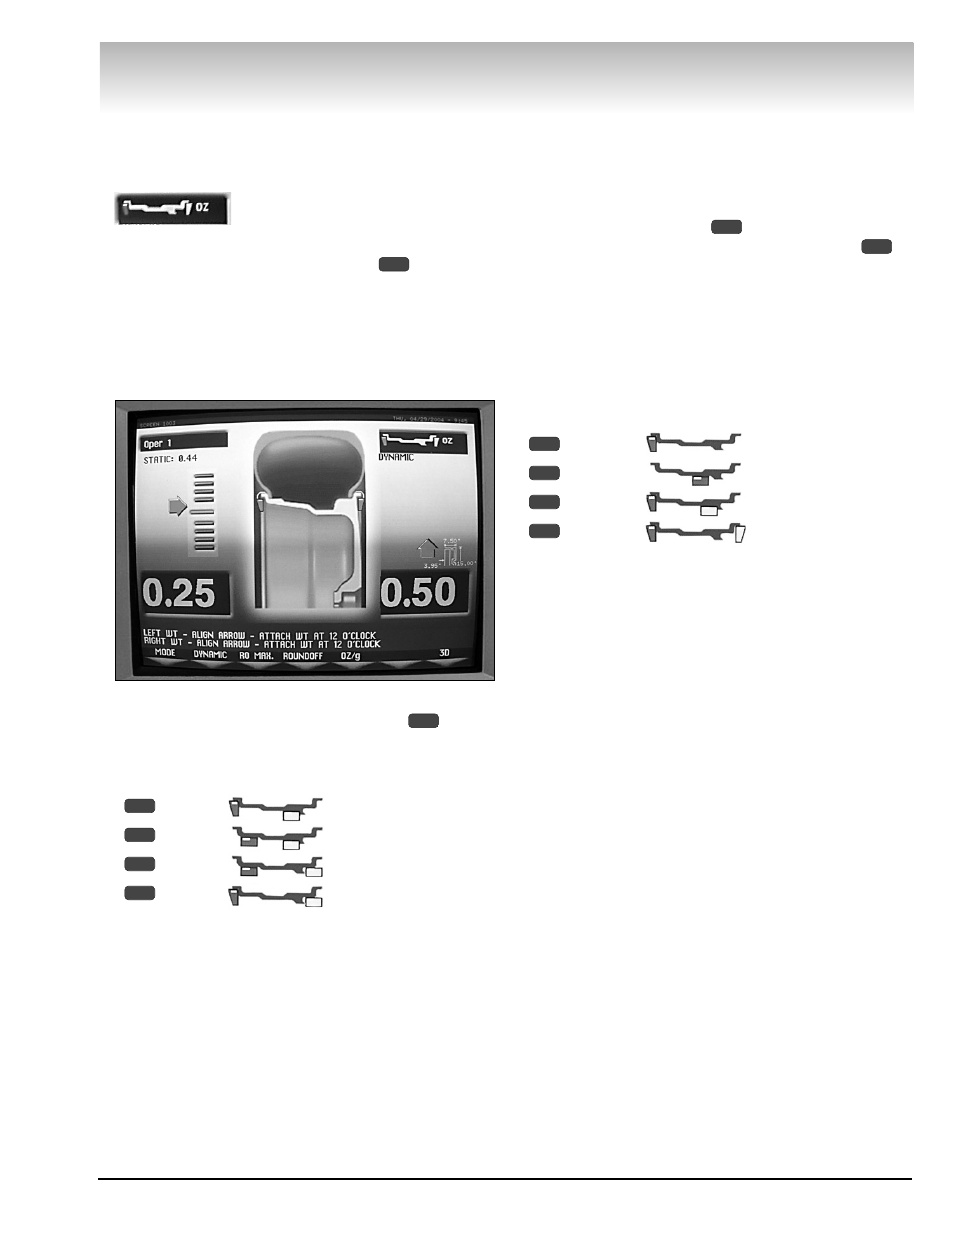
Clip-on Weights - the initial screen. This mode is
used for most passenger and light truck tire assem-
blies using the most common location for corrective
weights. Clip-on weights are placed
on the inner and outer rim flanges.
Note: To reset the mode back to the initial screen at
any time, press the DYNAMIC option
, or turn the
machine OFF then ON. Note that if an operator is in a
balance mode, it may be necessary to finish the bal-
ance cycle first.
Have the following items handy: steel rim passenger
or light truck tire wheel assembly mounted on the bal-
ancer and clip-on weights.
Figure 25 - Clip-on Weight Placement Screen
ALU modes - Select the MODE option
for the
modes menu. All the ALU modes are dynamic balance.
Choose the option that best fits the available weight
locations.
- ALU-1
- ALU-2
- ALU-3
- ALU-4
Have the following items handy: an appropriate
wheel assembly mounted on the balancer and Tape-A-
Weights™. You must use the appropriate measure-
ment and weight placement technique for each plane
selection (page 7) to balance the wheel.
Static Modes
Choose a static balance for wheel assemblies that
are not possible to balance dynamically or for narrow
wheels. For example, a motorcycle wheel that has a
small wheel width.
Select the MODE option
for the modes menu
and then select the STATIC MODES option
.
Choose the option that best fits the available weight
locations.
a. For a “single weight”, choose any one plane loca-
tion.
b. For “two weights”, choose any two plane locations.
Using this approach can reduce the amount of induced
dynamic unbalance by splitting the correctional weight
value among two different planes.
- STATIC1
- STATIC2
- STATIC3
- STATIC4
Have the following items handy: an appropriate
wheel assembly mounted on the balancer and a selec-
tion of weights.
4
3
2
1
6
1
4
3
2
1
1
2
Video Balancer