13 sensor removal procedure, 13 sensor, Removal – CiDRA SONARtrac HD GVF-100 User Manual
Page 111: Procedure -1, Figure 71 sensor cable connector removal -1, Sensor removal procedure
Copyright © 2006 CiDRA Corporation
Page 13-1
20675-02 Rev 01
13
SENSOR REMOVAL PROCEDURE
If removal of the sensor is required, the following procedure should be
followed.
1. Specific details regarding the removal of the SONARtrac sensor
should be discussed with a CiDRA representative prior to removal.
2. Obtain Hot Work Permit if required.
3. Turn off electrical power to the system. Follow lock-out / tag-out
procedures as required.
4. Open the transmitter door using a screwdriver and remove the
sensor band shorting plug (stored in the transmitter) if there is one.
5. Unlatch and disconnect the sensor to transmitter cable connector
from the sensor cover. Close cable connector cover on sensor
head cover.
6. Protect cable connector from dirt, water, etc. (example, wrap it in
a protective plastic bag).
7. Remove the rain seal(s) or boot gasket fenders (stainless steel
covers) from the sensor head (if equipped).
8. Open the sensor cable access panel located on the cover by
loosening the six screws (they should not be fully removed from
the cover as they are captive screws).
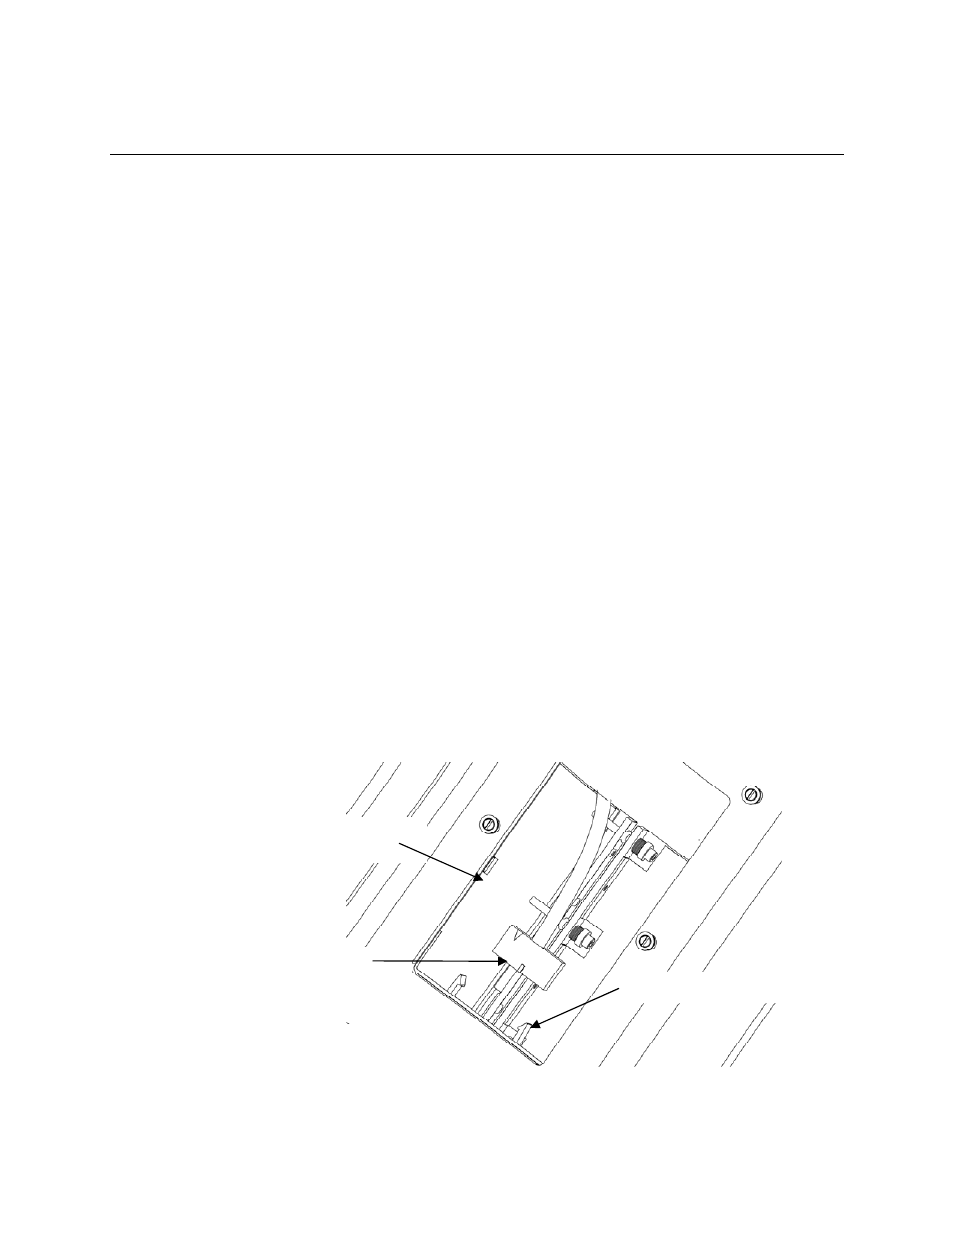
9. Under the access panel removed above, disconnect the sensor
band to cover electrical connector by unlatching the connector
locks and sliding the connector back as shown below.
Figure 71
Sensor Cable Connector Removal
Connector locks
Sensor cable
access port
Sensor cable with key
positioned up (away from pipe)