chiliGREEN X8100 User Manual
Page 123
Upgrading The Computer
Upgrading the Hard Disk Drive(s) 6 - 7
6
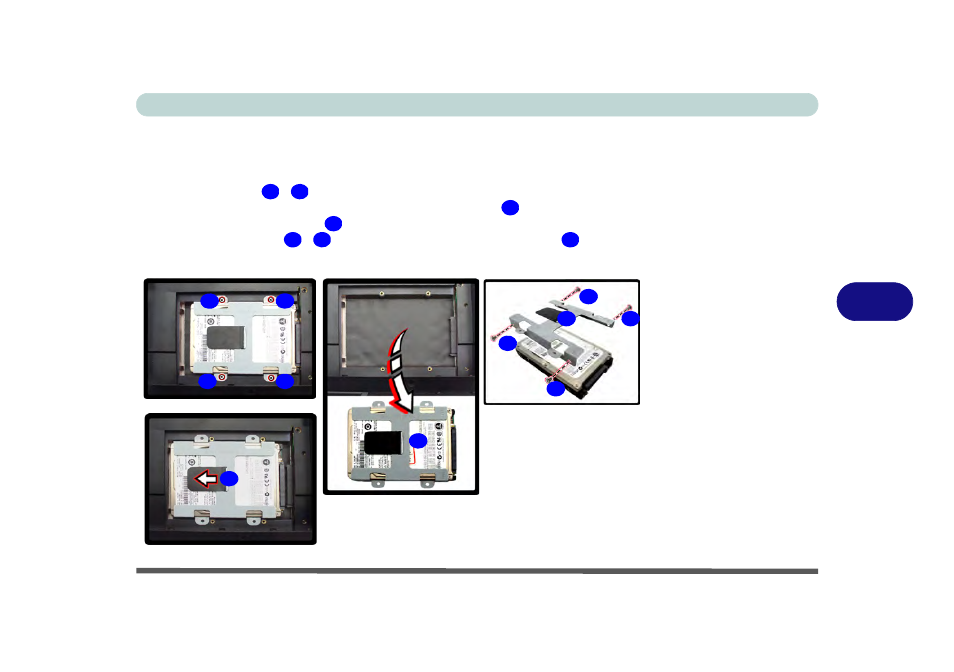
Removing the Hard Disk in the Secondary HDD Bay
1.
Turn off the computer, and turn it over and remove the battery.
2.
The secondary hard disk bay is located under the battery compartment.
3.
Remove screws
-
.
4.
Slide the hard disk assembly in the direction of the arrow
.
5.
Lift the hard disk assembly
out of the compartment.
6.
Remove the screws
-
to release the hard disk from the case
.
7.
Reverse the process to install any new hard disk(s).
Figure 6 - 5
Secondary HDD
Removal
25
28
29
30
31
34
35
25
26
30
29
27
28
31
32
33
34
35
See also other documents in the category chiliGREEN Notebooks:
- 15 4 M660SU MU2 (224 pages)
- P55I (76 pages)
- 15 4 M665SE (190 pages)
- 15 4 M665NC (154 pages)
- D610S U (209 pages)
- M400A (162 pages)
- QW6 (198 pages)
- Neo3 (7 pages)
- M730T (216 pages)
- 12 TN120R (240 pages)
- 12 M72xR (232 pages)
- X8100 (216 pages)
- W860CU (290 pages)
- W270BUQ (242 pages)
- W270BUQ (104 pages)
- P170HM (322 pages)
- P170HM (196 pages)
- MS1763 (50 pages)
- MS1762 (54 pages)
- MS1761 (110 pages)
- MS1761 (111 pages)
- MS1758 (48 pages)
- MS1755 (47 pages)
- MS1754 (105 pages)
- MS1736 (96 pages)
- MS1736 (90 pages)
- MS1733 (97 pages)
- MS1733 (102 pages)
- M770K (210 pages)
- M660SRU (226 pages)
- M57xRU (218 pages)
- E7130 (61 pages)
- E7130 (188 pages)
- 9270D (109 pages)
- X7 (198 pages)
- X500H (22 pages)
- X300H (22 pages)
- W760K (230 pages)
- W550SU2 (256 pages)
- W550SU2 (114 pages)
- W25BBZ W8 (103 pages)
- W25BBZ W7 (312 pages)
- W25BBZ W8 (312 pages)
- W251CZQ (260 pages)