JLG G12-55A Service Manual User Manual
Page 77
4-7
G10-55A, G12-55A
Cab and Covers
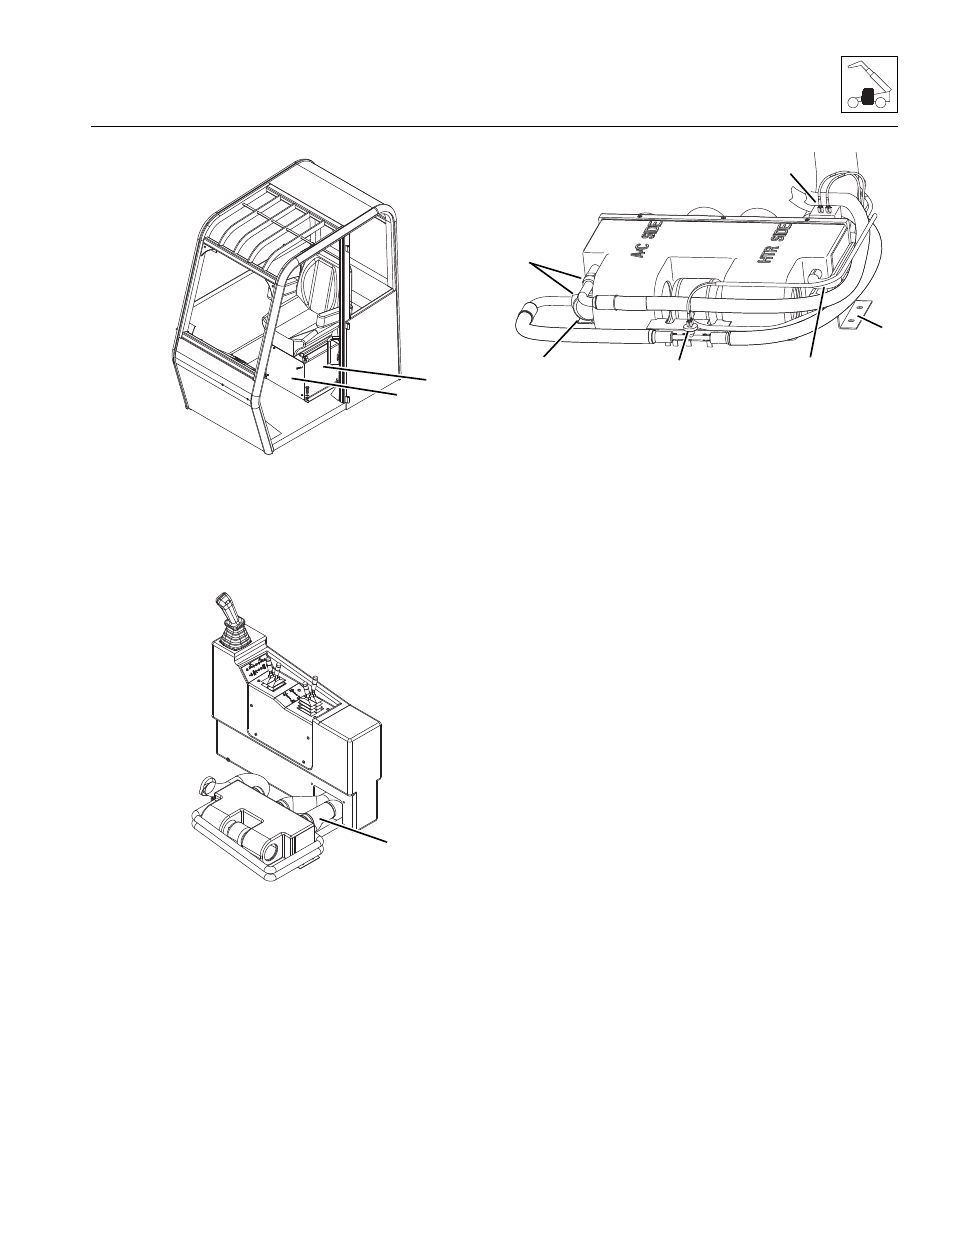
10. Remove the bolts securing the front plate (10) to the
seat riser weldment (11).
11. Remove the bolts securing the seat riser weldment
to the cab. Remove the riser weldment.
12. Loosen the hose and disconnect the heater air
duct hoses (12).
13. Loose hose clamps securing heater hoses (13).
14. Label and remove both heater hoses.
15. Label and disconnect any electrical
connections (14).
16. Label and disconnect both air conditioning
hoses (15).
17. Remove the bolts (16) securing the heater assembly
to the cab. Remove the heater assembly.
b. Heater Assembly Installation
Note: If machine is equipped with air conditioning,
air conditioning system must be charged by local
distributor or certified air conditioning service center.
1. Position the heater assembly to its original orientation
in the cab. Secure with the previous hardware.
2. Connect previously labeled electrical connections.
3. Connect previously labeled heater hoses to their
appropriate locations.
4. Connect the previously labeled air conditioning
hoses to their appropriate locations.
5. Install the seat riser weldment.
6. Install the front plate to the seat riser weldment.
7. Install the cab seat.
8. Fill the cooling system completely with coolant,
allowing time for the coolant to fill the engine block.
The cooling system capacity is listed in Section 2.5,
“Fluids and Lubricant Capacities.”
9. Properly connect the batteries.
MY0190
10
11
MAL0420
12
MY4390
14
HEATER WITH AIR
CONDITIONING SHOWN
14
13
15
16
16