5 fuel level sender, Fuel level sender – JLG G12-55A Service Manual User Manual
Page 161
9-19
G10-55A, G12-55A
Electrical System
c. Engine Coolant Temperature Sender Installation
and Testing
1. Thread engine coolant temperature sender into
engine block snugly, then connect sender connector to
wiring harness connector.
2. Properly connect the batteries.
3. Check for proper coolant level.
4. Start engine, allow it to reach operating temperature
and observe the operator’s instrument cluster for
warning indication. If sender is not defective, the
problem could be elsewhere; possibly in a shorted
wire, improper-running engine, improper or low
coolant, obstructed or faulty radiator, coolant pump,
loose fan belt, defective instrument display, etc.
5. Close and secure the engine cover.
6. Remove the Do Not Operate Tags from both the
ignition key switch and the steering wheel.
9.9.5
Fuel Level Sender
a. Fuel Level Indicator Testing
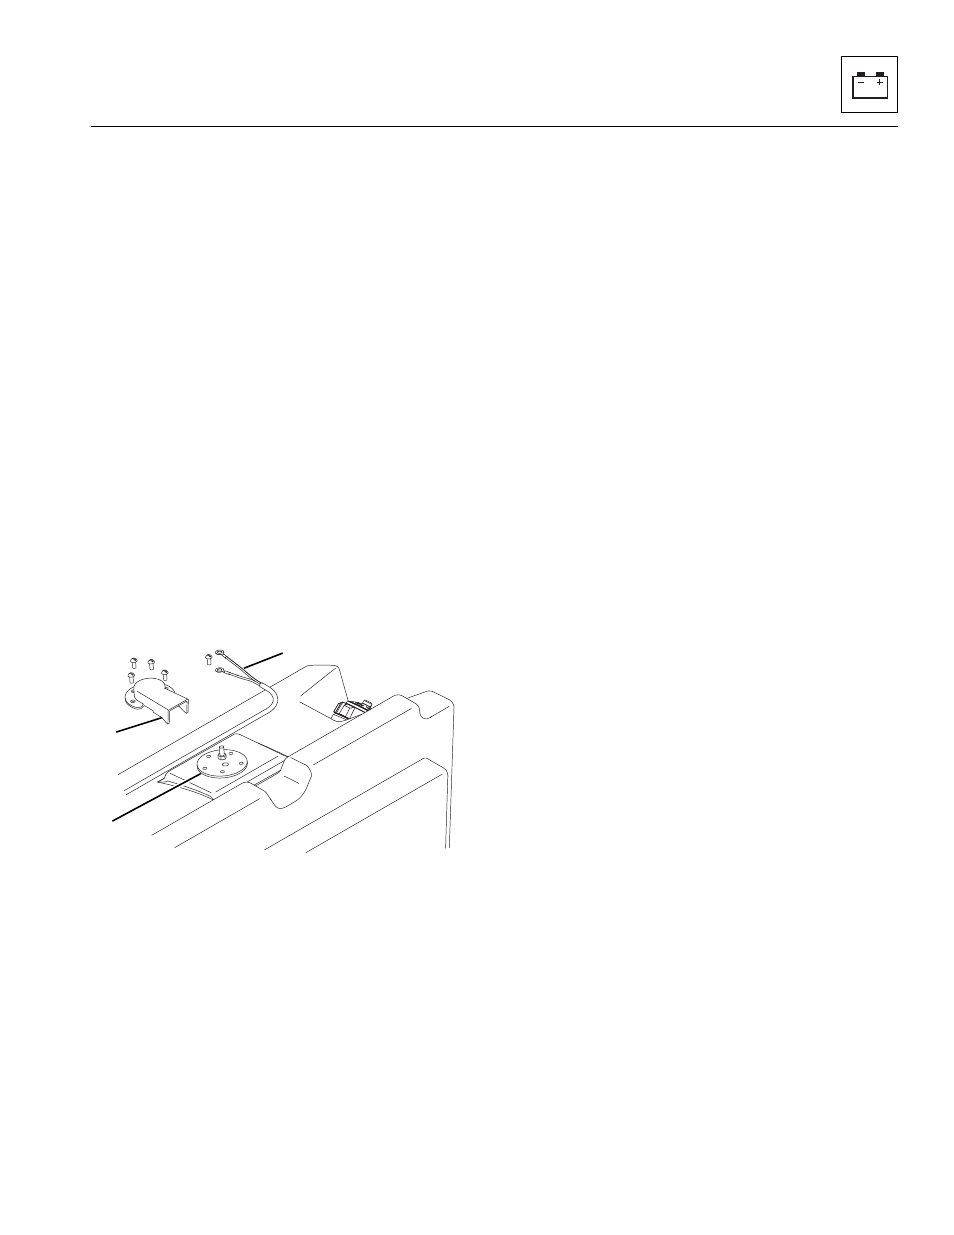
The fuel level sender wiring harness leads can be
accessed from the top of the fuel tank.
1. Loosen and remove he four screws securing the fuel
sender cover (6).
2. Disconnect the fuel level sender wiring harness
leads (7) from the fuel sender (8). With the help of an
assistant, touch both harness leads together.
3. From the operator’s cab, have the assistant turn the
ignition key switch to the RUN position. DO NOT
start the engine. Observe the fuel level indicator
needle on the operator’s instrument cluster. The
reading must be at the FULL mark.
4. Turn the ignition key switch to the OFF position. The
fuel level indicator needle should return to the
EMPTY position.
b. Fuel Level Circuit Tests
If the fuel level sender (8) is suspected of giving a false
reading, perform the following checks:
1. If the fuel level indicator needle does not move,
check the fuel tank for fuel.
2. Check for loose or defective wiring, faulty ground
connections, and corrosion on the fuel tank sender
and wiring lead.
3. If fuel level indicator needle does not move after
ignition key switch is turned to the RUN position, use
a test lamp to determine whether current is flowing
from ignition switch to fuel level sender.
4. If fuel level indicator does not move and a faulty or
defective fuel level sender in the fuel tank has been
ruled out, and in addition, wiring and connectors
have been checked and ruled out, the fuel level
indicator is defective and must be replaced.
5. Check that ignition terminal has current and that fuse
in fuse panel is not blown.
6. Check for broken, shorted, frayed, disconnected or
damaged wiring between the fuel level indicator
wiring at the cab, fuse and relay panel, ignition key
switch, and from the fuel level sender on fuel tank
through wiring in cab.
7. Check fuel level sender. A defective fuel level sender
in fuel tank may also prevent fuel level indicator from
moving. Refer to Section 9.5, “Electrical System
Schematics,” for further information.
MY4340
6
8
7