3 radiator/oil cooler and replacement, Radiator/oil cooler and replacement – JLG G12-55A Service Manual User Manual
Page 109
7-5
G10-55A, G12-55A
Engine
7.2.3
Radiator/Oil Cooler and Replacement
Before considering radiator or oil cooler replacement for
other than obvious damage, conduct a cooling system
pressure test check the coolant specific gravity, coolant
level, fan belt tension and dash panel temperature
indicator.
• If the engine runs hot, check the temperature of
the upper radiator hose.
• If the hose is not hot, the thermostat may be
stuck in the closed position.
• If the engine has overheated, performance may
suffer, indicating other damage including a leaking
cylinder head gasket, cracked cylinder head or
block, and/or other internal engine damage.
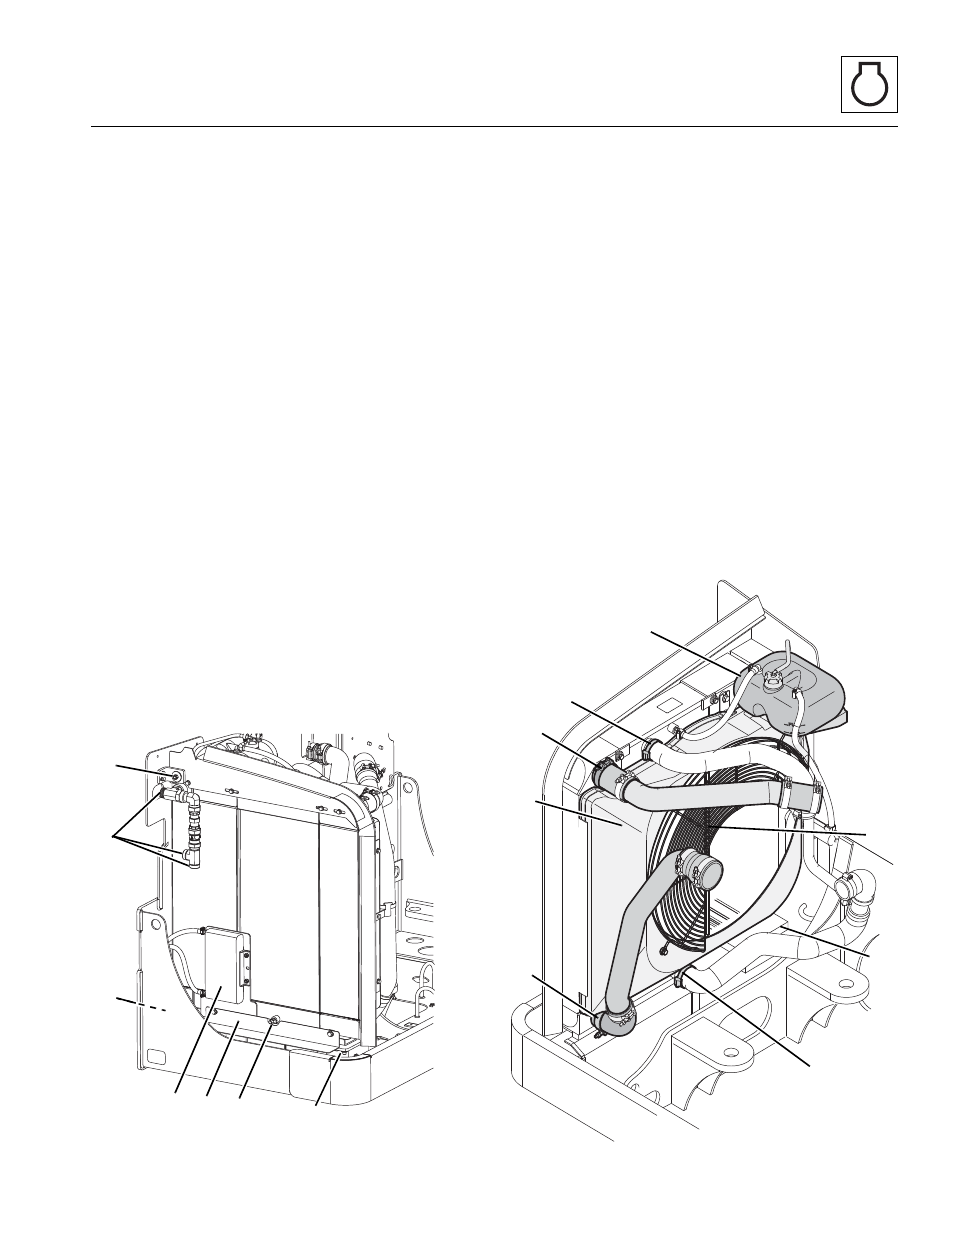
a. Radiator/Oil Cooler Removal
1. Park machine on a firm, level surface, level machine,
fully retract boom, lower boom, place transmission
control lever in (N) NEUTRAL position, engage
parking brake, and shut engine OFF.
2. Place a Do Not Operate Tag on both the ignition key
switch and steering wheel.
3. Open engine cover. Allow system fluids to cool.
4. Properly disconnect the batteries.
5. Slowly turn surge tank cap and allow any pressure to
escape. Remove surge tank cap.
6. Place a suitable container beneath radiator drain.
7. Place a funnel at base of radiator to channel drained
coolant into a container. Loosen drain cock (1) to
allow coolant to drain. Transfer the coolant into a
properly labeled container. Dispose of properly if
coolant
needs to be replaced. Tighten the radiator
drain cock.
8. Label, remove and cap the fuel cooler (2) fuel lines.
9. Remove drip shield plate (3).
10. Loosen and remove the nuts and washers from two
isolator mounts at the bottom of the radiator (4).
11. Place a suitable container beneath the hydraulic oil
cooler fittings.Transfer any hydraulic oil into a
properly labeled container. Dispose of properly.
12. Label, disconnect and cap four hydraulic cooler
hoses (5). Cap all fittings and openings to prevent
dirt and debris from entering hydraulic system.
13. Loosen and remove the nut and washer (6) from top
of radiator.
MAL1510
2
4
3
5
1
6
5
MY7370
12
8
7
11
9
8
10
9
IF EQUIPPED FOR ULS