6 windshield wiper assembly, 7 heater/air conditioning system (if equipped), Windshield wiper assembly – JLG G12-55A Service Manual User Manual
Page 76: Heater/air conditioning system (if equipped)
Cab and Covers
4-6
G10-55A, G12-55A
b. Joystick Assembly Installation
1. Uncap and connect the previously labeled hydraulic
hoses to their appropriate locations.
2. Connect the tilt function electronic connector.
3. Install the bolts securing the joystick to the cab.
4. Properly connect the batteries.
5. Test the complete range of the joystick functions per
control decal in cab or Operation & Safety manual.
6. Close and secure the engine cover.
7. Remove the Do Not Operate Tags from both the
ignition key switch and the steering wheel.
4.3.5
Frame Level, Auxiliary and Outrigger
Control Joysticks
a. Joystick Removal
1. Park machine on a firm, level surface, level machine,
fully retract boom, lower boom, place transmission
control lever in (N) NEUTRAL position, engage
parking brake and turn engine OFF.
2. Place a Do Not Operate Tag on both the ignition key
switch and steering wheel.
3. Open engine cover. Allow the system fluids to cool.
4. Properly disconnect the batteries.
.
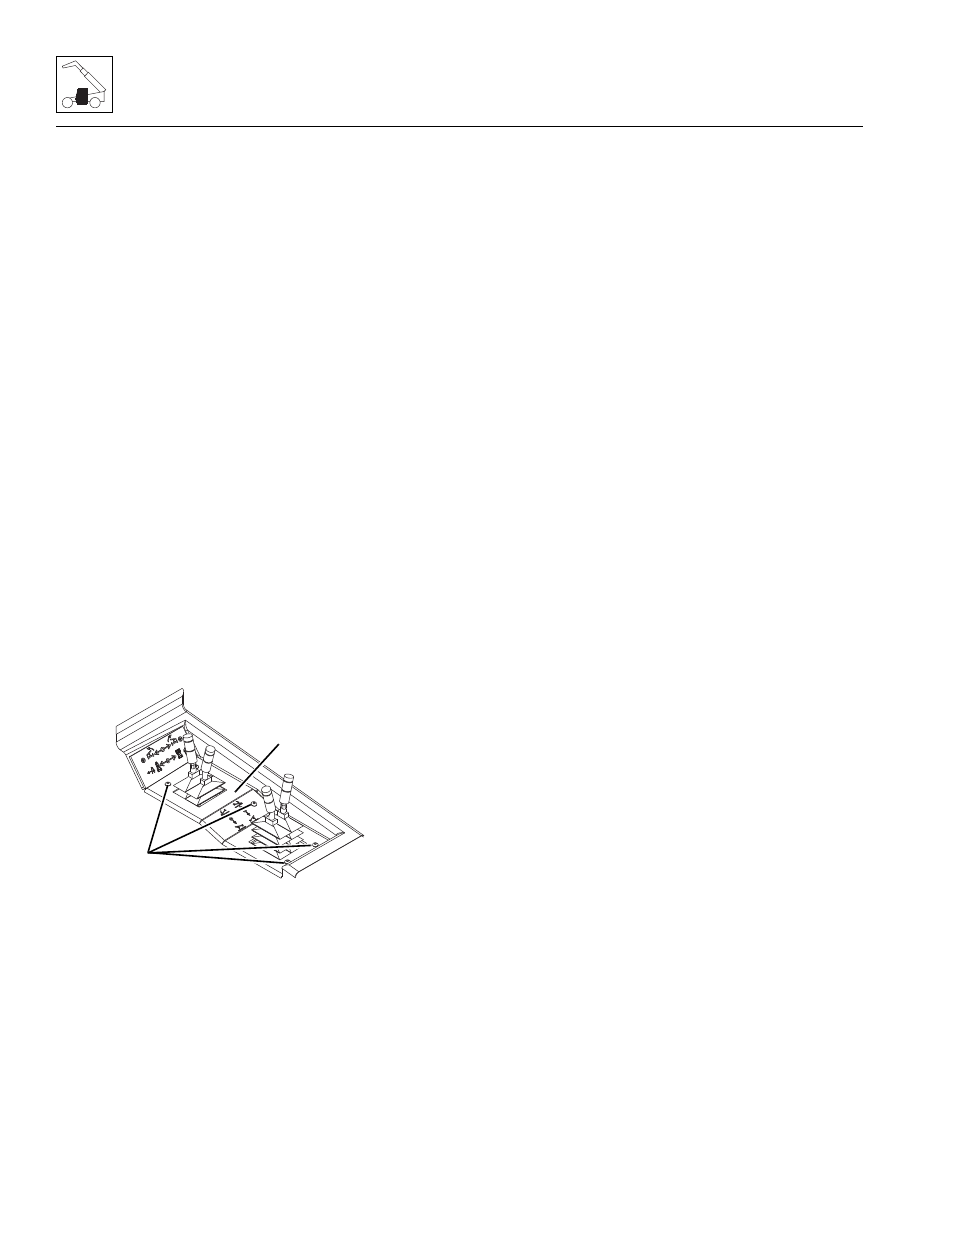
5. Remove the screws (8) securing the dash panel (9)
to the cab. Remove the dash panel.
6. Remove any hardware securing joystick to cab.
7. Label, disconnect and cap the hydraulic hoses
attached to the joystick.
8. Remove the joystick from the cab.
b. Joystick Installation
1. Uncap and connect the previously labeled hydraulic
hoses to their appropriate locations.
2. Install the bolts securing the joystick to the cab.
3. Install the dash panel to its original position with the
previously used hardware.
4. Properly connect the batteries.
5. Test the complete range of the joystick functions per
control decal in cab or Operation & Safety manual.
6. Close and secure the engine cover.
7. Remove the Do Not Operate Tags from both the
ignition key switch and the steering wheel.
4.3.6
Windshield Wiper Assembly
Refer to Section 9.9, “Window Wiper/Washer Windshield
Wiper Motor,” for removal and installation information.
4.3.7
Heater/Air Conditioning System
(if equipped)
Note: If machine is equipped with air conditioning,
DO NOT loosen or disconnect any air conditioning hoses
until the air conditioning system has been properly
drained by the local distributor or certified air
conditioning service center.
a. Heater Assembly Removal
1. Park the machine on a firm, level surface, level the
machine, fully retract the boom, lower the boom,
place the transmission control lever in the (N)
NEUTRAL position, engage the park brake and shut
the engine OFF.
2. Place a Do Not Operate Tag on both the ignition key
switch and the steering wheel.
3. Open engine cover. Allow the system fluids to cool.
4. Properly disconnect the batteries.
5. Place a suitable container beneath radiator. Slowly
turn surge allowing any pressure to escape. Remove
surge tank cap.
6. Place a funnel at the base of the radiator to channel
the drained coolant into the container. Loosen the
drain petcock and allow the coolant to drain.
7. Transfer the coolant to a container with a cover, and
label as “Used Antifreeze.” Dispose of the used
coolant at an approved recycling facility.
8. Tighten the radiator drain petcock.
9. Remove the bolts that secure the seat to the cab.
Remove the seat.
MY0960
9
8