2 hydraulic cylinders, Disassembly, Hydraulic cylinders -3 – JLG E300 Service Manual User Manual
Page 145: Disassembly -3, Gland seal disassembly -3, 2 hydraulic cylinders disassembly
SECTION 5 - HYDRAULICS
3121253
– JLG Lift –
5-3
5.2 HYDRAULIC CYLINDERS
Disassembly
NOTE: Disassembly of the cylinder should be performed on
a clean work surface in a dirt free work area.
1. Drain the oil from the cylinder.
2. Place the cylinder in a suitable holding fixture.
3. Position the cylinder vertically or horizontally.
4. Use the bottom and pin hole to prevent the cylinder
from turning and secure the axis.
NOTE: If there is a valve block that interferes with securing
the cylinder, remove the block.)
5. Unscrew the cylinder head.
6. Unscrew the gland 1 or 2 times with a spanner tool.
ROD DISASSEMBLY
EXTREME CARE SHOULD BE TAKEN WHEN REMOVING THE CYL-
INDER ROD, GLAND AND PISTON. AVOID PULLING THE ROD OFF-
CENTER, WHICH CAN CAUSE DAMAGE TO THE PISTON AND CYL-
INDER BARREL SURFACE.
7. With the tube clamped securely, apply the pressure
to the devise and withdraw the Rod assembly from
the cylinder barrel.
8. Withdraw the piston nut piston gland as below.
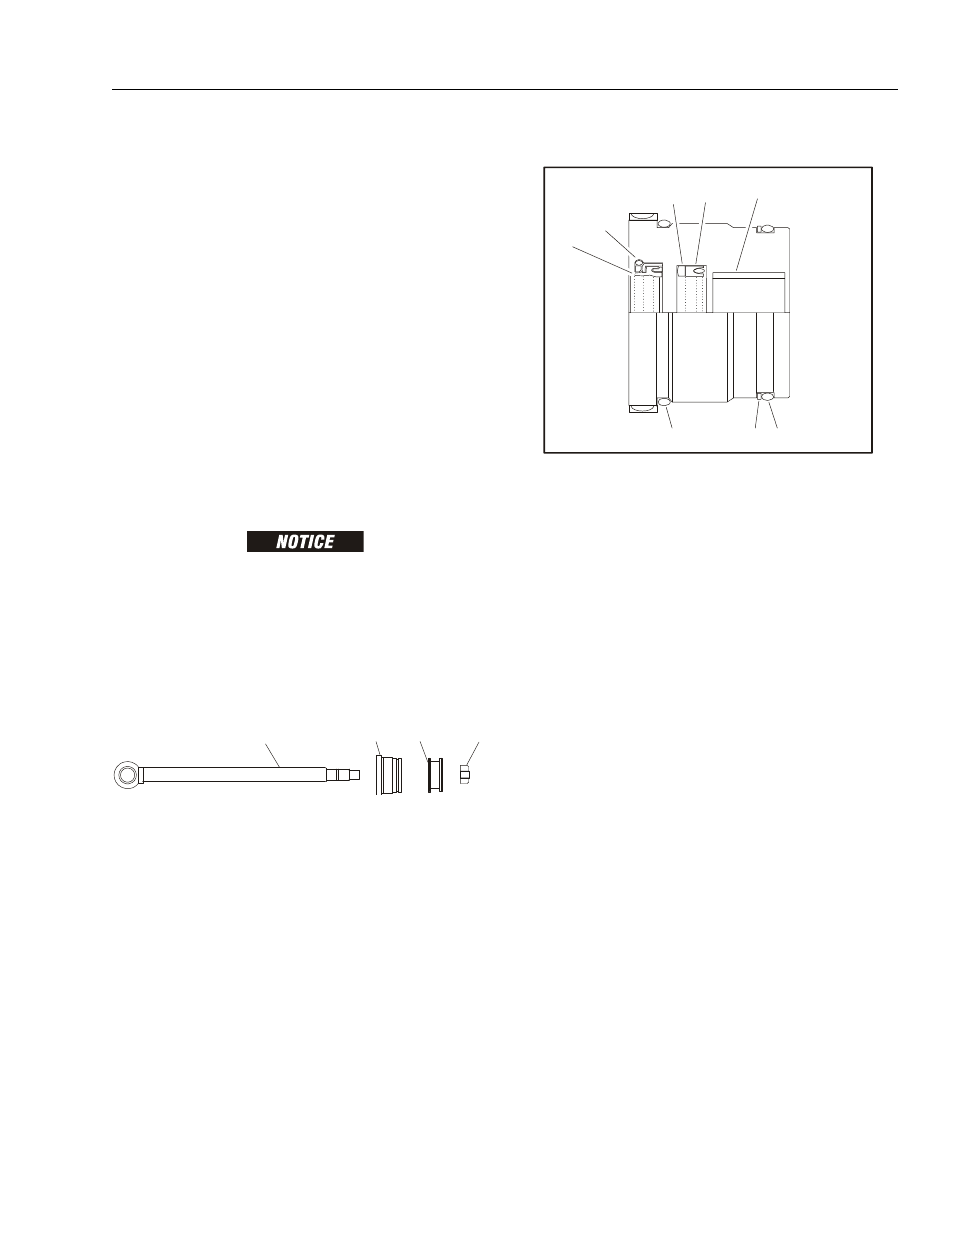
GLAND SEAL DISASSEMBLY
1. Withdraw the rod seal carefully with a tool which is
not sharp so as to not damage the seals.
2. Remove the retaining ring with a screwdriver prior to
removing the dust wiper.
3. Since the dust wiper is pressurized, tap it and then
withdraw the dust wiper by using a tool such as a
screwdriver.
ROD ASSEMBLY
GLAND
PISTON
NUT
1
2
3
4
5
6
7
8
1. Dust Ring
2. Retaining Ring
3. Backup Ring
4. Rod Seal
5. Bushing
6. O-ring
7. Backup Ring
8. O-ring
Figure 5-1. Gland Seal Disassembly