Apple Xserve (Early 2008) DIY Procedure for Enclosure User Manual
Page 160
Xserve (Late 2006/Early 2008) Rear ID Tab Replacement Instructions
19
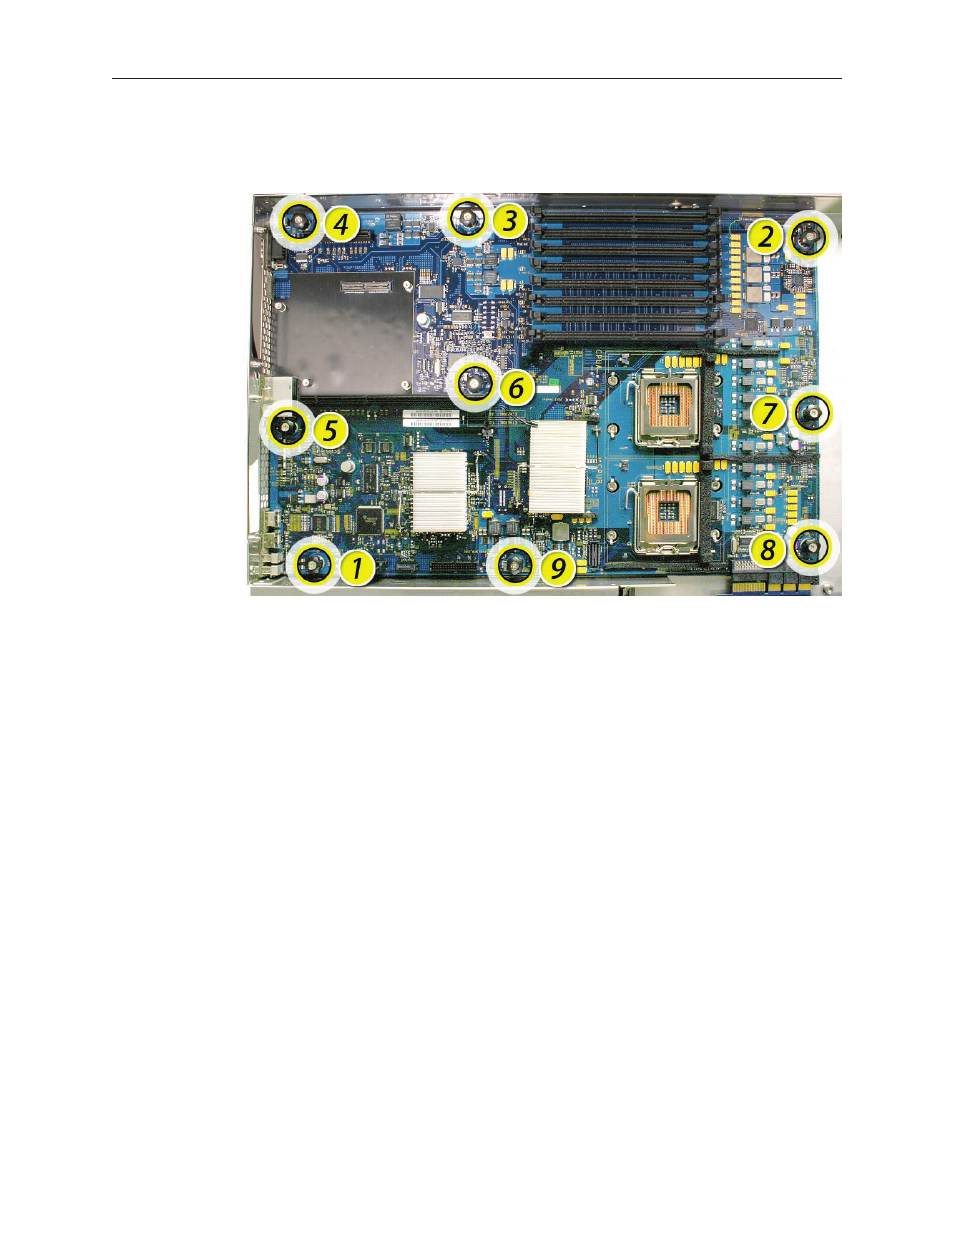
Following the order shown, use a screwdriver to tighten, but not overtighten, the nine
2.
thumbscrews that secure the logic board to the enclosure.
Slide the power distribution board back into place and tighten the thumbscrew.
3.
Note: Make sure the edge connector on the power distribution board goes completely into
the connector on the logic board. If the power distribution board doesn’t slide easily, make
sure the thumbscrew is popped up so it doesn’t catch on the mounting post beneath the
board.
Reconnect the front panel board cable and the optical drive cable to the logic board.
4.
Replacing the Processor Heat Sinks
Note: You will need to clean off the old thermal grease from the bottom of each heat sink and
the top of each processor. You will then need to apply new thermal grease to the top of each
processor, before re-installing the heat sink onto the processor.
Clean off any existing thermal grease on the heat sink using the alcohol wipes provided with
1.
the thermal grease. Keep the package that the wipes came in for use later.
Release the latch on the metal processor holder for the processor.
2.